
Lawn
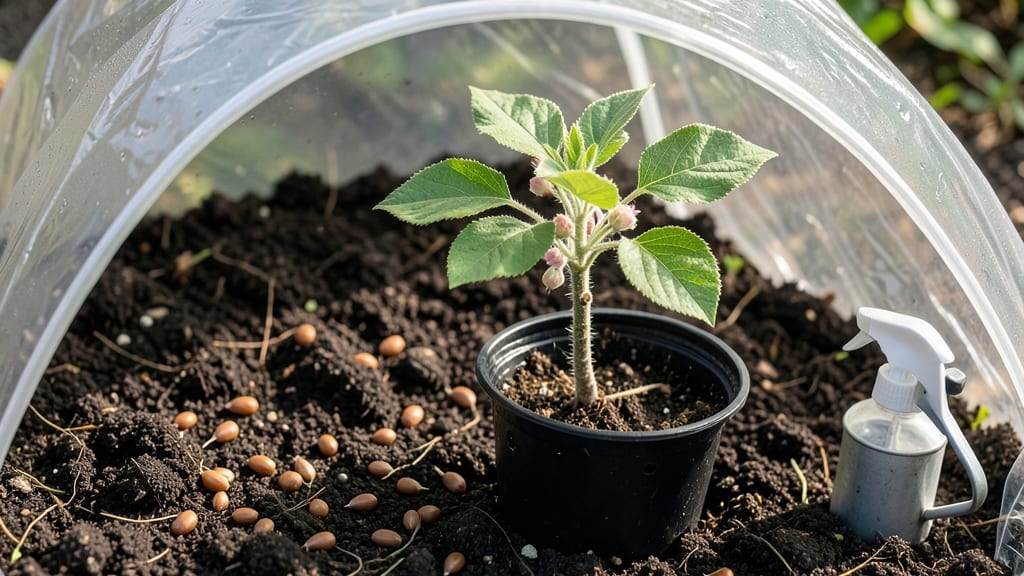
Watching apple seed growth turn kitchen scraps into future orchards is a patient gardener’s reward—each tiny sprout a promise of what’s to come with just a little time. 🌱 The process starts with selecting seeds from the best apples you eat, then mimicking winter’s cold to trick them into sprouting.
It’s not about next year’s harvest, but the one after that—maybe even the one after that—when those first blossoms appear.
You’ll need a few simple supplies: seeds from organic apples (non-hybrid varieties work best), a damp paper towel or peat moss, a plastic bag, and a sunny spot. The real magic happens during stratification—simulating winter’s chill so seeds break dormancy.
Most seeds need 6-8 weeks in the fridge, but some stubborn ones may take longer. Patience here pays off later when seedlings finally emerge.
Once sprouted, tiny seedlings need bright light and careful watering—never soggy soil. They’ll grow slowly at first, but within a year, you might see a small tree with real leaves. By year three or four, expect your first blossoms, though fruit may not appear for 5-10 years.
The wait teaches you that gardening’s best rewards take time, and every seed you plant is a bet on the future.
Fair warning: seed-grown apples rarely match their parents in flavor or size, but the adventure is in the unpredictability. If you’re willing to wait, this zero-waste experiment could turn your yard into an orchard—and your kitchen scraps into a legacy. Here’s how to start right.
📚 In This Guide
- What you need
- Instructions
- Tips and common mistakes
- Wrapping up and next steps
What you need
- ● Apple seeds: 10–20 fresh, viable seeds (harvested from organic apples for best results). Pro tip: 💡 Save seeds from heirloom or disease-resistant varieties for stronger seedlings!
- ○ Small pots or containers: 3–5 biodegradable pots (3–4 inches in diameter) or a seed tray with drainage holes. Optional: Use recycled containers like egg cartons or yogurt cups!
- ● Potting mix: 1–2 bags of seed-starting mix (lightweight, sterile, and well-draining). Avoid garden soil—it’s too dense!
- ● Spray bottle: 1–2 for gentle watering (avoids disturbing seeds).
- ● Plastic wrap or clear lid: To create a mini greenhouse effect.
- ● Labeling tags: 10–20 (to track seed varieties and planting dates).
- ○ Heat mat (optional but helpful): A small seedling heat mat (70–75°F range) to speed up germination.
- ● Warmth: Consistent temperature of 65–75°F (18–24°C) for germination. A sunny windowsill or grow light works!
- ● Humidity: High moisture levels (keep soil damp, not soggy).
- ● Light: Indirect sunlight or a grow light (12–16 hours/day) once sprouts emerge.
- ● Fertilizer: A diluted fish emulsion or seaweed extract (1 tsp per gallon of water) for young seedlings.
- ● Grow lights: LED bulbs (full-spectrum, 10,000–20,000K) for consistent light in low-sun areas.
- ● Humidity dome: A clear plastic cover to retain moisture during germination.
- ● pH meter: To test soil pH (ideal range: 6.0–7.0 for apple seeds).
Step-by-step guide to testing apple seed viability for future trees
Turn your kitchen scraps into next year's orchard with this simple, zero-waste method!
🌱 Step 1: Harvest and Prepare Your Apple Seeds
Start by selecting fresh, organic apples—avoid those with waxy coatings or chemical treatments. Cut the apple in half and scoop out the seeds, being careful not to damage them. Place the seeds in a bowl of lukewarm water and let them soak for 24 hours. This softens the outer coating and helps kickstart germination.
After soaking, spread the seeds on a paper towel and lay them between two more paper towels. Fold the towels to create a snug wrap, then place them in a sealed plastic bag. This creates a humid environment that mimics natural soil conditions. Store the bag in a warm spot, like on top of your fridge, where the temperature stays around 70-75°F. Check daily for moisture—squeeze the towels gently to ensure they stay damp but not soggy.
💧 Step 2: Monitor Germination and Prepare for Planting
Within 7-14 days, you should see tiny white roots emerge from the seeds—this is your cue that germination is underway! Once roots reach about ½ inch long, it’s time to prepare small containers. Use 3-4 inch deep pots filled with a light, well-draining mix (like a blend of potting soil and perlite). Plant each seed ½ inch deep, spacing them 2 inches apart in the pot.
Water gently after planting, keeping the soil consistently moist but not waterlogged. Place the pots in a sunny window or under a grow light, ensuring they receive 6-8 hours of light daily. You’ll notice the first true leaves (not the initial seed leaves) appear in 2-3 weeks. These leaves signal that your seedlings are strong enough to handle transplanting if needed.
☀️ Step 3: Nurture Seedlings for Strong Growth
Once seedlings have 3-4 true leaves, they’re ready for a larger pot or individual containers. Transplant carefully, burying the stem up to the first set of leaves—this encourages root development along the buried stem. Use 5-6 inch pots filled with fresh potting mix, and water thoroughly after transplanting.
Keep seedlings in bright, indirect light for the first week to help them adjust. Gradually introduce them to direct sunlight over the next few days. Fertilize lightly with a diluted balanced liquid fertilizer (like 10-10-10) every 4-6 weeks to support steady growth. Watch for signs of legginess—if stems stretch too tall or look weak, they need more light or slightly cooler temperatures.
⏰ Step 4: Overwinter Seedlings for Next Spring
As temperatures drop, move your seedlings indoors to a cool, bright spot (around 50-60°F). Reduce watering slightly but keep the soil lightly moist. Prune any yellow or damaged leaves to redirect the plant’s energy toward root and stem growth. By late winter, you’ll see new growth spurt as daylight increases—a sign your seedlings are ready for outdoor planting.
Before planting outdoors in spring, harden off the seedlings by gradually exposing them to outdoor conditions over 1-2 weeks. Start with 1-2 hours of shade and slowly increase their time outside, including direct sunlight. Plant in a well-drained location with full sun and mulch around the base to retain moisture. With patience, your apple seeds could grow into fruitful trees in 5-10 years!
Tips & tricks for perfect apple seed germination
These game-changing tricks will help you maximize your apple seed success rate and grow strong, healthy seedlings!
Soaking Strategy: The 24-hour soak in lukewarm water is your secret weapon for breaking seed dormancy. I always use room-temperature water—not too hot, not too cold—because extreme temperatures can damage the delicate seed structure. After soaking, give the seeds a quick rinse to remove any residual fruit pulp that could mold during germination. This simple step can double your germination rate!
Temperature Matters: Maintaining that 70-75°F range is critical during the germination phase. If your kitchen runs cooler, place the seed bag on top of your refrigerator or near a sunny window. A heat mat (set to low) can also help maintain consistent warmth. Watch for condensation on the bag—this is a good sign your seeds are happy and actively germinating.
Lighting Insight: Those 6-8 hours of daily light are non-negotiable for healthy seedling growth. If your windows don't get enough sunlight, invest in a simple LED grow light—it's the difference between leggy, weak seedlings and sturdy, vibrant plants. Position the light just 2-3 inches above the seedlings and adjust as they grow to maintain consistent light exposure.
Transplanting Technique: When moving seedlings to their 5-6 inch pots, I always use the "stem-burying" method from Step 3. This might seem counterintuitive, but burying the stem up to the first leaves actually encourages stronger root development. Just be gentle—you're not planting a tree, you're nurturing delicate young plants that need careful handling to thrive.
Pro Tips for Apple Seed Growth
- These game-changing tricks will help you maximize your apple seed success rate and grow strong, healthy seedlings!
- Soaking Strategy: The 24-hour soak in lukewarm water is your secret weapon for breaking seed dormancy. I always use r...
- Temperature Matters: Maintaining that 70-75°F range is critical during the germination phase. If your kitchen runs co...
Frequently asked questions
Got questions about growing apple seeds into trees?
You’re not alone! Here are answers to the most common queries—from patience to practical tips—to help you navigate your zero-waste gardening journey with confidence.
How long does it take for an apple seed to sprout?
Apple seeds typically take 3–6 weeks to germinate after stratification (cold treatment). Factors like seed age, moisture, and temperature can speed up or slow down the process. Pro tip: Keep soil consistently moist (not soggy) and maintain a cozy 60–70°F environment for best results!
Can I grow an apple tree from any seed?
While yes, you won’t get the exact same fruit as the parent tree. Apple seeds are hybrids, meaning the tree may produce different varieties—possibly even crabapples! For predictable results, graft a known cultivar onto your seedling later. Fun fact: Seed-grown trees can take 5–10 years to bear fruit!
What’s the best way to speed up germination?
Stratification is key! Place seeds in a damp paper towel, seal in a plastic bag, and refrigerate for 4–6 weeks to mimic winter. Afterward, plant them ½-inch deep in well-draining soil. Bonus hack: Use a heat mat (70°F) to encourage faster sprouting if your climate is cool.
Do apple seeds need full sun to grow?
Yes! Seedlings thrive in 6+ hours of direct sunlight daily. Start them indoors near a sunny window or under grow lights, then transplant outdoors after the last frost. Young trees are delicate—watch for pests like aphids and provide light shade if your area gets scorching afternoons.
What if my apple seed doesn’t sprout?
Don’t lose hope! Try these fixes:
- Check moisture: Soil should feel like a damp sponge.
- Test viability: Soak seeds in water overnight—sinkers are alive!
- Re-stratify: Some seeds need longer cold exposure.
- Try a new seed: Not all apples produce viable seeds (e.g., store-bought ones).
Can I grow apple seeds in containers?
Use a 5–7 inch pot with drainage holes and well-draining soil. Seedlings grow fast—transplant to the ground when roots fill the container. Container tip: Choose a dwarf rootstock variety later for space-saving orchards!
Wrapping up and next steps
Growing apples from seeds is a rewarding zero-waste journey that connects you to nature while testing viability for future harvests. 🌱 While it takes patience—expect 3-10 years for fruit—each step strengthens your gardening skills and reduces food waste.
Start small with just a few seeds, and let this experiment inspire sustainable habits in your garden.
🌟 Ready to Grow?
Your next step? Plant those seeds this fall and document your progress! Share your results with fellow gardeners or even experiment with different apple varieties. Every seed sown today could be tomorrow’s homegrown harvest—so get growing!