
Propagation
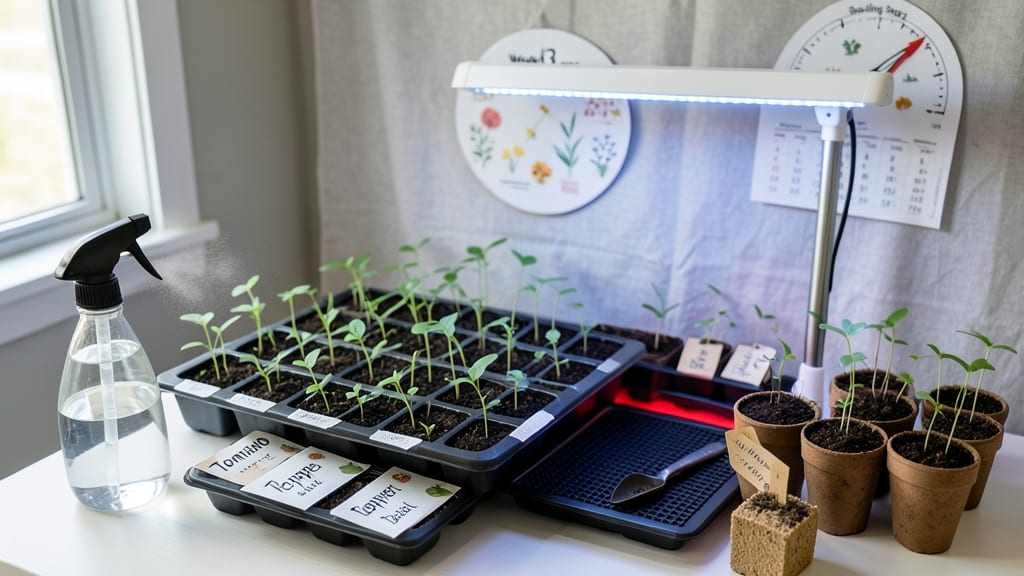
My seed starting chart saved me from bolting lettuce and leggy tomatoes—perfect timing means the difference between a thriving garden and a sad seedling pile. 🌱 Knowing exactly when to start indoors or outdoors in your zone turns guesswork into results, and I’m sharing the exact deadlines that work for my Zone 5 garden (adjust for yours!).
The chart breaks it down by plant type and last frost date, so you’ll see tomatoes need 6-8 weeks indoors before transplanting, while lettuce can go straight outside 4-6 weeks before your final frost. No more waiting until it’s too late or rushing seedlings that’ll never catch up.
Once you’ve got your chart, you’ll spot patterns—like how cool-season crops handle early starts, while heat-lovers need that last push. Print it out, tape it to your seed rack, and watch your germination rates soar while your neighbors still debate whether to plant.
For those tricky early/late seasons, I’ll show you how to tweak the schedule—because even the best chart needs flexibility when Mother Nature throws a curveball.
📚 In This Guide
- What you need
- Instructions
- Tips and common mistakes
- Wrapping up and next steps
What you need
- ● Seed starting mix: 10–20 lbs (or enough to fill your containers). Use a sterile, lightweight mix (avoid garden soil—it’s too dense!).
- ● Seed trays or containers: 10–20 cell packs (for small seeds like lettuce or herbs)
- ● 5–10 larger pots (4–6 inches deep, for tomatoes, peppers, or seedlings needing more space)
- ○ Optional: DIY containers like egg cartons or recycled plastic trays (sterilize first!)
- ● Seeds: Purchase or save seeds from last year! Check seed packets for days to germination and light requirements.
- ● Grow lights or sunny window: 1–2 LED grow lights (12–16 hours/day, 6–12 inches above seedlings)
- ● OR a south-facing window with 6+ hours of direct sunlight daily.
- ● Misting bottle or spray nozzle: For gentle watering (avoid drowning seeds!).
- ○ Heat mat (optional but helpful): For cold-starting seeds like peppers or tomatoes (70–85°F soil temp).
- ● Labels & markers: Waterproof labels + pencil or paint pen to track varieties and planting dates.
- ● Humidity dome or plastic wrap: To retain moisture for the first 7–10 days (remove once sprouts appear).
- ● Seedling heat mat: Speeds up germination for slow starters.
- ● Fertilizer (diluted): Use a balanced, water-soluble fertilizer (5–10–5 or 10–10–10) at half-strength after true leaves appear.
- ● Fan: A small clip-on fan (on low) to strengthen seedlings and prevent legginess.
- ● pH test kit: Ensures your soil mix is in the ideal range (5.8–6.5 for most veggies).
- ● Seedling clamps or stakes: For supporting tall or top-heavy plants (like sunflowers).
Instructions for using a seed starting chart to time plantings perfectly
Here's how to turn those zone-based deadlines into foolproof planting success.
📅 Step 1: Determine Your Planting Zone and Last Frost Date
First, find your USDA planting zone—this determines your entire schedule. I always check the average last frost date for my area because that's your absolute deadline. For example, Zone 5 has a last frost around April 15, while Zone 9 extends until March 15. Websites like the National Gardening Association offer free zone maps and frost date calculators.
Write this date in your garden journal—it's the anchor for every seed you start. If you're unsure, check local weather records or ask at your county extension office. Real talk: planting too early means frost will kill tender seedlings, while waiting too long means you'll be buying transplants at the nursery.
⏰ Step 2: Calculate Backward from Transplant Dates
Most seed starting charts show how many weeks before your last frost you should begin seeds indoors. For cool-season crops like lettuce, this might be 4-6 weeks before frost. Warm-season plants like tomatoes need 6-8 weeks because they're sensitive to cold. I always mark these dates on my calendar with colored dots—red for cool crops, yellow for warm.
Here's the thing—this isn't just about counting weeks. You also need to account for your seedlings' maturity. A basil plant might take 60 days to reach harvest, but you can't start it too early because it'll bolt in summer heat. The chart helps balance both timelines so you're harvesting at peak season, not struggling with overgrown or underdeveloped plants.
🌱 Step 3: Adjust for Your Specific Growing Conditions
Not all gardens are equal—your microclimate matters. If you live in a frost pocket or near large bodies of water, your last frost might come 1-2 weeks later than the official date. I've seen this firsthand in my valley garden where cold air settles at night. Use a minimum/maximum thermometer for a few seasons to track your real frost dates.
You'll also want to adjust for whether you're using grow lights or a sunny windowsill. Seedlings under lights can germinate 1-2 weeks earlier because you control the environment. Natural light varies daily, so I start my chart dates slightly later when relying on windows. Watch for seedlings stretching toward light—that's your signal to move them closer or add supplemental lighting.
📝 Step 4: Create Your Personalized Planting Timeline
Transfer the chart deadlines to your own schedule by listing each crop with its start date, transplant date, and harvest window. I use a spreadsheet with columns for: • Crop name • Start date (from chart) • Transplant date (last frost minus weeks to maturity) • Harvest window • Success notes (like "used grow lights" or "direct sown") This becomes your master planting calendar. When I see basil listed to start March 1 with a May 15 transplant date, I know I need to have my grow lights ready by then. The visual layout prevents me from missing critical steps in the process.
Don't forget to plan for succession planting! Leafy greens like spinach can be sown every 2 weeks for continuous harvests. The chart helps you space these plantings perfectly so you're never without fresh greens. I mark these on my calendar with arrows to show the progression.
✂️ Step 5: Monitor and Adjust as Seasons Progress
Weather doesn't always cooperate, so stay flexible. If an unexpected late frost hits, move your transplant date forward by 1 week and adjust your seed starting schedule accordingly. I've had to do this with peppers in Zone 6—starting them 2 weeks earlier than planned saved my crop when a cold snap delayed spring.
Watch your seedlings' progress against the chart's milestones. If they're growing slower than expected (maybe your heat mat isn't working), you might need to start a backup batch. The chart gives you benchmarks like "first true leaves" or "hardy enough to transplant" to track against real growth. When seedlings reach 3-4 inches tall with strong stems, they're ready for the garden—no matter what the calendar says.
Tips & tricks for perfect seed starting timing
These game-changing tips will help you turn your seed starting chart from a simple guideline into a foolproof planting system.
Microclimate Matters: Your official last frost date might not match reality. I've seen frost pockets delay planting by 1-2 weeks—use a minimum/maximum thermometer for 3 seasons to track your actual frost dates. This adjustment saved my pepper crop last spring when a late frost hit. For urban gardeners, concrete and pavement can create heat islands that push frost dates earlier than rural areas.
Lighting Strategy: Seedlings under grow lights can germinate 1-2 weeks earlier than those on sunny windowsills. I start my chart dates 3 days later when using natural light because morning sun isn't enough. Watch for "leggy" seedlings—this is your signal to move them closer to light or add supplemental lighting immediately. A simple LED grow light costs less than $20 and makes all the difference.
Backup Planning: Always prepare a backup batch for crops with 60+ day maturity. I keep a second set of seed trays ready for slow starters like tomatoes. If your first batch grows slower than expected (maybe your heat mat failed), you'll have fresh seedlings to transplant instead of scrambling to the nursery. This simple habit has saved me from buying $40 worth of transplants multiple times.
Visual Benchmarks: Instead of just tracking days, watch for these growth milestones: first true leaves (usually 7-14 days after germination), strong stems (ready for transplant), and 3-4 inch height. I mark these on my chart with colored highlighters—red for true leaves, green for transplant readiness. This visual system helps me adjust timelines without stressing over exact dates.
Pro Tips for Seed Starting Chart
- These game-changing tips will help you turn your seed starting chart from a simple guideline into a foolproof plantin...
- Microclimate Matters: Your official last frost date might not match reality. I've seen frost pockets delay planting b...
- Lighting Strategy: Seedlings under grow lights can germinate 1-2 weeks earlier than those on sunny windowsills. I sta...
Frequently asked questions
Got questions about seed starting? You’re not alone!
Whether you’re a first-time gardener or a seasoned pro, timing can be tricky. Here are answers to the most common questions about using a seed starting chart to nail your planting schedule.
When should I start seeds indoors vs. outdoors?
It depends on your frost date and plant type! Most veggies (like tomatoes or peppers) need 6–8 weeks indoors before the last frost. Cool-season crops (spinach, kale) can go straight in the ground 4–6 weeks before frost. Check your seed starting chart for zone-specific deadlines!
What if I miss the recommended start date?
Don’t panic! Some plants (like beans or radishes) tolerate direct sowing after frost. Others (tomatoes, peppers) may grow slower but still thrive. For late starts, opt for fast-maturing varieties or extend the season with row covers.
How do I adjust for unusual weather (early frost or heatwave)?
Flexibility is key! If frost threatens early, rush seedlings outdoors with protection (cloches, row covers). For heatwaves, delay sowing heat-sensitive seeds (lettuce, peas) until temps drop. Your chart’s “last chance” dates are your guide.
Can I use a seed starting chart for container gardening?
Containers warm up faster than soil, so start seeds 1–2 weeks earlier than ground planting dates. Just ensure pots have drainage and use a heat mat if your space is chilly. Dwarf varieties often work best in containers.
My seedlings look leggy or weak—did I start too late?
Not necessarily! Leggy seedlings often mean lack of light or overcrowding, not timing. Fix it by moving them to a sunny window or under grow lights. If they’re past the “true leaf” stage, transplant deeper to encourage sturdy growth.
Wrapping up and next steps
Mastering your seed starting chart is the first step toward a thriving garden! By aligning your planting dates with your hardiness zone, you’ll give your seedlings the best possible head start—no more guesswork or wasted effort. 🌱
Now that you’re armed with the perfect timing, take the next step: grab your seeds, gather your supplies, and get growing! Whether you’re a seasoned gardener or just starting out, every seed you plant today is a future harvest waiting to happen. Happy sowing! 🌿