
Lawn
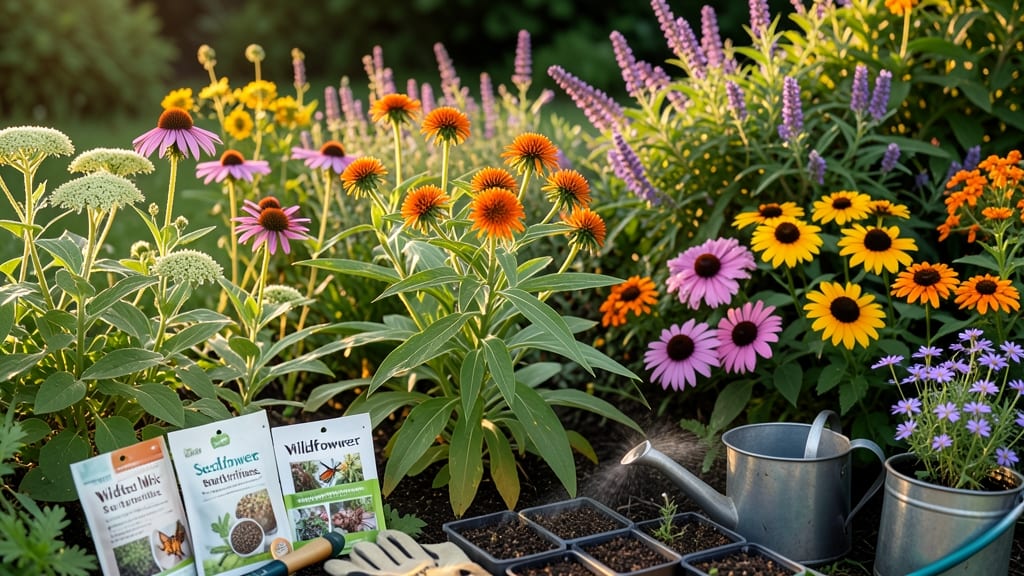
Your backyard can become a butterfly magnet in just 30 days—no green thumb required. 🌿 I planted my first butterfly seed mix last spring, and within weeks, monarchs, swallowtails, and fritillaries were sipping nectar from flowers I didn’t even recognize.
The secret isn’t fancy equipment; it’s choosing the right seeds, planting at the perfect time, and giving them what butterflies crave most: sunlight and water.
Start with a sunny patch—at least 6 hours of light daily—and loamy, well-draining soil. Scatter seeds in late spring or early fall (just before the first frost), then lightly rake them in. A sprinkle of compost boosts early growth, and mulch keeps moisture locked in.
Most mixes bloom in 3-4 weeks, but some perennials take longer to establish. The key is patience—those first fluttering visitors are worth the wait.
By summer, you’ll have a vibrant pollinator party with flowers in every shade of purple, pink, and yellow. Butterflies won’t just visit—they’ll linger, lay eggs, and create a cycle that keeps your garden buzzing for years.
The best part? You’ll watch caterpillars transform into butterflies, right in your own yard. It’s magic that starts with a handful of seeds.
Works in containers, borders, or even a small windowsill garden—just scale the space. If you’re in a drier climate, water lightly but often; in rainier areas, let nature handle it.
The goal is simple: feed the butterflies, and they’ll feed your garden in return. Ready to turn your space into a haven?
📚 In This Guide
- What you need
- Instructions
- Tips and common mistakes
- Wrapping up and next steps
What you need
- ● Butterfly-friendly seed mix (1–2 lbs, depending on area): Native wildflowers (e.g., milkweed, coneflower, black-eyed Susan) Nectar-rich annuals (e.g., cosmos, zinnias, marigolds) Perennial grasses (e.g., little bluestem, switchgrass)
- ○ Well-draining soil or potting mix (5+ gallons, organic preferred) Watering can or hose with gentle spray nozzle Small hand rake or hoe (for loosening soil) Optional: Mulch or straw (to retain moisture, 1–2 inches) 🔧 Tools & Prerequisites Sunny outdoor space (6+ hours of sunlight daily) Gloves (to protect hands while planting) Measuring tape or ruler (for spacing seeds) Optional but helpful: Seedling trays (for indoor pre-sprouting) Organic fertilizer (low-nitrogen, 5-10-5 ratio) Bird netting (to protect young plants from pests)
Step-by-step instructions for planting a butterfly seed mix
Here’s how to transform a patch of soil into a vibrant butterfly magnet in just four weeks.
🌱 Step 1: Choose and Prepare Your Planting Site
Select a sunny spot with at least 6 hours of direct sunlight daily—butterfly-friendly flowers thrive where they can soak up warmth. Clear away weeds and debris, then loosen the top 6 inches of soil with a garden fork to improve drainage. If your soil is heavy clay or sandy, mix in 2 inches of compost to enrich it—this ensures roots establish quickly and flowers bloom faster.
Butterfly seed mixes often contain fine seeds, so avoid disturbed, windy areas where they’ll blow away. A slight slope or raised bed helps prevent water pooling, which can rot delicate seedlings. I like to mark my spot with a small wooden stake—this keeps me from accidentally planting in the wrong place when the seeds arrive.
💧 Step 2: Scatter Seeds and Lightly Cover
Open the seed packet and pour the mix directly onto the prepared soil—no need to measure. Butterfly seed blends are formulated for natural distribution, so scatter them evenly across the area without overcrowding. For a 4-foot-by-4-foot patch, the average packet (about 1/4 pound) covers it perfectly.
Gently press the seeds into the soil with your fingers or a lightweight rake—just enough to make contact with the earth. Cover them with a thin layer of soil (no more than 1/8 inch deep). If your mix includes larger seeds like cosmos or sunflowers, they’ll need slightly deeper planting (1/4 inch), but most butterfly-friendly annuals prefer minimal burial. Water lightly with a fine mist until the soil looks damp but not soggy.
☀️ Step 3: Maintain Moisture and Watch for Sprouts
Keep the soil consistently moist for the first 2-3 weeks—this is critical for germination. Water early in the morning so the soil has time to dry slightly before evening, which prevents fungal issues. You’ll know moisture is right when the surface feels damp to the touch but doesn’t pool or glisten.
Butterfly seed mixes often include fast-germinating species like cosmos and bachelor’s buttons, so you’ll see first sprouts in 7-14 days. Once they appear, reduce watering to every 2-3 days unless your area experiences extreme heat. Avoid overhead watering after germination—direct streams can uproot tiny seedlings. Instead, water at the base with a gentle spray.
✂️ Step 4: Thin and Encourage Full Growth
When seedlings reach 2-3 inches tall, thin them to 6-12 inches apart, depending on the mix’s instructions. This prevents overcrowding and ensures each plant gets enough sunlight and nutrients. Use sharp scissors to snip excess seedlings at soil level—pulling can disturb roots and damage nearby plants.
Butterfly seed mixes often include a mix of annuals and perennials, so some may bloom faster than others. Once flowers appear (usually 4-6 weeks after planting), you’ll start seeing visitors like swallowtails and monarchs. To keep the patch vibrant, deadhead spent blooms regularly—this encourages continuous flowering and attracts more pollinators.
🪴 Step 5: Add Long-Term Support for Pollinators
After the first flush of blooms, add a thin layer of mulch (1-2 inches) around the base of plants to retain moisture and suppress weeds. Organic mulch like straw or shredded leaves also breaks down slowly, feeding the soil. Place a small dish of water nearby—hummingbirds and butterflies will visit for a drink, especially on hot days.
To extend the season, plant a second batch of seeds 4-6 weeks later. This staggered approach ensures a continuous supply of nectar-rich flowers from early summer through fall. Keep an eye out for pests like aphids—spraying with a soapy water solution (1 tablespoon mild dish soap per gallon of water) keeps them in check without harming butterflies.
Tips & tricks for creating a thriving butterfly garden
Transforming your yard into a butterfly haven takes more than just planting seeds—it’s about creating the perfect conditions for these delicate visitors to thrive.
Sunlight Strategy: While the instructions specify at least 6 hours of direct sunlight daily, I’ve found that full sun (8+ hours) produces the most vibrant blooms and attracts the widest variety of butterflies. If your space only gets partial sun, prioritize planting in the sunniest spot available—even a small 3x3-foot patch with full sun will yield better results than a larger area with only 4 hours of sunlight. Morning sun is especially beneficial as it helps dry dew quickly, reducing fungal risks for those delicate seedlings.
Soil Prep Pro Tip: The instructions recommend loosening the top 6 inches of soil and adding 2 inches of compost if needed, but here’s what nobody tells you—if your soil is extremely compacted, consider adding a 1-inch layer of coarse sand or perlite to the bottom of your planting area before mixing in compost. This creates better drainage channels for roots, especially important for fine butterfly seeds that can rot if waterlogged. Think of it as giving your future flowers a head start on healthy root development.
Watering Wisdom: The 2-3 week consistent moisture window is critical, but timing matters just as much as quantity. I’ve learned the hard way that watering in the late afternoon can lead to fungal issues—those damp leaves overnight create the perfect breeding ground for mold. Instead, water early morning (before 9 AM) so the foliage has all day to dry. For extra insurance, water at the base rather than overhead, especially after germination when those tiny seedlings are most vulnerable to being knocked over by heavy water droplets.
Season Extension Hack: The instructions suggest planting a second batch 4-6 weeks later for continuous blooms, but here’s how to maximize that strategy: choose varieties with staggered bloom times—plant early bloomers like cosmos alongside later varieties like zinnias. This creates a continuous nectar supply from early summer through fall, keeping butterflies visiting your garden longer. I’ve seen monarchs stay in my garden for weeks when I’ve layered my plantings this way!
Pro Tips for Butterfly Seed Mix
- Transforming your yard into a butterfly haven takes more than just planting seeds—it’s about creating the perfect conditions for these delicate visitors to thrive.
- Sunlight Strategy: While the instructions specify at least 6 hours of direct sunlight daily, I’ve found that full sun (8+ hours) produces the most vibrant blooms and attracts the widest variety of butterflies.
- This creates better drainage channels for roots, especially important for fine butterfly seeds that can rot if waterlogged.
Frequently asked questions
How long does it take for butterfly seeds to sprout?
Most butterfly seed mixes sprout within 7–14 days after planting, depending on warmth and moisture. Keep the soil consistently damp (but not soggy) and place seeds in a sunny spot. If you don’t see sprouts in 3 weeks, gently rake the soil to check for buried seeds—some may need light to germinate!
When is the best time to plant butterfly seed mix?
Plant in early spring (after the last frost) or late summer for fall blooms. Avoid planting in extreme heat or cold, as seeds need stable conditions to germinate. Pro tip: Pre-soak seeds overnight for faster sprouting in dry climates!
Can I plant butterfly seeds in pots or containers?
Use well-draining pots at least 6 inches deep with a mix of potting soil and compost. Place containers in full sun (6+ hours daily) and water regularly. Just ensure pots have drainage holes to prevent root rot—butterflies love window boxes too!
What if birds or squirrels eat my seeds before they sprout?
This happens often! Try these tricks:
- Pre-sprout seeds: Plant them indoors in trays, then transplant seedlings outside.
- Use wire mesh: Cover the area temporarily until seeds germinate.
- Choose larger seeds: Some mixes (like sunflower) are harder for critters to steal.
Will butterfly seeds grow back every year?
Most butterfly seed mixes are annuals, meaning they bloom once and die back. However, some seeds (like milkweed) self-seed, returning for years! For perennial options, mix in native wildflowers like coneflowers or black-eyed Susans. Check your mix’s label for specifics!
What if my seeds don’t grow?
Don’t panic! Common issues and fixes:
Problem
Solution
No sprouts after 3 weeks
Seeds may need light—rake soil gently or try replanting.
Seeds sprout but die
Overwatering or poor drainage—let soil dry slightly between waterings.
Slow growth
Add compost or fertilizer (low-nitrogen) for a nutrient boost.
Wrapping up and next steps
Transforming your garden into a vibrant pollinator haven with a butterfly seed mix is easier—and more rewarding—than you think! 🌸 With just a little patience and care, you’ll soon see wings fluttering through your space in as little as 30 days.
Whether you’re a seasoned gardener or a beginner, this simple project brings beauty, life, and joy to your outdoor oasis.
Ready to take the next step? Grab your seed mix, pick a sunny spot, and plant today! Your garden—and the butterflies—will thank you. 🦋✨