
Planting
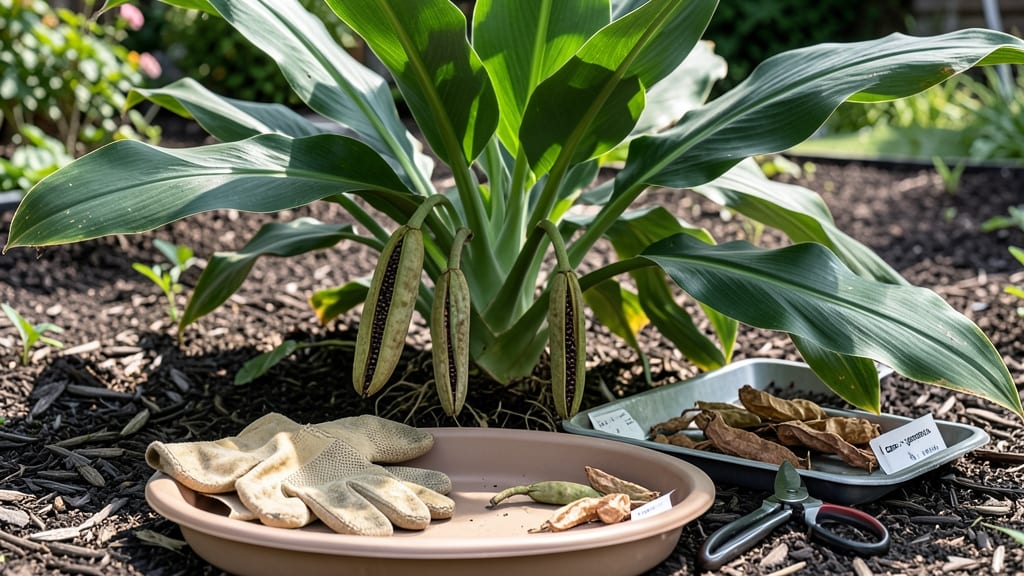
Canna plant seed pods hold the secret to next year’s garden—if you know how to handle them. 🌿 These papery pods look like nature’s own treasure chests, but many gardeners toss them without realizing they contain viable seeds for bold, tropical foliage.
I’ve saved seeds from my own cannas for three seasons now, and the results are worth the effort: free plants that outperform store-bought tubers every time.
The process starts when pods turn from green to brown and begin splitting open—this is your cue to harvest. Use clean scissors to snip them off the stalk, then lay the pods in a dry, shaded spot for a week to fully dry.
Once brittle, gently crush them to release the seeds, which look like tiny, dark brown beans. Store them in a paper envelope in a cool, dark place until spring planting.
Germination is where most people trip up—these seeds need warmth and patience. Soak them overnight before planting, then tuck them just below the soil surface in pots kept at 70-75°F.
With consistent moisture, sprouts appear in 2-4 weeks, though some seeds may take longer. The payoff? Vigorous young cannas that mature into plants with 6-foot stalks and dramatic foliage.
Now, here’s the thing—canna seeds aren’t always reliable, and division is often easier. But when you’ve got extra pods and a little time, this zero-waste method feels like magic.
Even if only half your seeds sprout, you’ll still have more plants than you started with. Worth the gamble for the satisfaction of growing something from scratch.
📚 In This Guide
- What you need
- Instructions
- Tips and common mistakes
- Wrapping up and next steps
What you need
- ● Mature canna plants – Healthy plants with fully developed seed pods (typically late summer/fall). Aim for at least 3-5 plants for a good seed yield.
- ● Sharp pruning shears or garden scissors – For cleanly harvesting pods without damaging the plant.
- ● Paper bags or breathable mesh sacks – 2-3 medium-sized bags (12x15 inches) to collect pods and allow airflow.
- ● Labeling tags & permanent marker – To tag pods by variety (e.g., "Canna ‘Striped Beauty’ – 2024").
- ● Drying tray or wire rack – A flat surface (e.g., baking sheet) to spread pods for drying.
- ● Paper towels or newsprint – For lining the drying tray to prevent mold.
- ● Small paper envelopes or seed packets – For storing dried seeds (aim for 5-10 envelopes depending on yield).
- ● Fine-mesh strainer or sieve – To separate seeds from dried pod debris.
- ○ Air-tight containers (optional but recommended) – Small glass jars or resealable bags with silica gel packets for long-term storage.
- ● Hand lens or magnifying glass – For inspecting seed viability up close.
- ● Humidity pack or dehumidifier – If storing seeds in a damp climate.
- ● Notebook or seed-tracking app – To log pod harvest dates, varieties, and germination notes.
- ● Spray bottle with water – For lightly misting pods if drying conditions are too dry.
- ● Gloves (nitrile or cotton) – To protect hands from sticky resin or thorns on some canna varieties.
Step-by-step guide to extracting canna seeds from pods
Here's how to rescue seeds from canna pods before they dry out—no waste, just next season's plants.
🌱 Step 1: Harvest Mature Seed Pods at Peak Ripeness
Wait until the pods turn a deep, papery brown and begin splitting open naturally. You'll know they're ready when the outer skin cracks slightly—this usually happens in late fall or early winter in most climates. Harvest pods before they shatter completely, as seeds lose viability once exposed to the elements.
Gently twist each pod from the stem to avoid damaging the seeds inside. Place them in a single layer on a clean, dry surface. Don't wash them—any moisture speeds up decay. If pods are still green, leave them on the plant for another 1-2 weeks. Overripe pods that have already split open won't yield good seeds.
🪴 Step 2: Dry and Clean the Pods Properly
Spread the harvested pods in a well-ventilated area away from direct sunlight. A mesh screen or paper towel works perfectly. Let them dry for 7-10 days until completely crisp and brittle to the touch. You'll hear them rattle when shaken—this means the moisture is gone and seeds are protected.
Once fully dry, place the pods in a paper bag and crush them gently by hand. The seeds will pop out cleanly while the empty pod husks stay behind. Sift through the debris to collect only the plump, dark seeds—discard any that look shriveled or discolored. Store the viable seeds in an envelope labeled with the variety and harvest date.
⏰ Step 3: Test Seed Viability Before Storing
Fill a small container with room-temperature water and add 10-12 seeds. Let them soak for 24 hours. Healthy seeds will sink to the bottom while empty or nonviable ones float. Remove any seeds that remain afloat—these won't germinate. This quick test saves you from wasting time planting duds next spring.
For the remaining seeds, prepare a small pot with moist potting mix and plant 3-4 seeds about ½ inch deep. Keep the soil consistently moist (not soggy) and place the pot in a warm spot (70-75°F). You should see sprouts in 2-4 weeks. If germination rates are below 50%, your seeds may need stratification or your storage conditions need adjustment.
🌿 Step 4: Store Seeds for Optimal Germination Next Year
Place the viable seeds in a sealed envelope or small jar with a desiccant packet (like those that come with electronics). Store them in a cool, dark place—your refrigerator's crisper drawer works perfectly. Check them periodically to ensure no moisture has developed. Properly stored canna seeds remain viable for 1-2 years, though germination rates drop after the first year.
When spring arrives, plant the seeds ¼ inch deep in warm soil (75-80°F) and keep them moist until germination. Canna seeds germinate best when the soil stays consistently warm—consider using a seedling heat mat if your climate runs cool. Watch for sprouts within 10-14 days under ideal conditions.
Tips & tricks for perfect canna seed extraction
Here's what nobody tells you about getting the most from your canna pods—these tricks save time and ensure you don't waste a single viable seed.
Harvest Timing: The 1-2 week window for green pods is critical—don't rush it. I've learned the hard way that harvesting too early means immature seeds, while waiting too long means the pods shatter and seeds scatter. Check daily once pods start turning brown, and harvest on a dry day when you can spread them out immediately.
Drying Strategy: For the 7-10 day drying period, I place my pods on a mesh screen in a well-ventilated area with indirect sunlight. A sunny windowsill works perfectly, but avoid direct sun which can overheat and damage seeds. You'll know they're ready when they rattle like maracas—this crispness is what protects the seeds during storage.
Viability Test: The 24-hour water test is your quality control step—don't skip it! I always test a small batch first to gauge how many seeds I'm working with. If more than half float, your seeds may need stratification (a cold treatment) to break dormancy. This simple test saves you from planting hundreds of seeds that won't sprout.
Storage Wisdom: When storing your seeds in the refrigerator, I use small envelopes with the variety name and harvest date written on them. Place a desiccant packet inside each envelope to prevent any moisture buildup. Check them every 6 months—seeds that develop a musty smell should be discarded, as they've lost viability.
Pro Tips for Canna Plant Seed Pods
- Here's what nobody tells you about getting the most from your canna pods—these tricks save time and ensure you don't ...
- Harvest Timing: The 1-2 week window for green pods is critical—don't rush it. I've learned the hard way that harvesti...
- Drying Strategy: For the 7-10 day drying period, I place my pods on a mesh screen in a well-ventilated area with indi...
Frequently asked questions
Got questions about harvesting and saving canna plant seed pods? You’re not alone! Here are some of the most common queries—plus straightforward answers to help you master the process.
When are canna plant seed pods ready for harvest?
Seed pods typically mature 8–12 weeks after flowering. Look for pods that are dry, brown, and slightly papery—they’ll rattle when shaken. If they’re still green or soft, give them another week or two. Pro tip: Harvest on a dry day to prevent mold!
How do I store canna seeds until planting season?
Store seeds in a cool, dry place (like a sealed envelope or jar with silica gel) at 35–45°F. Avoid refrigeration unless necessary—moisture is the enemy! Label pods with the harvest date and variety. Most seeds stay viable for 1–2 years if stored properly.
What if my seed pods crack open before I can collect them?
Don’t stress! If pods split early, gently scoop out the seeds (they’ll be dark brown/black) and let them dry on paper towels for 2–3 days. Wind or pests often cause premature cracking—try covering plants with light mesh if this happens repeatedly.
Can I grow canna plants from seed pods instead of buying new plants?
Canna seeds are 100% viable
for next season’s garden. Each pod yields 10–20 seeds, and they’re cheaper than tubers. Just plant them ¼-inch deep in warm soil (70°F+) after the last frost. Bonus: Seed-grown plants may produce unique color variations!
Why aren’t my canna seed pods forming at all?
Missing pods? Check these fixes:
- Pollination: Cannas are self-pollinating, but gentle hand-pollination (transfer pollen with a brush) can help.
- Light/Heat: Ensure plants get full sun (6+ hours/day) and warm temps (60°F+).
- Age: Younger plants may not flower. Wait until they’re 2–3 years old for reliable pods.
Wrapping up and next steps
Harvesting canna plant seed pods is a rewarding way to ensure a fresh, thriving garden next season—all while embracing a zero-waste approach! 🌱 By following these simple steps, you’ll unlock the potential of these vibrant pods, turning them into seeds for future growth.
Whether you’re a seasoned gardener or just starting out, this process is both easy and eco-friendly.
Ready to take the next step? Mark your calendar for late fall or early winter to collect your pods, and get ready to nurture your garden with homegrown canna seeds. Happy planting—and here’s to a garden full of color and life! 🌟