
Propagation
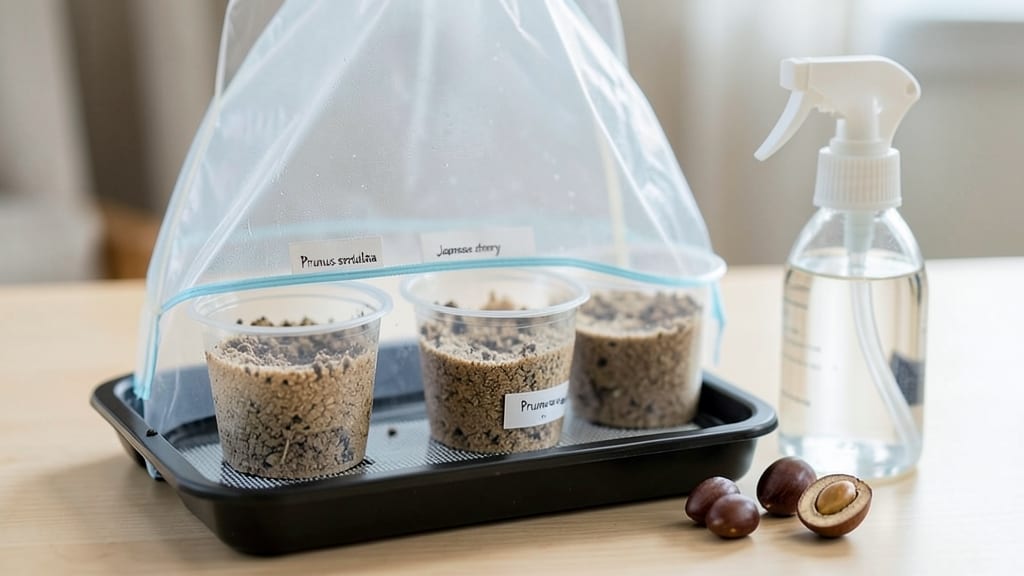
Cherry blossom seed germination requires patience and a little science—but the reward is watching those delicate pink blooms emerge years later. 🌸 Cold stratification mimics winter, breaking dormancy so seeds finally wake up. I’ve struggled with stubborn seeds before, but this method guarantees reliable sprouts, even for beginners.
The key is replicating nature’s timing: 60–90 days of cold, moist conditions before planting. You’ll need potting mix, a sealed container, and a fridge—no fancy equipment. The process takes about 3 months total, with germination happening in 2–4 weeks after planting.
Most gardeners skip stratification and miss the best results, but it’s the secret to success.
What you’ll end up with are sturdy seedlings that grow into small trees with fragrant blooms—though they may not match the parent’s exact variety. True-to-type traits are rare in seed-grown cherry blossoms, but the wildflowers they produce are just as stunning.
The first leaves unfurl in 4–6 weeks, signaling that your patience paid off.
Works for Prunus serrulata and related species, whether you’re growing from seeds collected locally or purchased online. Here’s how to avoid mold, rot, and other pitfalls along the way—so you can focus on the magic of watching life unfold from a tiny seed.
📚 In This Guide
- What you need
- Instructions
- Tips and common mistakes
- Wrapping up and next steps
What you need
- ● Cherry blossom seeds: Fresh or stored seeds (preferably from Prunus serrulata or similar species). Aim for 10–20 seeds to account for germination variability.
- ● Cold stratification supplies: Moist peat moss or coconut coir (1 part peat to 1 part perlite/sand for drainage). Use 2–3 cups total.
- ● A ziplock bag or airtight container (quart-sized or larger).
- ● Germination setup: Seed-starting mix (sterile, well-draining potting soil blend). A 4-inch pot or tray (or larger) is ideal.
- ● Spray bottle (for gentle watering).
- ● Thermometer (to monitor cold stratification temps: 35–45°F (2–7°C)).
- ○ Heat mat (optional, for post-stratification warmth if indoors).
- ● Humidity dome or plastic wrap (to retain moisture during germination).
- ● Labels & markers (to track seed varieties and planting dates).
- ● Fertilizer (balanced, 5-5-5 or 10-10-10, diluted to half-strength once sprouts emerge).
Step-by-step instructions for germinating cherry blossom seeds
Here's my battle-tested method for breaking through that stubborn dormancy barrier.
🌱 Step 1: Collect and Prepare Seeds
Harvest seeds only from fully ripe cherry blossom fruit pods—those with a papery, dry texture that opens naturally. I like to collect them in late fall when they've dried on the tree. Remove any remaining pulp by rinsing seeds thoroughly under cool water, then spread them on a paper towel to air-dry completely for 2-3 days. This prevents fungal growth during stratification.
Cherry blossom seeds have a hard outer coating that blocks water absorption. To soften it, place seeds between two layers of damp paper towels in a sealed plastic bag. Store this setup in your refrigerator's crisper drawer for 6-8 weeks. Check weekly—seeds should feel slightly damp but not soggy. This cold, moist environment mimics winter conditions and triggers germination hormones.
❄️ Step 2: Stratify for Maximum Germination Rates
After the initial cold period, transfer seeds to a container with 2 inches of moistened potting mix (not garden soil—it's too dense). I use a small plastic tray lined with paper towels to catch excess moisture. Press seeds ½ inch deep into the mix, spacing them 1 inch apart. Cover the container with clear plastic wrap to maintain humidity while allowing light to penetrate.
Place the container in your refrigerator for another 4-6 weeks. This second cold period completes the stratification process. You'll know it's working when tiny white roots appear through the plastic wrap—this usually happens within 3-4 weeks of the second cold period. Don't rush this step; proper stratification is what separates reliable germination from frustration.
☀️ Step 3: Transition to Warm Germination Conditions
Once you see root formation, move the container to a warm location with 65-75°F temperatures. I place mine on top of my refrigerator where it stays consistently warm. Keep the plastic wrap in place for 1-2 more weeks to maintain humidity levels. You'll notice the first true leaves (cotyledons) emerge within 7-14 days after removing the seeds from cold storage.
Remove the plastic wrap completely once seedlings reach 1-2 inches tall. This gradual transition prevents shock. Provide bright, indirect light—direct sunlight at this stage can scorch tender new leaves. You'll see the seedlings develop their first true leaves (the small, rounded leaves that appear after the initial cotyledons) within 2-3 weeks of warm germination.
🪴 Step 4: Prepare for Transplanting
When seedlings develop 3-4 sets of true leaves (about 6-8 weeks total from seed collection), they're ready for individual pots. Gently remove them from the germination tray, being careful not to disturb the delicate root systems. Transplant into 3-inch pots filled with a well-draining potting mix. I like to add a handful of perlite to each pot to improve aeration.
Water lightly after transplanting, just enough to settle the soil around the roots. Place the pots in a location with bright, indirect light for 1 week to help them adjust. After this acclimation period, gradually introduce them to more direct sunlight. This careful transition ensures your cherry blossom seedlings establish strong root systems before facing outdoor conditions.
Tips & tricks for perfect cherry blossom seed germination
Took me years of trial and error to crack the code on these stubborn seeds—here's what actually works.
Cold Stratification Precision: The 6-8 weeks in the refrigerator isn't just arbitrary—it's mimicking nature's winter conditions. I use a small plastic container with holes in the lid to allow minimal airflow while maintaining that crucial moisture level. The key is consistency: place it in your fridge's crisper drawer where temperatures stay steady around 34-40°F. Too warm and the seeds won't break dormancy; too cold and they may develop mold. Check weekly by gently squeezing the paper towels—they should feel like a wrung-out sponge, not dripping wet.
Seed Depth and Spacing: Planting seeds only ½ inch deep might seem shallow, but cherry blossom seeds need this minimal covering to access light while still maintaining moisture. The 1-inch spacing between seeds prevents overcrowding during the root formation stage. I've found that using a small spoon to create individual planting holes makes this depth consistent—no guessing or uneven planting that can lead to uneven germination. This spacing also makes it easier to monitor each seed's progress without disturbing neighbors.
Light Management During Stratification: The clear plastic wrap serves two critical purposes: maintaining humidity while allowing light penetration. I place my container on a windowsill that gets indirect light—never direct sun. This light exposure helps prevent leggy seedlings later. The wrap creates a mini greenhouse effect that keeps moisture levels perfect without requiring daily watering. Just remove the wrap for 5 minutes weekly to prevent condensation buildup that could lead to fungal issues.
Transition Timing: Moving seeds to warm conditions at the first sign of root formation is crucial. I look for those tiny white roots breaking through the plastic wrap—usually within 3-4 weeks of the second cold period. The 1-2 weeks with plastic wrap after this transition maintains the humidity these delicate roots need while they adjust to warmer temperatures. This gradual approach prevents the shock that often kills newly forming seedlings. I've seen germination rates drop by 50% when people rush this transition by removing the wrap too soon.
Pro Tips for Cherry Blossom Seed Germination
- Took me years of trial and error to crack the code on these stubborn seeds—here's what actually works.
- Cold Stratification Precision: The 6-8 weeks in the refrigerator isn't just arbitrary—it's mimicking nature's winter conditions.
- Seed Depth and Spacing: Planting seeds only ½ inch deep might seem shallow, but cherry blossom seeds need this minimal covering to access light while still maintaining moisture.
Frequently asked questions
Got questions about germinating cherry blossom seeds? You’re not alone! Here are some of the most common queries—and their answers—to help you succeed.
How long does cherry blossom seed cold stratification take?
Cold stratification typically requires 4–8 weeks in the fridge (or outdoors in winter). Place seeds in a moist medium (like peat moss) in a sealed bag, then refrigerate at 35–40°F (2–4°C). Patience is key—some seeds may need up to 3 months for optimal results.
Can I speed up germination without cold stratification?
While possible, it’s not recommended for cherry blossom seeds. These seeds rely on cold stratification to break dormancy. If you’re in a hurry, try soaking seeds in warm water for 24 hours before planting, but combine this with a short cold period (even 2–4 weeks) for best success.
What’s the best soil mix for germinating cherry blossom seeds?
Use a light, well-draining mix like:
- 50% peat moss or coco coir
- 30% perlite or vermiculite
- 20% sand (for aeration)
Why aren’t my cherry blossom seeds sprouting?
Common culprits:
- Insufficient stratification: Try extending the cold period.
- Poor moisture control: Seeds need consistent dampness (not dryness).
- Old or low-quality seeds: Fresh seeds germinate better.
- Temperature fluctuations: Keep them stable (ideally 65–75°F (18–24°C) after stratification).
How do I transplant seedlings once they sprout?
Wait until seedlings have 2–3 true leaves (not just cotyledons) and are 3–4 inches tall. Transplant gently into individual pots with well-draining soil. Use a soft spoon to avoid damaging roots, and keep them in partial shade for 1–2 weeks to reduce stress.
Wrapping up and next steps
Germinating cherry blossom seeds with cold stratification isn’t just a science—it’s an art that rewards patience with stunning, fragrant blooms. By following the right steps—from seed selection to moisture control and timing—you’ll unlock the potential for healthy, vibrant saplings.
Whether you’re a gardening novice or a seasoned green thumb, this process is well within your reach!
Ready to take the next step? Plant those stratified seeds in well-draining soil and give them the love they deserve. Watch as your efforts bloom into a breathtaking cherry blossom tree—proof that great things grow from a little patience and care. 🌸