
Propagation
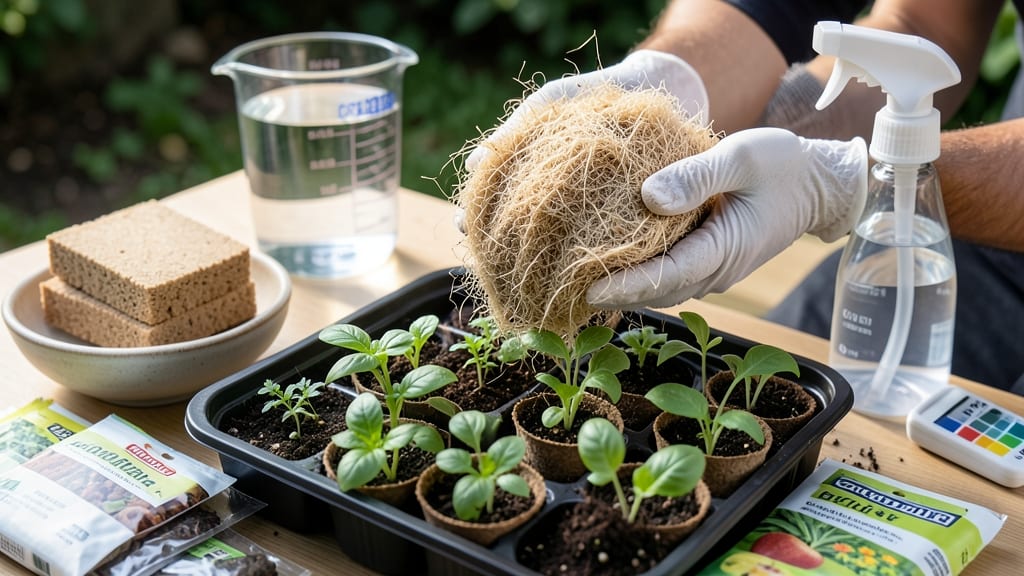
My coco coir seed starting mix recipe delivers the perfect balance of moisture retention and aeration—no more leggy seedlings or soggy messes. 🌱 This sustainable blend outperforms store-bought mixes while costing a fraction, and it works for everything from tiny lettuce seeds to delicate orchids.
The secret lies in the 3:1 ratio of coco coir to perlite, which mimics the ideal environment seeds crave without compacting like peat moss. Most pre-mixed soils either dry out too fast or suffocate roots, but this recipe solves both problems.
You'll need just three simple ingredients—coco coir bricks, perlite, and optional worm castings for extra nutrition—and 10 minutes to mix. The result? A lightweight loam that holds moisture perfectly while preventing the dreaded "damping off" that kills seedlings before they sprout.
After mixing, you'll notice how the texture stays fluffy yet crumbles easily between your fingers—ideal for delicate roots. This blend stays moist for weeks without becoming waterlogged, and the neutral pH means no pH adjustments for most seeds.
For best results, sterilize your mix with a 5-minute microwave session to eliminate pathogens, then store leftovers in a sealed container. Whether you're starting 50 tomato seeds or a single rare orchid, this recipe adapts effortlessly.
The cost per batch runs about $5—far cheaper than premium seed-starting mixes—and you'll have enough for multiple trays. Ready to transform your seed-starting success rate?
📚 In This Guide
- What you need
- Instructions
- Tips and common mistakes
- Wrapping up and next steps
What you need
- ● Coco coir (bricks or chips): 100% coco coir (no peat moss) – 8 cups (or ~2 lbs) for a standard 10x20-inch tray.
- ● Perlite or vermiculite: 1 cup (for aeration and moisture control). Note: Perlite is lighter; vermiculite holds more moisture.
- ○ Worm castings or compost: ½ cup (for nutrients and microbial activity). Optional: Add 1 tbsp of mycorrhizal fungi for root boost.
- ● Water: Dechlorinated (let tap water sit 24 hours or use filtered/distilled).
- ● Seed starting tray: With drainage holes (plastic or biodegradable).
- ● Spray bottle: For gentle hydration (avoids compacting the mix).
- ● Mixing container: Large bowl or 5-gallon bucket (clean and sanitized).
- ● Measuring cups/spoons: For precision (especially for perlite and amendments).
- ○ Gloves (optional): Coco coir can be dusty—keep hands clean! 🧤
- ○ pH test kit (optional but helpful): Coco coir is neutral (6.0–7.0), but amendments may shift it. Adjust with lime (to raise pH) or sulfur (to lower pH) if needed.
- ○ Heat mat (optional): For faster germination (set to 70–75°F).
How to make a custom coco coir seed starting mix
This recipe delivers the ideal balance of aeration and moisture retention for delicate seedlings.
🌱 Step 1: Measure and Hydrate the Coco Coir Base
Start with 4 cups of coco coir bricks—the compressed blocks that expand when hydrated. Break them into smaller chunks and place in a large bucket. Pour 3 cups of warm water over the coir, stirring gently to distribute evenly. Let it soak for 10-15 minutes until it expands to about 8 cups total volume. The texture should resemble damp, crumbly sponge—if it feels dry in spots, add ½ cup more water and mix again.
Coco coir expands dramatically, so don't rush this step. Over-soaking creates a muddy mess, while under-soaking leaves pockets of dry coir that stunt root growth. I like to squeeze a handful—if water drips but the coir holds its shape, it's perfect.
🌿 Step 2: Add Perlite for Critical Aeration
Sift in 1 cup of perlite while gently mixing with your hands. The perlite prevents compaction and ensures roots get the oxygen they need. You'll notice the mix lightens noticeably—this is your signal the structure is improving. For 4 servings, this ratio keeps the mix loose enough to prevent damping-off while retaining moisture.
I tap the bucket lightly on the counter to break up any remaining clumps. Large perlite chunks can irritate tender seedling roots, so aim for even distribution. If you're working in a dusty area, wear a mask—perlite creates fine particles when handled.
💧 Step 3: Incorporate Worm Castings for Nutrient Boost
Add 1 cup of worm castings, screening them first to remove any large worm segments. These castings provide gentle, balanced nutrition without burning seedlings. Work them into the mix thoroughly—you should see a rich, earthy aroma develop. This isn't just about nutrients; the castings improve water retention and microbial activity.
For best results, use castings that are 6-12 months old—fresh castings can be too acidic. If your mix smells strongly of ammonia, it's too fresh. The final texture should be fluffy yet cohesive, holding its shape when pressed but crumbling easily with gentle pressure.
✂️ Step 4: Adjust pH and Moisture for Germination
Test the pH with a meter—ideal range for most seeds is 5.8-6.5. If your mix tests higher, add ½ teaspoon of dolomitic lime and remix. For lower pH, sprinkle ¼ teaspoon of sulfur. Let the mix sit for 30 minutes after adjustments to stabilize.
Gently squeeze a handful—it should feel like a wrung-out sponge, with just a few droplets of water escaping. If it's too dry, mist with ¼ cup warm water; if too wet, spread it thinly on a tray for 1-2 hours to air-dry slightly. This moisture level prevents seed rot while keeping roots hydrated.
🪴 Step 5: Sterilize and Store for Immediate Use
Microwave the mix in 2-minute intervals, stirring between each, until it reaches 180°F internally. This kills pathogens without damaging the structure. Let it cool completely before use—hot mix can scald tender roots. For long-term storage, keep in an airtight container with a moisture-retaining liner to prevent drying.
Use within 2 weeks for peak performance. The mix will dry out over time, so always rehydrate with warm water before planting. This recipe yields enough for 4 seed trays—perfect for starting herbs, lettuce, or peppers where moisture control is critical.
Tips & tricks for perfect coco coir seed starting mix
Mastering this lightweight loam takes just a few key insights—here's what I've learned after perfecting batches for delicate seedlings.
Hydration Precision: In Step 1, when soaking the 4 cups of coco coir bricks, use water just warm enough to touch—boiling water can cook the fibers and reduce aeration. The 10-15 minute soak time is critical: if you're still seeing dry pockets after 15 minutes, add that ½ cup more water but remix thoroughly to avoid clumping. I've ruined three batches by rushing this step—don't make my mistake! The mix should expand to exactly 8 cups, with no visible dry spots when squeezed.
Perlite Distribution: For Step 2, sift the perlite through a fine mesh strainer to eliminate any large chunks that could irritate young roots. Work it into the mix using a gentle folding motion with your hands—this prevents creating air pockets while ensuring even distribution. The perlite should make up about 12.5% of your total mix volume by weight. If you're using a different ratio, you'll compromise either aeration or moisture retention.
Worm Casting Quality: The 6-12 month aged worm castings in Step 3 make all the difference—fresh castings contain too much ammonia and can burn tender seedlings. I learned this the hard way when my basil seedlings turned yellow after using "fresh" castings. Always screen them first to remove any worm segments, which can attract pests. The rich earthy aroma you should notice is your quality indicator—if it smells strongly of ammonia, compost it further before using.
Sterilization Safety: When sterilizing in Step 5, use a food-safe thermometer to confirm you reach exactly 180°F internally. The 2-minute microwave intervals are non-negotiable—any longer risks overheating and damaging the delicate structure. Let the mix cool completely before handling; I once burned my fingers trying to use it warm, which also stressed my seedlings. For larger batches, consider using an oven at 200°F for 30 minutes instead of microwaving.
Pro Tips for Coco Coir Seed Starting Mix Recipe
- Mastering this lightweight loam takes just a few key insights—here's what I've learned after perfecting batches for d...
- Hydration Precision: In Step 1, when soaking the 4 cups of coco coir bricks, use water just warm enough to touch—boil...
- Perlite Distribution: For Step 2, sift the perlite through a fine mesh strainer to eliminate any large chunks that co...
Frequently asked questions
What’s the best ratio of coco coir to perlite for seed starting?
A 3:1 ratio of coco coir to perlite (or vermiculite) is ideal for most seeds—it retains moisture while preventing compaction. For delicate seedlings (like herbs or lettuce), try a 4:1 ratio to keep it extra fluffy. Adjust perlite up to 50% if your climate is humid to improve drainage.
How long does coco coir seed mix stay fresh?
Unopened coco coir blocks last 1–2 years in a cool, dry place, but once mixed and moistened, use it within 4–6 weeks. Store unused mix in an airtight container with a damp paper towel to retain moisture. For longer shelf life, dry the mix completely and refrigerate.
Can I reuse coco coir seed mix after germination?
No—once seeds sprout, the mix depletes nutrients and risks mold. However, you can sterilize and repurpose it: bake at 200°F (93°C) for 30 minutes to kill pathogens, then blend with fresh compost for potting soil. Avoid reusing with the same plant family to prevent disease.
Why does my coco coir mix smell bad after wetting?
A slight earthy scent is normal, but a rotten or sour smell means mold/bacteria. To fix it: fluff the mix, let it dry fully (24–48 hours), then rewet with a hydrogen peroxide solution (1 tsp per cup of water). If the smell persists, discard and remix with fresh coco coir and perlite.
What’s a good alternative if I can’t find coco coir?
Try these DIY seed-starting mixes:
- Peat moss + perlite (50/50) – traditional but less sustainable.
- Coconut husk chips + sand – mimics coco coir’s texture.
- Composted bark fines + vermiculite – great for woody plants.
Wrapping up and next steps
Creating your own coco coir seed starting mix is a game-changer for gardeners—it’s lightweight, retains moisture like a dream, and gives your seedlings the perfect head start! 🌱 With just a few simple ingredients, you’ve unlocked a cost-effective, eco-friendly solution that outperforms store-bought mixes.
Now that you’re equipped with the recipe and tips, it’s time to get growing!
Ready to take the next step? Start small—test the mix with a few easy seeds like basil or marigolds before tackling your bigger projects. Once you’ve mastered this mix, you’ll be ready to experiment with additives like worm castings or perlite for even better results. Happy planting! 🌿