
Lawn
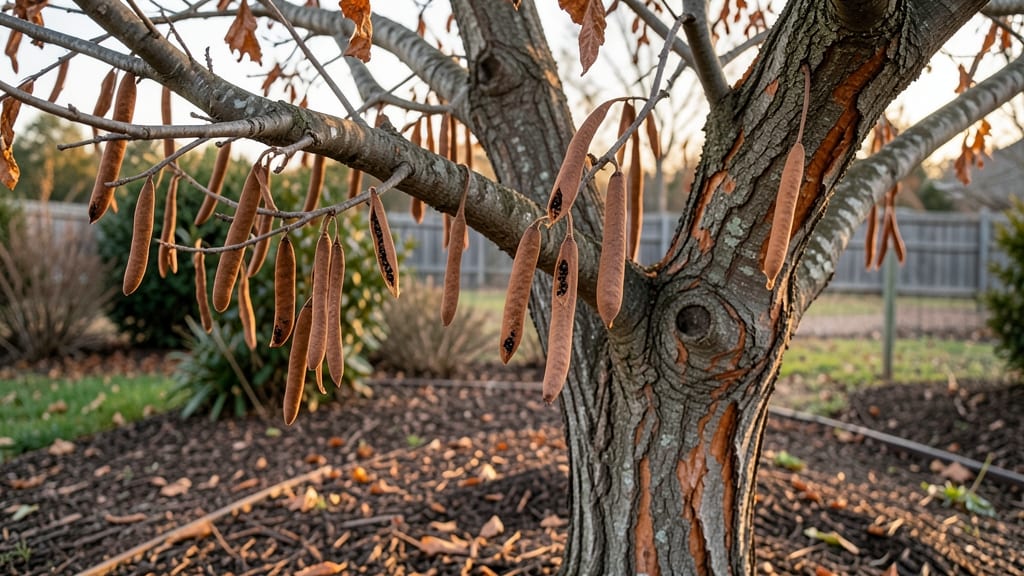
Those stubborn crape myrtle seed pods hold the secret to next year’s blooms. 🌿 I’ve wrestled with them for years—until I discovered the twist-resistant harvesting trick that saves time and keeps your plant healthy.
The pods aren’t just decorative; they’re nature’s way of ensuring new growth, but only if you handle them right.
Timing is everything: wait until pods turn brown and split open naturally, usually in late fall or early winter. Grab a pair of gloves and gently twist each pod—it should come off cleanly without tearing the bark.
If they resist, they’re not ready yet. This method preserves the tree’s energy for spring blooms while giving you seeds for propagation.
Once harvested, you’ll have two options: plant the seeds immediately for a head start, or store them in a cool, dry place until spring. The seeds inside are tiny but mighty, and with proper care, they’ll sprout into new crape myrtles in just a few weeks.
Your garden gains free, hardy plants while the parent tree stays strong and vibrant.
Pro tip: Skip the pods if you’re not ready for propagation—they’ll eventually drop on their own, fertilizing the soil naturally. But if you’re eager to grow more, this twist method makes it simple. Next year, you’ll have a whole new generation of blooms to enjoy.
📚 In This Guide
- What you need
- Instructions
- Tips and common mistakes
- Wrapping up and next steps
What you need
- ● Gloves (heavy-duty or gardening gloves) – Protects hands from thorns and potential irritation (1 pair).
- ● Pruning shears or loppers – Sharp, clean tools for cutting pods from branches (1 pair, 6–10-inch blades recommended).
- ● Large bucket or trash bag – For collecting pods (1–2, 10+ gallon capacity).
- ● Newspaper or cardboard – For drying pods indoors (1–2 sheets).
- ● Paper bags or breathable mesh bags – For storing dried pods (5–10 bags, 1–2 gallon size).
- ● Labeling markers or tags – To mark seed varieties (1 pack).
- ○ Rake or leaf blower – For clearing fallen pods from the ground (optional but helpful).
- ● Safety goggles – If working near dusty or thorny areas.
- ● Disinfectant spray (70% isopropyl alcohol) – For sterilizing tools between cuts.
- ● Seed catalog or notebook – To track pod maturity and harvest dates.
- ● Twine or rubber bands – For bundling large branches before cutting.
- ● Extension pole (for loppers) – If your crape myrtle is tall (6–12 ft reach).
Step-by-Step guide to harvesting crape myrtle seed pods
Here’s how to collect seed pods without damaging the tree—and set up next year’s beautiful blooms.
🌿 Step 1: Identify and Wait for Ripe Seed Pods
Look for seed pods that have turned brown and papery—they’ll feel dry and brittle when gently squeezed. These pods are ready for harvesting, usually in late fall or early winter after the first frost. Avoid picking green or still-flexible pods; they won’t contain viable seeds.
Crape myrtles produce pods in clusters, so focus on the driest, most mature-looking pods first. If you’re unsure, tap a pod—ripe ones will rattle inside. Harvesting too early means seeds won’t be fully developed, while waiting too long risks them scattering on the ground.
✂️ Step 2: Gently Twist and Remove Pods Without Breaking Branches
Use your fingers to gently twist the pod away from the branch—don’t pull or yank, as this can strip bark or snap small limbs. Start at the base of the pod and work upward to avoid tearing. If a pod resists, it’s not fully ripe yet; leave it for another week.
Place harvested pods in a paper bag (not plastic) to prevent moisture buildup, which can cause mold. Label the bag with the harvest date—this helps track seed viability over time. I like to harvest on a dry, overcast day to reduce stress on the tree.
🪴 Step 3: Dry and Store Pods for Seed Extraction
Spread the pods in a single layer on a towel or mesh screen in a warm, dry, well-ventilated spot (like a garage or shed) for 1-2 weeks. This ensures they’re completely dry before handling. Avoid direct sunlight, which can overheat the pods and damage seeds.
Once dry, crack open each pod by pressing firmly with your thumb—seeds will pop out easily. Discard any empty or shriveled pods. Store the seeds in a paper envelope in a cool, dark place (like a seed vault or airtight container with silica gel packets) to maintain viability for up to 2 years.
🌱 Step 4: Plant Seeds for Next Season’s Growth
Sow seeds indoors in early spring (6-8 weeks before last frost) in well-draining potting mix kept at 70-75°F. Press seeds ¼ inch deep and mist lightly—don’t overwater, as crape myrtle seeds rot easily in soggy soil. Place trays under grow lights for 12-14 hours daily to prevent leggy seedlings.
Transplant seedlings outdoors after the last frost, spacing them 10-15 feet apart in full sun with well-draining soil. Mulch around the base to retain moisture and suppress weeds. Young trees may take 3-5 years to bloom, but patience pays off with vibrant, long-lasting flowers.
⏰ Step 5: Monitor and Prune for Healthy Future Blooms
In late winter or early spring, prune your crape myrtle to remove dead or crossing branches—this encourages stronger growth and more flowers. Never "top" the tree (cutting the top flat), as this weakens the structure and reduces blooms. Aim for an open, vase-like shape to improve airflow and sunlight penetration.
Water deeply once a week during dry spells, but avoid overwatering—crape myrtles are drought-tolerant once established. Fertilize lightly in early spring with a balanced, slow-release fertilizer to support new growth. With proper care, your harvested seeds will grow into stunning, low-maintenance trees.
Tips & tricks for perfect crape myrtle seed pod harvesting
Here's what I've learned after years of harvesting these delicate pods without damaging a single tree.
Pod Ripeness Test: The key to successful harvesting is knowing exactly when pods are ready. Beyond the brown color, fully ripe pods will have a hollow sound when tapped—almost like a drum. I've ruined batches by picking too early, so always do this quick test before harvesting. If you're still unsure, wait another week; patience here means better seeds later.
Gentle Twisting Technique: In Step 2, when you're twisting pods from the branch, start at the base and work upward—this prevents tearing the pod or damaging the tree. I've seen beginners yank pods straight off, which can strip bark or snap small branches. Think of it like unscrewing a stubborn jar lid: slow, steady pressure wins every time. If a pod feels tough to remove, it's not ready yet.
Drying Strategy: For Step 3, I recommend using a mesh screen over a towel instead of just a towel alone. The mesh allows better airflow around each pod, which speeds up drying time while preventing mold. Spread them in a single layer and avoid stacking—even a few pods piled together can trap moisture. A warm, dry spot like a garage works perfectly, but never leave them in direct sunlight which can overheat and damage the seeds.
Seed Storage Hack: After extracting seeds, store them in a paper envelope with a silica gel packet—this keeps them dry and maintains viability for up to two years. I like to add a small label with the harvest date and variety if I'm growing multiple types. For extra protection, you can also place the envelope in a sealed plastic bag with a tiny hole for airflow, but the paper envelope alone works well for most gardeners.
Pro Tips for Crape Myrtle Seed Pods
- Here's what I've learned after years of harvesting these delicate pods without damaging a single tree.
- Pod Ripeness Test: The key to successful harvesting is knowing exactly when pods are ready. Beyond the brown color, f...
- Gentle Twisting Technique: In Step 2, when you're twisting pods from the branch, start at the base and work upward—th...
Frequently asked questions
about crape myrtle seed pods—because even the best gardeners need a little clarity! Here are answers to the most common questions to help you tackle those twisty pods like a pro.Why do crape myrtle seed pods twist and pop open?
Crape myrtle seed pods twist and release seeds as a natural survival strategy—this helps disperse seeds for new plants! The twisting motion is triggered by changes in humidity and temperature. If you’re harvesting early, you can prevent this by cutting pods before they fully mature (when they’re still green).
When is the best time to harvest crape myrtle seed pods?
Harvest seed pods when they turn brown and papery but before they start twisting open—usually in late fall or early winter (October–December, depending on your climate). If left too long, the pods will release seeds naturally, making collection harder. A quick twist or gentle squeeze should release seeds if they’re ready!
Can I reuse or compost the empty seed pods after harvesting?
Yes! Empty seed pods can be composted or used as natural mulch around your crape myrtle or other plants. They’ll break down over time, adding organic matter to your soil. Just avoid burning them—they can pop unexpectedly and create a mess! For a creative touch, dry them and use as winter decorations in arrangements.
What should I do if my crape myrtle isn’t producing seed pods?
If your tree isn’t producing pods, it might be too young (most crape myrtles need 3–5 years to flower and set seeds), lacking nutrients, or not getting enough sunlight. Check for pests (like aphids) or disease (such as powdery mildew), and ensure it’s planted in well-draining soil. A balanced fertilizer in early spring can also encourage healthy growth and flowering.
Will harvesting seed pods hurt my crape myrtle tree?
Nope! Harvesting seed pods won’t harm your tree—it’s actually a helpful task. Removing spent pods reduces disease risk and keeps your yard tidier. Plus, it encourages the tree to focus energy on next year’s blooms. Just avoid cutting into the woody stems or live branches while harvesting—stick to the pods only!
Wrapping up and next steps
Harvesting crape myrtle seed pods is a rewarding way to ensure next year’s vibrant blooms—but timing and technique are everything! 🌸 With the right tools and patience, you’ll transform those twist-resistant pods into a future full of color.
Now that you’re armed with answers and tips, why not take action? Grab your gloves, head outside, and give it a try—your garden will thank you!
Next step: Mark your calendar for late fall or early winter to harvest those pods before they release seeds naturally. Happy gardening! 🌿