
Lawn
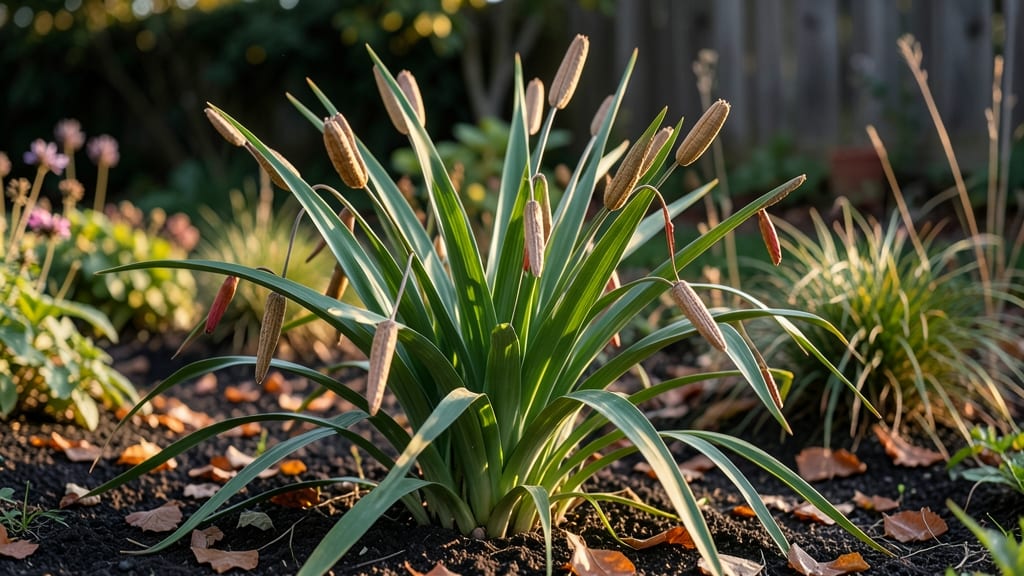
Those striking red-orange crocosmia seed pods are nature’s way of promising next year’s fiery blooms—but handling them wrong can mean wasted effort. 🌱 I’ve learned the hard way that timing and technique make all the difference between a thriving new crop and a pile of dried-up disappointment.
Collect pods when they’re crisp and brown but just before they burst open—usually late summer to early fall. Store them in a paper bag with a few holes for airflow until spring, or sow them fresh in well-draining soil.
The key? Patience—crocosmia seeds need cold stratification to germinate, so don’t rush them.
You’ll end up with bold, clumping plants that multiply faster than weeds, their sword-like foliage and torch-like flowers lighting up the garden. Just watch for slugs—they adore fresh pods—and consider dividing mature clumps if your patch gets too crowded.
This method works best for gardeners with space to spare, but even small gardens can grow crocosmia in containers. The trade-off? Seed propagation is slower than division, but the payoff is worth it for those who love a challenge.
📚 In This Guide
- What you need
- Instructions
- Tips and common mistakes
- Wrapping up and next steps
What you need
- ● Crocosmia plants: Healthy, mature plants with visible seed pods (preferably Crocosmia × crocosmiiflora or similar varieties). Aim for at least 3-5 plants to ensure a good yield.
- ● Pruning shears or sharp scissors: Clean, sterilized tools to avoid spreading disease. A bypass pruner works best for precision cuts.
- ● Paper bags or breathable seed envelopes: 4-6 medium-sized brown paper bags (or kraft paper envelopes) to collect and dry the pods. Avoid plastic—it traps moisture!
- ● Permanent marker or labels: To mark the date harvested and variety name on each bag.
- ● Drying rack or mesh screen: A cool, dry, well-ventilated area (like a garage or shed) with 18-24 inches of airflow around the pods.
- ● Small sieve or fine mesh: A #10 or #20 mesh sieve (or a clean kitchen strainer) to separate seeds from chaff once dried.
- ○ Glass jars or airtight containers: 4-6 small jars (2-4 oz size) with desiccant packets (optional but recommended) to store seeds long-term.
- ● Hand lens or magnifying glass: For inspecting seed viability up close.
- ● Humidity pack (silica gel): To absorb excess moisture in storage jars.
- ● Notebook or garden journal: To track germination rates and planting dates for future reference.
- ● Gloves (nitrile or latex): If you’re sensitive to plant sap or thorns.
- ● Spray bottle with water: For lightly misting pods if they dry too quickly.
How to harvest and save crocosmia seed pods for future gardens
Turn those striking red-orange seed pods into next season’s vibrant blooms with this simple, foolproof method.
🌱 Step 1: Identify and Select Mature Seed Pods
Wait until late fall or early winter when the pods turn a deep red-orange and begin splitting open naturally. These pods contain the seeds needed for propagation, but they must be fully mature to ensure strong germination. Look for pods that are dry to the touch and have started cracking along their seams.
Harvest pods on a dry day to prevent moisture from encouraging rot. Use clean, sharp pruning shears to snip the entire pod from the stem, leaving about ½ inch of stem attached. This helps maintain seed viability during storage. Place harvested pods in a paper bag to allow airflow while preventing debris from entering.
💧 Step 2: Dry and Clean the Seed Pods
Spread the harvested pods in a single layer on a clean, dry surface in a well-ventilated area. Choose a spot with indirect light to prevent overheating, which can damage the seeds inside. Allow the pods to dry for 7-10 days until they feel brittle and the seeds rattle inside when shaken gently.
Once fully dry, gently crush each pod between your fingers or use a small hammer to release the seeds. Avoid pressing too hard—you want the seeds intact, not pulverized. Sift the seeds through a fine mesh sieve to remove any remaining pod fragments or debris. Store the clean seeds in a labeled envelope or small glass jar.
⏰ Step 3: Store Seeds Properly for Spring Planting
Place the dried seeds in an airtight container with a desiccant packet to absorb excess moisture. Store the container in a cool, dark place, such as a refrigerator or basement, where temperatures stay between 35-45°F. This mimics natural winter conditions and helps break seed dormancy, ensuring better germination rates in spring.
Label the container with the date and variety of crocosmia to avoid confusion. Seeds remain viable for 1-2 years under these conditions, but planting them within the first year yields the best results. Check the container periodically for signs of mold or pests—discard any seeds that appear discolored or damaged.
☀️ Step 4: Prepare for Spring Planting
In early spring, about 4-6 weeks before your last frost date, remove the seeds from storage and let them sit at room temperature for 24 hours to acclimate. This gradual temperature change helps prevent shock and encourages uniform germination. Fill small seed trays or individual pots with a well-draining seed-starting mix.
Sow the seeds ¼ inch deep in the soil, spacing them about 1 inch apart to allow room for growth. Mist the soil lightly with water to keep it moist but not soggy. Place the trays in a warm, bright location with indirect light, such as a sunny windowsill or under a grow light. Keep the soil consistently moist until germination occurs, which typically takes 2-4 weeks.
🌿 Step 5: Transplant Seedlings Outdoors
Once seedlings develop 2-3 true leaves and are at least 3 inches tall, they’re ready for transplanting. Choose a location with full sun to partial shade and well-draining soil. Crocosmia thrives in slightly acidic to neutral soil with a pH of 6.0-7.0, so amend the soil with compost if needed.
Dig small holes slightly larger than the root balls of the seedlings and space them 12-18 inches apart to allow for mature growth. Water the seedlings thoroughly after transplanting to help them establish roots. Mulch around the base with a 2-inch layer of organic mulch to retain moisture and suppress weeds, ensuring your young plants get the best start for next year’s bold blooms.
Tips & tricks for perfect crocosmia seed pod harvesting
These insider tips will help you maximize seed viability and ensure your crocosmia thrives from harvest to next season's vibrant blooms.
Timing Secret: Harvest those red-orange pods only when they're fully mature and beginning to crack naturally—this usually happens in late fall or early winter. I've learned the hard way that premature harvesting yields weak seeds that won't germinate properly. Look for pods that feel dry to the touch and have visible cracks along the seams. This precise timing is what separates successful propagation from wasted effort.
Storage Wisdom: The 7-10 day drying period in Step 2 is crucial—don't rush it! Place your pods in a spot with indirect light to prevent overheating, which can damage the seeds. I recommend using a mesh produce bag or screen for airflow while keeping out debris. Once completely dry (they should feel brittle and rattle when shaken), store them in airtight containers with desiccant packets to maintain that critical 35-45°F storage temperature.
Germination Boost: The 24-hour room temperature acclimation before spring planting is your secret weapon for breaking seed dormancy. This gradual temperature shift mimics natural spring conditions and triggers uniform germination. Pro tip: Place your seed trays under grow lights if your windowsill doesn't get enough bright light—crocosmia seedlings need consistent light to prevent leggy growth. The 2-4 week germination window gives you time to be patient, but don't forget to keep that soil consistently moist!
Pro Tips for Crocosmia Seed Pods
- These insider tips will help you maximize seed viability and ensure your crocosmia thrives from harvest to next seaso...
- Timing Secret: Harvest those red-orange pods only when they're fully mature and beginning to crack naturally—this usu...
- Storage Wisdom: The 7-10 day drying period in Step 2 is crucial—don't rush it! Place your pods in a spot with indirec...
Frequently asked questions
Got questions about those striking crocosmia seed pods? You’re not alone! Here are answers to the most common queries—from timing to troubleshooting—to help you make the most of your harvest.
When should I collect crocosmia seed pods?
Harvest pods when they turn dry and papery (usually late summer to early fall). If left too long, they’ll split open and scatter seeds prematurely. A gentle twist or snip with clean scissors works best—avoid crushing them!
How long do crocosmia seeds stay viable?
Freshly collected seeds sprout best within 6–12 months. Store them in a paper envelope (not plastic!) in a cool, dry place. Viability drops sharply after a year, so prioritize planting or sowing ASAP for the highest success rate.
Can I grow crocosmia from seed pods instead of dividing rhizomes?
Seed-grown plants may take 2–3 years to bloom compared to 1 year from divisions, but they offer genetic variety. For faster results, start with rhizomes, but pods are a fun, low-cost way to expand your garden organically.
What do I do if my seed pods mold or rot?
Mold or rot signals overripe pods or damp storage. Discard affected pods immediately. To prevent this, harvest when pods are fully dry and store them in a well-ventilated container. If humidity’s high, add a silica gel packet to absorb moisture.
Will crocosmia seed pods produce the same flowers next year?
Not always! Seed-grown plants may revert to wild-type traits (e.g., shorter stems or different colors). For consistent blooms, save seeds from your favorite cultivars or stick with rhizome divisions of proven plants.
Wrapping up and next steps
Crocosmia seed pods are a gardener’s secret weapon for bold, vibrant blooms next season—packed with potential and easy to work with! Whether you’re harvesting, drying, or storing them, these fiery red-orange pods hold the key to multiplying your garden’s beauty. 🌱✨
Now that you’re armed with the know-how, why not take the next step? Try experimenting with your own seed pods this fall—your future garden will thank you! Happy gardening! 🌸