
Lawn
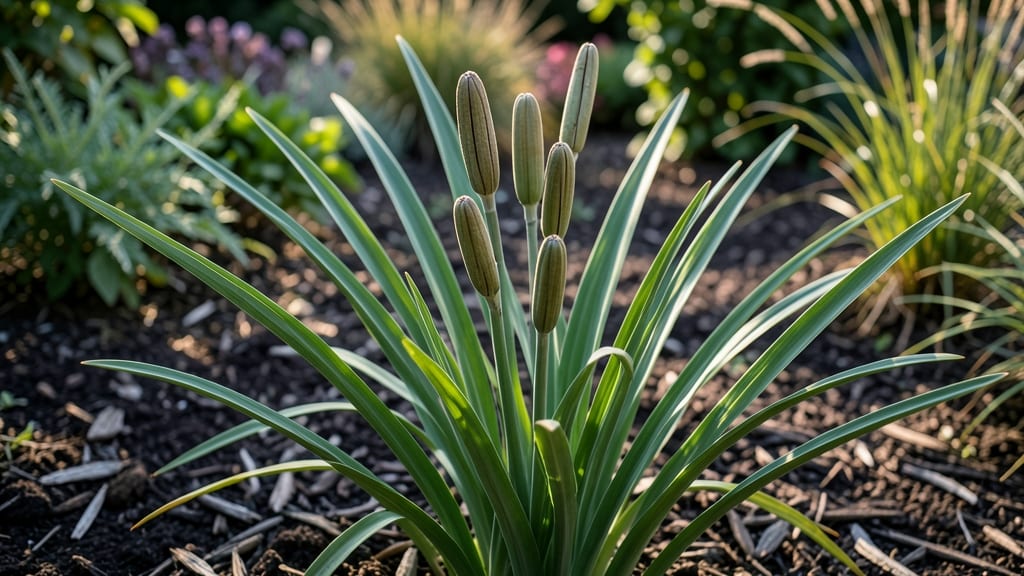
Daylily seed pods hold the secret to multiplying your garden's beauty for free next season. 🌱 The dry-and-twist method transforms these unassuming pods into fresh plants that thrive with minimal effort—once you know the right timing and technique.
These pods appear after blooms fade, looking like dried, papery cylinders dangling from stems. Harvest them when they're completely brown and crispy, usually in late summer or early fall. Twisting them gently releases tiny, viable seeds that can be planted directly or stored for spring sowing.
With proper care, these seeds grow into hardy daylilies that multiply faster than divisions. You'll see new shoots emerging within 4-6 weeks of planting, and established plants will reward you with bold blooms by next summer.
The key is patience—some seeds take longer to germinate, but the payoff is worth it. Avoid common mistakes like harvesting too early or storing seeds in damp conditions, and you'll enjoy a garden that grows itself.
📚 In This Guide
- What you need
- Instructions
- Tips and common mistakes
- Wrapping up and next steps
What you need
- ● Mature daylily seed pods: 5–10 fully developed pods (green turning brown, ~2–3 inches long). Look for pods that are slightly dry and starting to split open.
- ● Sharp pruning shears or scissors: Clean, sterilized tools to snip pods from the stem without damaging them.
- ● Brown paper bags or breathable mesh bags: 1–2 bags (8x10 inches) to collect seeds and allow airflow.
- ● Labeling tags or masking tape: To mark pods by variety (e.g., "Hosta Purple" or "Stella de Oro").
- ● Drying tray or cardboard box: A flat, elevated surface (like a wire rack or cardboard lined with newspaper) to air-dry pods.
- ● Small paintbrush or tweezers: For gently extracting seeds from dried pods.
- ● Paper towels or coffee filters: To separate seeds from chaff during cleaning.
- ● Seed-saving envelope: A small, labeled envelope to store seeds long-term (add silica gel packets to prevent moisture).
- ● Hand lens or magnifying glass: For inspecting seeds for viability (look for plump, firm seeds).
- ● Humidity dome or plastic bag: To create a mini greenhouse for germinating seeds indoors (if starting early).
- ● Notebook or app: To track pod collection dates, varieties, and germination progress.
How to harvest and process daylily seed pods for next season
Here's my foolproof method for collecting daylily seeds that'll sprout strong next spring.
🌱 Step 1: Identify and Select Mature Seed Pods
Wait until seed pods turn completely brown and begin splitting open naturally—this usually happens in late fall after the foliage yellows. I look for pods that are dry to the touch and feel papery thin when gently squeezed. Avoid green or partially brown pods; they won't contain viable seeds.
Use clean pruning shears to snip the entire pod from the stem, leaving about 1 inch of stem attached. This prevents seed loss during handling. Collect pods in a paper bag (not plastic) to allow airflow. I mark each bag with the variety name and harvest date—this saves headaches later when you're sorting through dozens of pods.
🪴 Step 2: Dry and Prepare Pods for Seed Extraction
Spread the pods on a mesh screen or paper towels in a dry, well-ventilated area away from direct sunlight. I place mine on a wire cooling rack in my garage where temperatures stay around 60-70°F for about 2-3 weeks. This slow drying prevents mold while ensuring seeds remain viable.
Check pods daily for any signs of moisture or softness. If you see condensation on the pods or feel any dampness, extend the drying time by another week. The goal is to have pods that crumble easily when twisted between your fingers—this indicates complete dryness and seed readiness.
✂️ Step 3: Extract Seeds Using the Twist-and-Pull Method
Hold a dried pod firmly in one hand and twist it gently with the other until it splits open completely. You'll hear a faint popping sound as the pod releases its seeds. I like to do this over a clean white sheet of paper—it makes it easy to spot any debris or damaged seeds.
Empty the contents onto the paper and separate the seeds from the chaff. Viable seeds will be plump and firm, while empty or damaged ones will be shriveled or hollow-sounding when tapped. Store only the plump seeds in an envelope labeled with the variety and harvest year.
💧 Step 4: Store Seeds Properly for Spring Planting
Place the selected seeds in a sealed envelope or small paper bag with a desiccant packet to absorb any moisture. I store mine in the vegetable drawer of my refrigerator where temperatures stay around 35-40°F—this mimics natural winter conditions and helps maintain viability.
Check seeds periodically for any signs of mold or softening. If stored correctly, daylily seeds can remain viable for up to 3 years, though I've found they germinate best when planted within 1-2 years. Label each container with the variety name and harvest date to keep track of your collection.
☀️ Step 5: Prepare for Spring Planting
In early spring, remove seeds from storage and soak them in lukewarm water for 12-24 hours to soften the seed coat. This step dramatically improves germination rates. I use a shallow dish and cover it with a damp paper towel to keep seeds moist during soaking.
After soaking, plant seeds directly in the garden or in small pots filled with well-draining soil. Press them just below the soil surface—daylily seeds need light to germinate, so don't bury them deeply. Keep the soil consistently moist until germination occurs, which typically takes 2-4 weeks depending on your climate.
Tips & tricks for processing daylily seed pods
Here's what I've learned after saving dozens of daylily varieties over the years—these little tricks make all the difference between viable seeds and wasted effort.
Timing is Everything: Don't rush the drying process in Step 2! Those 2-3 weeks at 60-70°F are non-negotiable. I've tried cutting it to 1 week, and the seeds either didn't germinate or sprouted mold. The slow drying mimics natural conditions and preserves viability. If your garage feels too humid, move to a drier spot like a basement or sunroom with good airflow.
The Twist Technique: When extracting seeds in Step 3, use a clean, sharp knife to make a small slit in the pod if it resists opening. This prevents tearing that could damage seeds inside. I also recommend wearing gloves—daylily pods can be surprisingly dusty, and the seeds are tiny but sharp when dry. Place a small bowl under the pod to catch seeds that might bounce away during the twist.
Seed Quality Check: After extracting, perform this quick viability test: Fill a glass with water, add your seeds, and let them sit for 10 minutes. Viable seeds will sink to the bottom (they're dense and full), while empty or damaged ones will float. This simple trick helps you separate good seeds from bad without needing special equipment. I've saved hours of planting failures using this method!
Storage Wisdom: For long-term storage in Step 4, consider vacuum-sealing your seeds after placing them in the envelope. This removes all moisture and extends viability beyond the 3-year mark. I've successfully stored seeds for up to 5 years using this method, though germination rates do decline after 3 years. Always test a few seeds before committing to a full planting—this gives you confidence your seeds are still good.
Pro Tips for Daylily Seed Pods
- Here's what I've learned after saving dozens of daylily varieties over the years—these little tricks make all the difference between viable seeds and wasted effort.
- Timing is Everything: Don't rush the drying process in Step 2!
- The Twist Technique: When extracting seeds in Step 3, use a clean, sharp knife to make a small slit in the pod if it resists opening.
Frequently asked questions
Got questions about daylily seed pods? You’re not alone! Here are some of the most common queries—and their straightforward answers—to help you master the dry-and-twist method like a pro.
Why do my daylily seed pods stay green instead of drying out?
If your pods stay green or moldy, it’s often due to high humidity or overwatering. Move them to a dry, well-ventilated spot (like a paper bag with holes) and let them ripen naturally. Avoid direct sunlight, which can cause them to dry too fast or crack open prematurely.
How long does it take for daylily seed pods to dry completely?
With proper conditions, pods typically dry in 4–8 weeks. Check daily: they’re ready when they turn brown and papery and twist open easily. If they’re still green after 2 months, they may not be viable—try again next season!
Can I save seeds from hybrid daylilies (Hemerocallis hybrids)?
Yes, but the seedlings may not match the parent plant’s traits. Hybrid daylilies often produce unpredictable offspring—think of it as a fun surprise! For consistent blooms, stick to named cultivars or propagate via divisions instead.
What’s the best way to twist open a dried seed pod without damaging the seeds?
Gently grasp the pod near the base and twist clockwise (like opening a jar). If it resists, let it dry a few more days. Avoid cutting—seeds are delicate! Once open, tap the pod over a tray to catch the tiny, flat seeds (they’re no bigger than a grain of rice).
Do I need to store daylily seeds in the fridge for stratification?
Nope! Daylily seeds don’t require cold stratification—just plant them fresh in well-draining soil (spring or fall). For extra insurance, store them in a cool, dry place (like a sealed envelope) for up to a year, but they’ll germinate just fine without it.
My seed pods split open too soon—what went wrong?
Premature splitting usually means too much moisture or heat stress. Next time, harvest pods as soon as they turn brown and move them to a shady, dry spot. If they’ve already split, scoop out any seeds (they may still germinate) and save the rest for future pods!
Wrapping up and next steps
Harvesting daylily seed pods using the dry-and-twist method is a rewarding way to ensure fresh, viable seeds for next season’s blooms! 🌱 By mastering this simple technique—drying pods fully, twisting gently, and storing seeds properly—you’ll unlock the potential for vibrant new plants.
Whether you’re a seasoned gardener or just starting, this method is your ticket to effortless propagation.
Ready to grow your garden’s future? Grab those dried pods, follow the steps, and watch your daylilies thrive with homegrown vigor. Start experimenting today! 🌸