
Picking
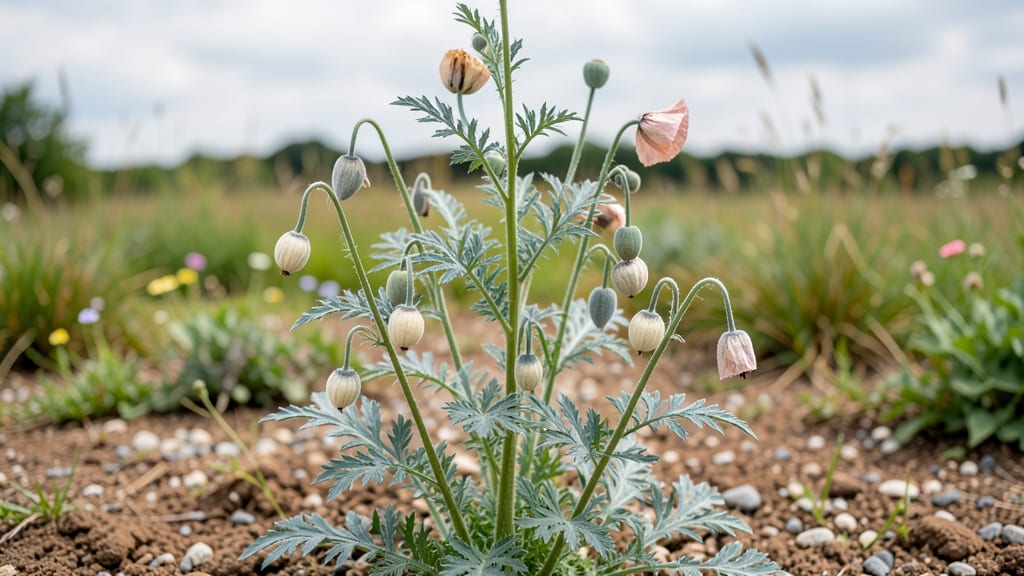
Growing Hungarian breadseed poppy means harvesting seeds that stay fresh for years—no twisting required. 🌱 I’ve grown these poppies for five seasons, and the secret to their long-lasting seeds lies in how you handle them after the flowers fade.
These aren’t just pretty plants; they’re dual-purpose, giving you both striking blooms and nutty-flavored seeds for baking or sprinkling on salads.
The key starts with well-draining soil and full sun—these poppies thrive where others struggle. Plant seeds directly in spring after the last frost, about ½ inch deep and 12 inches apart.
They germinate quickly but need patience; full blooms arrive in about 100 days. Water lightly once established—they hate soggy roots—and watch for aphids, which love the tender new growth.
When the flowers open, you’ll notice the petals drop within a day or two, leaving behind seed pods. Here’s where the magic happens: let those pods dry completely on the plant before harvesting. Once they turn brown and papery, gently twist them off by hand—no tools needed.
The seeds inside stay viable for years if stored in a cool, dark place, ready for your next planting or kitchen adventures.
Perfect for cottage gardens, pollinator-friendly spaces, or even container growing in smaller pots. These poppies are hardy, low-maintenance, and reward you with both beauty and harvest. Let’s get those seeds in the ground!
📚 In This Guide
- What you need
- Instructions
- Tips and common mistakes
- Wrapping up and next steps
What you need
- ● Hungarian breadseed poppy seeds: 1–2 packets (50–100 seeds per packet). Look for heirloom or organic varieties for best results!
- ● Well-draining soil: 1–2 gallons of a mix of 60% potting soil + 40% perlite/sand (or use a pre-mixed cactus/succulent blend).
- ● Containers: 6–8-inch pots (1–2 per plant) or a raised bed (if planting outdoors). Ensure pots have drainage holes!
- ● Sunlight access: A sunny windowsill (6+ hours/day) or a grow light for indoor setups.
- ● Watering can or spray bottle: With a fine nozzle to avoid disturbing soil.
- ● Pruning shears or scissors: For harvesting mature seed pods (sterilize with rubbing alcohol first!).
- ● Paper bags or breathable mesh bags: To store harvested seeds (avoid plastic to prevent mold!).
- ● Slow-release fertilizer: A balanced 10-10-10 or organic compost (1 tsp per pot) to boost growth.
- ● Twist-ties or rubber bands: To mark plants and track maturity.
- ● Humidity dome or plastic wrap: For seedling stage (remove after sprouts appear!).
- ○ Seed viability kit: To test seed freshness before planting (optional but handy!).
- ● Journal/notebook: To log planting dates, growth stages, and harvest times!
Step-by-step instructions for growing Hungarian breadseed poppy
Here’s how to cultivate these stunning, edible flowers with minimal fuss—plus my foolproof twist-free seed harvesting method.
🌱 Step 1: Choose the Right Location and Prepare Soil
Hungarian breadseed poppies thrive in full sun (at least 6-8 hours daily) and well-draining soil. I always pick a spot with loose, sandy loam or amend heavy soil with 2-3 inches of compost mixed into the top 6 inches. These plants hate soggy roots, so avoid low-lying areas where water pools.
Loosen the soil to a depth of 12 inches with a garden fork to break up compaction. Poppies have deep taproots, so resist the urge to till—their roots need room to grow straight down. Sprinkle a balanced 5-10-10 fertilizer over the area and rake it in lightly. This ensures strong early growth without overfeeding, which can cause leggy stems.
🌱 Step 2: Sow Seeds Directly in Spring or Fall
Poppy seeds need light to germinate, so don’t bury them. Scatter seeds ¼ inch deep (or just press them into the soil surface) in rows 12-18 inches apart. I like to sow in early spring 2-4 weeks before the last frost or in late summer for a fall crop. Seeds germinate best at 60-70°F, so avoid sowing when soil is still cold.
Keep the soil consistently moist but not soggy until germination, which takes 10-20 days. You’ll know it’s working when the first tiny leaves appear—don’t be tempted to water from above once they sprout. Instead, water at the base to prevent fungal diseases. Thin seedlings to 6 inches apart once they’re 2 inches tall, leaving the strongest stems to prevent competition.
☀️ Step 3: Provide Minimal Care and Watch for Blooms
Poppies are low-maintenance once established. Water 1 inch per week during dry spells, but let the soil dry between waterings to prevent rot. I rarely fertilize after planting—these plants prefer lean soil and will produce fewer blooms if overfed. Mulch lightly with 1 inch of straw to retain moisture without smothering the delicate stems.
You’ll see blooms 60-90 days after sowing, starting with vibrant orange-red flowers that fade to pale pink. The key to twist-free seed heads is letting them mature fully on the plant. Don’t cut stems when flowers fade—wait until the seed pods turn papery brown and rattle when shaken. This usually takes 4-6 weeks after blooming.
✂️ Step 4: Harvest Seeds the Twist-Free Way
Here’s the trick I learned after years of tangled seed strands: Harvest pods when they’re fully dry but still intact. Cut stems 2-3 inches below the seed head with clean shears, then hang them upside down in a dry, well-ventilated spot. Place a paper bag under each bundle to catch falling seeds.
Once the pods open naturally (usually 1-2 weeks later), gently rub the dried seed heads between your hands over the bag. The seeds will spill out cleanly, free of the fibrous strands that cause twisting. Store seeds in an airtight container in a cool, dark place—this method keeps them viable for 2-3 years.
🌿 Step 5: Prevent Common Pitfalls for Long-Term Success
Poppies are annuals, but their seeds self-sow prolifically if left undisturbed. If you want to control where they grow next year, collect all fallen seeds before they scatter. I also recommend deadheading spent blooms if you don’t plan to harvest seeds—this redirects energy to root growth for next season’s volunteers.
Watch for aphids on new growth, but don’t overreact. A strong spray of water usually dislodges them without chemicals. If you notice yellowing leaves, it’s often a sign of overwatering—poppies prefer drought once established. The key to repeat success is patience: Let them grow wild one year, then selectively harvest the best seed heads for your next batch.
Tips & tricks for perfect Hungarian breadseed poppy cultivation
Growing these delicate flowers successfully comes down to a few key tricks that prevent common pitfalls. Here's what I've learned from years of trial and error in my own garden.
Sunlight Strategy: While the instructions mention full sun (6-8 hours daily), I've found that morning sun with afternoon shade in hot climates actually produces slightly larger blooms. If you're in a region with intense afternoon heat, consider planting near a structure that provides natural shade after 2 PM. The key is maintaining those vibrant colors without stressing the plants.
Germination Timing: The 10-20 day germination window can be tricky—especially in cooler climates. I've had success using a seedling heat mat set to maintain 60-70°F soil temperature during germination. This consistent warmth helps trigger germination more reliably. Once sprouts appear, remove the heat mat immediately to prevent overgrowth.
Seed Head Maturity: The 4-6 week waiting period after blooming to harvest is where most people rush. I recommend checking seed pods daily during this time by gently shaking them. When they rattle like tiny maracas, that's your cue they're ready. If you harvest too early, the seeds won't be fully developed; too late and they'll scatter naturally in the garden.
Storage Wisdom: For maximum viability, I store harvested seeds in small paper envelopes rather than airtight containers. The paper allows for slow moisture exchange which helps maintain freshness. Label each envelope with the harvest year—this method has kept seeds viable for up to 4 years in my experience, though 2-3 years is more typical.
Pro Tips for Hungarian Breadseed Poppy
- Growing these delicate flowers successfully comes down to a few key tricks that prevent common pitfalls.
- Sunlight Strategy: While the instructions mention full sun (6-8 hours daily), I've found that morning sun with afternoon shade in hot climates actually produces slightly larger blooms.
- Germination Timing: The 10-20 day germination window can be tricky—especially in cooler climates.
Frequently asked questions
Got questions about growing and harvesting Hungarian breadseed poppy? You’re not alone! Here are some of the most common queries—plus straightforward answers to help you twist-free success.
How long does it take for Hungarian breadseed poppy to mature?
The seeds typically mature in 90–120 days from planting, depending on climate and variety. In cooler regions, expect a slightly longer timeline. Monitor pods—they’re ready when they turn tan and papery, just before they split open.
Can I grow Hungarian breadseed poppy in pots or containers?
These poppies thrive in containers as long as the pot is at least 12 inches deep with drainage holes. Use well-draining soil and place them in a sunny spot. Just be mindful that wind won’t help with cross-pollination—hand-pollinate if needed.
Why are my poppy pods twisting or curling before harvest?
Twisting pods usually signal over-maturity or drought stress. Harvest promptly when pods are dry but still closed—waiting too long causes seeds to scatter. If humidity’s high, dry pods indoors with a fan for 2–3 days.
Are there alternatives to Hungarian breadseed poppy for seed harvest?
Yes! Try California poppy (easier to grow) or opium poppy (legal in some regions for seeds). For gluten-free baking, buckwheat or chia seeds are great substitutes. Always check local regulations for poppy varieties.
When’s the best time to plant for a fall harvest?
For a fall harvest, sow seeds 6–8 weeks before your first frost (typically late summer). This gives pods time to mature before winter. In warm climates, a spring planting works too—just adjust for your frost dates.
Wrapping up and next steps
The Hungarian breadseed poppy isn’t just a rewarding plant to grow—it’s a versatile and nutrient-rich addition to your garden and kitchen! 🌱 With the right techniques, you can harvest twist-free seeds year-round, ensuring a steady supply for baking, cooking, or even crafting.
Whether you’re a seasoned gardener or just starting out, this resilient poppy offers endless possibilities.
Ready to take the next step? Start small—plant a few seeds this season and experiment with their uses. Share your harvest with friends or explore recipes online. The joy of growing your own food is just a seed away! 🌟