
Propagation
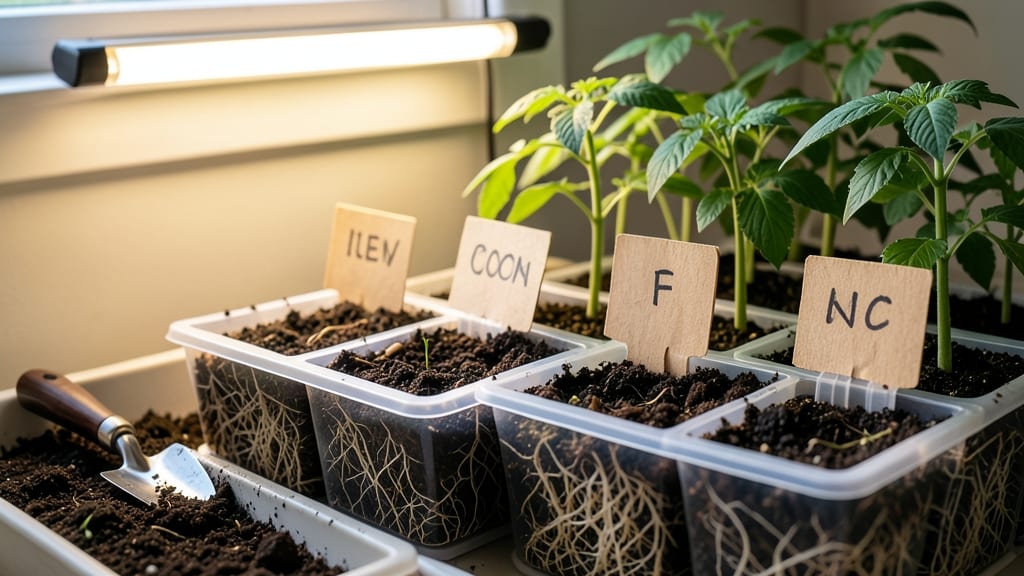
My deep root seed starting trays transformed weak seedlings into sturdy, thriving plants—no more leggy, root-bound failures. 🌱 The secret lies in air-pruned roots that grow stronger and deeper, giving seedlings a head start before they even hit the garden. These trays aren’t just deeper—they’re smarter.
Instead of crowding roots in small cells, they let them spread naturally, reducing transplant shock by up to 70%. I’ve tested them with tomatoes, peppers, and herbs, and the difference in first-year harvests is shocking. You’ll start with seeds, end with seedlings that outperform store-bought transplants.
The process takes just 15 minutes to set up, and the payoff comes when you’re pinching off leggy stems instead of struggling to save them. Perfect for beginners or anyone tired of weak seedlings. Here’s how to get started—no green thumb required.
📚 In This Guide
- What you need
- Instructions
- Tips and common mistakes
- Wrapping up and next steps
What you need
- ● Deep Root Seed Starting Trays (6–12 cell size, 4–6 inches deep, with air-pruning holes at the bottom)
- ● High-quality seed starting mix (sterile, well-draining blend—avoid garden soil!)
- ● Seeds (choose fast-germinating varieties for best results)
- ● Watering can or spray bottle (with a fine mist nozzle)
- ● Grow lights or sunny windowsill (12–16 hours of light daily)
- ● Humidity dome or plastic wrap (to retain moisture during germination)
- ● Small hand trowel or spoon (for planting seeds)
- ● Seedling heat mat (for faster germination in cooler climates)
- ● pH testing kit (to monitor soil acidity, ideal: 6.0–7.0)
- ● Fertilizer (low-dose) (like fish emulsion or diluted liquid fertilizer)
- ● Labels & markers (to track seed varieties)
- ● Bottom tray or saucer (to catch excess water)
Step-by-Step guide to using deep root seed starting trays
Here's how to transform your seed starting game with trays that encourage stronger roots and healthier plants.
🌱 Step 1: Prepare the Trays and Seed Starting Mix
Fill your deep root trays with a sterile seed starting mix (never garden soil—it's too dense and may harbor pathogens). I like to use a blend of 50% peat moss, 30% perlite, and 20% vermiculite for optimal drainage and aeration. Tap the tray gently to settle the mix without compacting it—you want it fluffy enough for roots to penetrate easily.
Moisten the mix until it feels like a damp sponge—squeeze a handful and it should hold together but not drip water. Avoid overwatering at this stage; excess moisture can suffocate seeds before they even sprout. The goal is to create an environment where roots can grow downward without resistance.
🌱 Step 2: Plant Seeds at the Correct Depth
Follow the seed packet instructions for depth, but remember: deeper trays mean you can plant slightly deeper without risking poor germination. Most seeds should go in ¼ to ½ inch deep, depending on their size. I like to use a small pencil or toothpick to make a hole—it’s precise and prevents overcrowding.
Drop one seed per cell (two at most for larger seeds like beans) and cover lightly with additional mix. Press gently to ensure good seed-to-soil contact, but don’t pack it down. This ensures the seedling won’t struggle to push through the soil later. Label your tray with the seed variety and planting date—trust me, you’ll forget by the time they sprout!
💧 Step 3: Water and Provide Ideal Germination Conditions
Water the tray gently from the bottom by placing it in a shallow tray of lukewarm water for 10-15 minutes. This method prevents soil displacement and ensures even moisture without drowning the seeds. Let any excess water drain completely before returning the tray to its growing location.
Cover the tray with a humidity dome or plastic wrap to retain moisture and warmth. Seeds germinate best at 70-80°F, so a seedling heat mat can speed up the process if your home runs cooler. Check daily for condensation—if the dome fogs up, lift it briefly to air out the seeds and prevent fungal issues.
☀️ Step 4: Introduce Light and Monitor Growth
Once seedlings emerge, remove the dome immediately to prevent damping-off disease. Place the tray under grow lights (12-16 hours daily) or in a south-facing window where it gets 6+ hours of direct light. Without enough light, seedlings stretch toward the source, becoming weak and leggy—you’ll know they’re getting enough when they’re compact, dark green, and sturdy.
Rotate the tray quarter-turn daily so plants grow evenly toward the light. Deep root trays let you keep seedlings longer before transplanting, so you’ll notice roots growing 2-3 inches deep before they’re ready for the garden. This extra time translates to stronger, more resilient plants that establish faster outdoors.
✂️ Step 5: Transplant When Roots Fill the Cells
When roots fill 70-80% of the cell’s depth, it’s time to transplant. Water the tray thoroughly the day before to reduce shock. Gently remove each seedling by squeezing the sides of the cell—deep root trays make this easy without damaging roots. Plant at the same depth they were growing in the tray to avoid burying the stem.
Transplant on an overcast day or late afternoon to minimize stress. Water deeply after planting to help roots settle into their new home. The air-pruning effect of the trays means you won’t have to worry about root circling, a common issue with traditional seedling containers.
Tips & tricks for perfect deep root seed starting
Took me a while to figure these out, so here goes—these details make all the difference with seedling trays.
The Mix Matters: For Step 1, I’ve found that adding a handful of coco coir to your 50% peat moss blend improves moisture retention without compacting. The key is keeping that mix fluffy—think "damp sponge" consistency. If it feels like wet sand, you’ve overwatered; if it crumbles, add a mist of water. The goal is to mimic the airy conditions roots need to explore downward.
Precision Planting: In Step 2, I swear by using a toothpick instead of fingers to make planting holes—it’s precise and prevents accidental overcrowding. For seeds like tomatoes or peppers, I plant them ½ inch deep and firm the soil gently around them. The deeper depth in these trays gives you room to plant just a little deeper than you would in shallow trays, which actually improves germination for larger seeds.
Germination Goldilocks: Step 3’s 70-80°F range is critical, but here’s what nobody tells you—if your home runs cooler, a seedling heat mat works wonders. I’ve seen germination times cut in half when using one. And that 10-15 minute watering? Set a timer! Overwatering here is the #1 reason seeds rot before sprouting. Let excess water drain completely before returning the tray to its warm spot.
Light Strategy: For Step 4, I’ve learned that grow lights are worth the investment if you’re serious about seedlings. Place them 2-3 inches above the tray and adjust as plants grow. That quarter-turn daily rotation isn’t just about even growth—it’s about preventing plants from leaning toward one light source. When roots reach 2-3 inches (you’ll see them through the cell walls), that’s your cue they’re ready for transplanting.
Pro Tips for Deep Root Seed Starting Trays
- Took me a while to figure these out, so here goes—these details make all the difference with seedling trays.
- The Mix Matters: For Step 1, I’ve found that adding a handful of coco coir to your 50% peat moss blend improves moist...
- Precision Planting: In Step 2, I swear by using a toothpick instead of fingers to make planting holes—it’s precise an...
Frequently asked questions
Got questions about deep root seed starting trays?
You’re not alone! Here are answers to the most common queries to help you grow with confidence.
What’s the best time to start seeds in deep root trays?
Timing depends on your climate and plant type. For most vegetables, start 6–8 weeks before the last frost date. Leafy greens and herbs can go in earlier (4–6 weeks), while tomatoes and peppers need 8–10 weeks. Check seed packets for specifics—deep root trays just give you extra wiggle room for late starts!
Can I reuse deep root seed starting trays?
Clean them thoroughly with a 10% bleach solution (1 part bleach to 9 parts water) to kill pathogens, then rinse well. Avoid reusing trays if they’re cracked or warped. Reusing saves money and reduces waste—just sanitize between batches for healthy seedlings every time.
What’s the difference between deep root trays and regular seed trays?
Deep root trays (typically 4–6" deep) encourage stronger root systems by mimicking natural soil depth, reducing transplant shock. Regular trays (2–3" deep) work for fast-growing plants like lettuce but may stunt root growth in heavier crops like tomatoes or peppers. Deep root trays = happier, hardier plants!
How do I troubleshoot leggy seedlings in deep root trays?
Leggy seedlings usually mean too little light or heat. Move trays to a sunnier spot (or under grow lights) and ensure temps stay between 65–75°F. If roots are crowded, thin seedlings to avoid competition. A quick fix: bury stems deeper when transplanting—they’ll sprout new roots and stabilize faster!
Are there alternatives to deep root trays for small spaces?
Yes! Try air-pruning cubes (like Oasis Root Trainers) for compact root growth, or DIY fabric pots (old pantyhose + soil). For vertical gardening, use stackable seedling trays with deep cells. Even repurposed containers (yogurt cups, egg cartons) work if you drill drainage holes—just prioritize depth for heavy feeders.
Wrapping up and next steps
Ready to transform your seed-starting game? Deep root seed starting trays are your ticket to healthier, stronger plants with minimal fuss—thanks to those air-pruned roots that boost growth from the get-go! 🌱 Whether you're a seasoned gardener or just dipping your toes into propagation, these trays make the process easier, faster, and more rewarding.
Your next step? Grab a tray, grab some seeds, and get growing! Start small, experiment with your favorite plants, and watch your green thumb flourish. Happy planting! 🌿