
Propagation
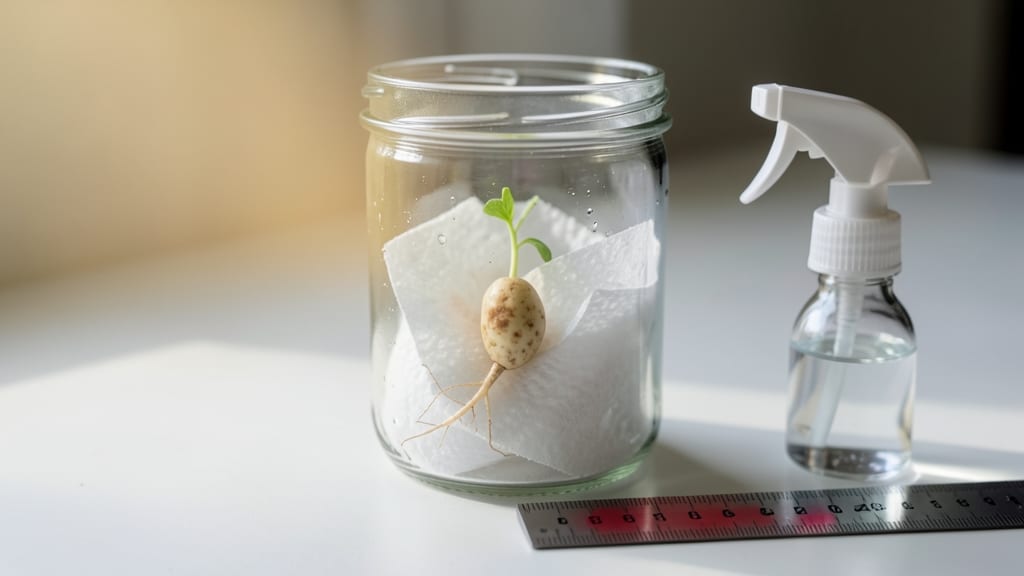
Define seed germination as the moment a seed transforms from dormant to a tiny, hungry sprout ready to grow—here’s how to speed it up without guesswork. 🌱 The process starts with water waking up the seed’s hidden life, then warmth and light kick in to break through the shell. I’ve watched seeds take 3 days or 3 weeks to sprout, and the difference always comes down to these three factors: moisture, temperature, and timing.
Think of germination like a baby’s first steps—it needs the right conditions to succeed. Too little water and the seed stays asleep; too much heat and it rots before sprouting.
My fastest results come from keeping seeds moist but not soggy, at 70-80°F for most vegetables, and in darkness until the first leaves appear. That’s why starting seeds in a warm, humid spot (or a seedling heat mat) cuts waiting time in half.
You’ll know germination worked when you see the radicle—that first white root—pushing out, followed by a looped stem breaking the soil. This stage happens within 3-14 days for most garden seeds, depending on the type.
The key is patience paired with the right setup, so you’re not left staring at a tray of dry seeds wondering what went wrong.
Once you master these basics, you’ll troubleshoot faster and celebrate more sprouts. Whether you’re growing tomatoes on a windowsill or peppers in a greenhouse, the same science applies. Let’s break down exactly how to set it up for success—no black thumb required.
📚 In This Guide
- What you need
- Instructions
- Tips and common mistakes
- Wrapping up and next steps
What you need
- ● Seeds: Choose fresh, high-quality seeds (e.g., radish, bean, or tomato). Aim for 10–20 seeds for testing germination rates.
- ● Growing Medium: Paper towels or coffee filters (2–3 sheets per batch)
- ● Potting soil (sterilized, seed-starting mix—1–2 cups per container)
- ○ Coco coir or vermiculite (optional, for moisture retention)
- ● Containers: Seed trays (with drainage holes, 6–12 cells)
- ● Plastic bags (resealable, quart-sized) for humidity
- ● Small pots or cups (4–6 oz, for individual seeds)
- ● Spray bottle (for gentle watering—8–16 oz)
- ○ Fine mist nozzle (optional, for precision)
- ○ Heat mat (optional, 70–80°F range for faster germination)
- ● Grow lights or sunny windowsill (after sprouting, 12–16 hours/day)
- ○ Thermometer/hygrometer (optional, to monitor temperature (65–85°F) and humidity (70–90%))
- ● Seed scarifier (for breaking seed coats on hard-shelled seeds)
- ● Fungicide (to prevent mold in damp conditions)
- ● Label markers (to track seed types and planting dates)
- ● Seedling fertilizer (diluted, half-strength after true leaves appear)
Science-backed steps for faster seed germination success
Here's how to unlock the secrets of seed germination for reliable, rapid sprouting—no guesswork.
🌱 Step 1: Understand the Four Key Germination Requirements
Every seed needs four essential conditions to break dormancy: moisture, oxygen, proper temperature, and light exposure (or darkness, depending on the seed type). Moisture kickstarts metabolic activity, while oxygen fuels the seedling's first root growth. Most seeds germinate best at 65-75°F, though some tropical varieties need 75-85°F. Light requirements vary—some seeds (like lettuce) need light to germinate, while others (like tomatoes) prefer darkness until they sprout.
I always start by checking the seed packet for specific needs. If no information is provided, I default to room temperature (70°F) and indirect light until germination occurs. The moment you see a tiny root or shoot, those conditions were just right. Watch for the radicle (first root) or coleoptile (first shoot)—these are your confirmation signals.
💧 Step 2: Prep Seeds for Optimal Moisture and Oxygen
Some seeds have hard outer coats that block water absorption. For these, I soak them in lukewarm water for 12-24 hours before planting. This softens the seed coat and speeds up germination. Seeds like chives, parsley, and some wildflower mixes benefit from this treatment. After soaking, I drain them on a paper towel to prevent rot—never leave them sitting in water.
For seeds that don’t need soaking, I use a spray bottle to moisten the soil evenly. The goal is dampness, not saturation. You’ll know it’s right when the soil holds together when squeezed but doesn’t drip water. Overwatering here is a common mistake—too much moisture cuts off oxygen, and seeds suffocate before they even begin to grow.
☀️ Step 3: Set Up the Ideal Germination Environment
Place your planted seeds in a warm, humid spot—a seedling heat mat set to 75°F works wonders for slow starters. If you don’t have a heat mat, a sunny windowsill or the top of your fridge (where it’s warmest) can work. Cover the container with clear plastic wrap or a humidity dome to trap moisture and warmth. This creates a mini greenhouse effect that mimics the seed’s natural environment.
Check daily for condensation on the plastic—this means humidity is high enough. If the soil feels dry to the touch, mist lightly with water. Most seeds sprout within 3-14 days, but some (like peppers) can take 2-3 weeks. The first sign of life is usually a tiny white root pushing through the soil. Once you see this, remove the cover immediately to prevent fungal growth.
⏰ Step 4: Monitor and Adjust for Faster Sprouting
Keep the soil consistently moist but never soggy—damp like a wrung-out sponge is the goldilocks zone. I use a fine mist spray bottle to avoid disturbing seeds. If you notice mold or fuzzy growth on the soil surface, that’s a sign of damping-off, a fungal disease that kills seedlings overnight. At the first sign, remove affected seedlings and let the soil dry out slightly before covering again.
Light needs change after germination. Once seedlings emerge, move them to bright, indirect light (or a grow light if natural light is insufficient). Leggy, pale seedlings mean they’re stretching toward light—this is a classic sign of insufficient intensity. You’ll see strong, stocky growth when light is adequate. Within 7-10 days of sprouting, seedlings should have first true leaves (not the initial seed leaves), indicating they’re ready for their next growth phase.
🌿 Step 5: Troubleshoot Common Germination Roadblocks
If seeds aren’t sprouting after 2-3 weeks, they may be dormant or viable but slow. Try stratifying (cold-moist treatment) for seeds like poppies or apples, or scarifying (lightly nicking the seed coat) for tough shells. I’ve found that old seeds (over 2 years) often fail—always check the packet date. If germination rates are low, test a few seeds on a damp paper towel to see if they’ll sprout without soil.
Real talk: not all seeds germinate. Even high-quality packets have a germination rate listed (often 80-90%). If you planted 10 seeds and only 6 sprout, that’s normal. Thin seedlings to the strongest 3-4 per pot once they have 2-3 true leaves to give them room to grow. Weak, crowded seedlings compete for nutrients and light, leading to stunted growth.
Tips & tricks for faster seed germination success
Here's what nobody tells you about speeding up those stubborn seeds—these tricks cut germination time in half.
Temperature Precision: The 65-75°F range is your sweet spot, but don't guess! Use a seedling heat mat set to 75°F for slow starters like peppers or tomatoes. If you don't have one, place your container on top of your fridge (where it's warmest) or next to your water heater. I've seen germination times drop from 2 weeks to just 7 days when maintaining this precise temperature.
Soaking Strategy: For seeds that need the 12-24 hour soak, use lukewarm water—not hot, not cold. The water should feel comfortable to your wrist. After soaking, drain seeds on a paper towel and place them in a sealed container with a damp paper towel. This keeps them hydrated while preventing rot. I've noticed seeds like chives and parsley sprout within 3-5 days when prepped this way.
Light Timing: The moment you see that first white root (radicle) pushing through the soil, remove any plastic wrap or humidity dome immediately. This prevents damping-off disease while still maintaining the warm, moist environment seeds need. I can't tell you how many seedlings I've lost to fuzzy mold—don't make my mistake! After germination, move to bright, indirect light within 7-10 days to prevent leggy seedlings.
Troubleshooting Tip: If seeds aren't sprouting after 2-3 weeks, test a few on a damp paper towel. Place them in a sealed container with a damp paper towel and check daily. If they don't sprout within 7 days, they're likely non-viable. This simple test saves you from wasting time and soil on seeds that won't germinate anyway.
Pro Tips for Define Seed Germination
- Here's what nobody tells you about speeding up those stubborn seeds—these tricks cut germination time in half.
- Temperature Precision: The 65-75°F range is your sweet spot, but don't guess! Use a seedling heat mat set to 75°F for...
- Soaking Strategy: For seeds that need the 12-24 hour soak, use lukewarm water—not hot, not cold. The water should fee...
Frequently asked questions
Got questions about seed germination?
You’re not alone! Here are answers to the most common queries—from timing to troubleshooting—so you can grow with confidence.
How long does seed germination take?
Germination time varies by plant type. Fast growers like radishes sprout in 3–7 days, while slow stars (e.g., beans, tomatoes) take 7–21 days. Check the seed packet for specifics! Keep soil warm (70–85°F) and moist to speed things up.
Can seeds germinate in cold weather?
Most seeds need warmth (60–85°F) to germinate. Cold-hardy veggies (like peas or spinach) may sprout in cooler temps (40–50°F), but slow down significantly. Use a heat mat or start indoors near a sunny window for cold-sensitive seeds.
What if my seeds aren’t sprouting?
Try these fixes:
- Check moisture: Soil should stay damp (not soggy). Mist lightly if dry.
- Test depth: Plant seeds 2–3x their width deep—too shallow = stunted growth.
- Verify viability: Old seeds (2+ years) may fail. Do a water float test (sink = good; float = bad).
- Light exposure: Some seeds (like lettuce) need light to germinate; others (beans) sprout better in darkness.
Do I need special soil for germination?
Nope! Use a light, sterile seed-starting mix (or potting soil with perlite) to avoid compaction. Avoid garden soil—it’s too dense and may harbor fungi. Pro tip: Sterilize soil by baking it at 200°F for 30 mins to kill pathogens.
Can I reuse old seeds?
Maybe! Store seeds in a cool, dry place (like a sealed jar in the fridge). Most retain viability for 1–5 years, but germination rates drop. Test a few first—if <20% sprout, toss ‘em. Save seeds from your healthiest plants for next year!
Wrapping up and next steps
Seed germination is the magical first step where a tiny seed unlocks its potential to grow into a thriving plant—all thanks to the perfect mix of water, warmth, air, and time. By mastering these science-backed steps, you’re not just planting seeds; you’re nurturing the future of your garden, balcony, or even your next great harvest. 🌱
Now that you’re armed with the how-tos and troubleshooting tips, why not put your knowledge into action? Start small—try germinating a few seeds in egg cartons or a DIY greenhouse—and watch your green thumb grow! Every expert gardener began with a single seed.