
Lawn
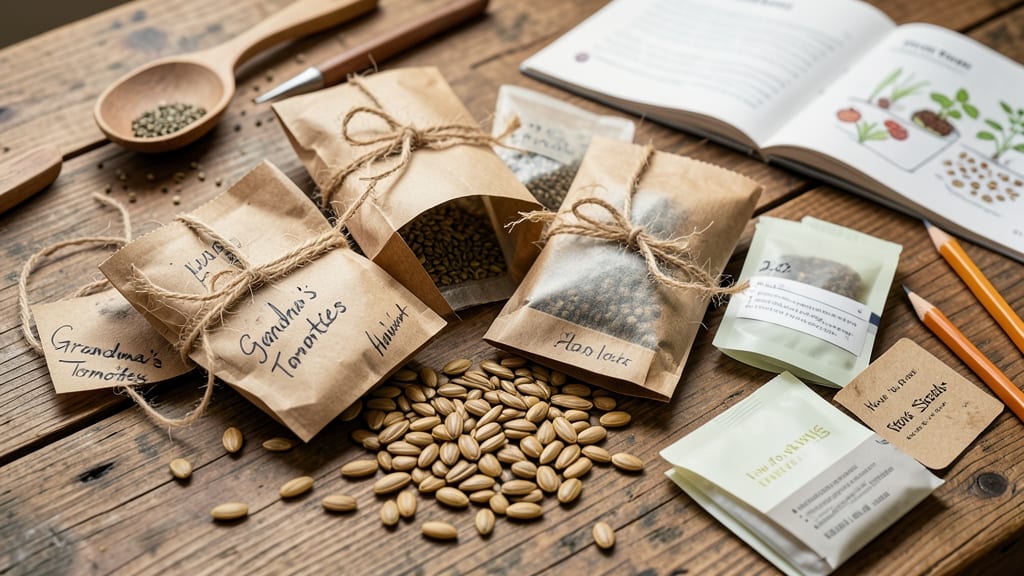
Creating DIY seed packets from your garden isn’t just smart—it’s a way to preserve the exact plants that thrive in your space. 🌱 I’ve turned my best-performing tomatoes, beans, and flowers into custom seed packets, cutting costs and ensuring next year’s garden starts with winners, not store-bought guesswork.
The process starts with simple supplies: dried seed pods, small envelopes or paper bags, and a pencil for labeling. You’ll also need a dry, cool spot to store them until planting season.
The key is patience—wait until seeds are fully mature and dry before packaging, or they’ll mold instead of sprout.
By the time next spring rolls around, you’ll have a stash of seeds tailored to your garden’s conditions. Imagine harvesting heirloom tomatoes that ripen perfectly in your climate or flowers that bloom exactly where you planted them last year. The satisfaction of growing from your own saved seeds is unmatched.
This method works for annuals, many perennials, and even some vegetables. Just skip hybrid varieties—they won’t grow true to type. With a little practice, you’ll be creating seed packets that outperform anything you can buy, all while reducing waste and saving money for bigger garden projects.
📚 In This Guide
- What you need
- Instructions
- Tips and common mistakes
- Wrapping up and next steps
What you need
- ● Seed envelopes or packets: 10–50 envelopes (depending on seed volume) – paper-based, compostable, or reusable fabric pouches
- ● Size: 3.5" x 4.5" (standard for most seed savers)
- ● Seeds to save: Harvested, clean, and fully dry seeds (store-bought seeds won’t work for this project!)
- ● Quantity: 1–2 tsp per envelope (adjust based on seed size)
- ● Labeling supplies: Permanent markers (archival-quality ink to prevent fading)
- ○ Printed seed labels (optional—use a free template online)
- ○ Small funnel or spoon – For easy seed filling (optional but handy!)
- ● Desiccant packets – 1–2 per batch to absorb moisture (place inside envelopes)
- ● Resealable bags – quart-sized for bulk seed storage before packaging
- ○ Twine or ribbon – For decorative tying (optional)
Step-by-step instructions for creating DIY seed packets
Preserve your garden’s legacy with these simple, eco-friendly seed-saving steps.
🌱 Step 1: Harvest Seeds at Peak Maturity
Wait until seeds are fully mature—usually when the plant’s pods or flowers turn brown, dry, and brittle. For example, basil seeds form inside tiny brown flowers, while tomatoes develop seeds in the fruit’s jelly-like center. Harvest on a dry, sunny morning when humidity is low to prevent mold.
Gently twist or cut open dried seed pods and collect the seeds inside. For fleshy fruits like tomatoes or peppers, scoop out the gel and seeds, then rinse them in a fine-mesh strainer under cool water to remove pulp. Let seeds air-dry completely on a paper towel for 3-5 days before packaging.
🪴 Step 2: Test and Store Seeds Properly
Test viability by placing a few seeds between damp paper towels in a sealed bag. Keep them in a warm spot for 3-5 days—if most sprout, your seeds are ready for storage. Discard any that fail the test to avoid wasting space.
Store seeds in airtight containers like small glass jars or envelopes. Add a silica gel packet or a few grains of uncooked rice to absorb moisture. Label each container with the plant name, harvest date, and location (e.g., "Heirloom Tomato, 2024, Sunny Patio"). Keep them in a cool, dark place like a pantry or basement.
✂️ Step 3: Package Seeds for Next Year
Use recycled materials like seed envelopes made from old book pages or small glass jars with screw-top lids. For envelopes, fold a 4x6-inch sheet in half, then fold the edges inward to create a seal. Write the plant name and harvest year clearly with a pencil or fabric marker.
Fill envelopes with 1-2 teaspoons of seeds per packet, leaving room to shake them out easily. For bulk storage, use small glass jars with screw tops—label the lid with the plant name and store them upright in a drawer. This keeps seeds organized and protected from light.
💧 Step 4: Maintain Seed Viability Long-Term
Check stored seeds every 2-3 years and test a few for germination. If viability drops below 80%, replace the packet. Some seeds, like lettuce or onion, last only 1 year, while others, like beans or peas, stay viable for 3-5 years.
Rotate older seeds to the front of your storage container so you use them first. Avoid refrigeration unless storing for over 5 years—most seeds thrive in cool, dry conditions without extreme cold. With proper care, your DIY packets will keep your garden thriving for seasons to come.
Tips & tricks for perfect DIY seed packets
Here's what nobody tells you about making these eco-friendly seed packets work like a pro.
Timing is Everything: Those 3-5 days of air-drying might feel slow, but rushing this step risks moldy seeds. Place your paper towels in a warm, dry spot—like a sunny windowsill—but keep them out of direct sunlight to prevent overheating. A small fan on low can speed up drying without adding heat. I learned this the hard way after losing an entire batch of tomato seeds to mold!
Viability Test Shortcut: When testing germination in Step 2, use a clear plastic bag instead of a sealed bag to monitor progress without opening it. You'll see sprouts forming through the clear sides, and you can check humidity levels too. If condensation forms inside, your seeds need more drying time before storage.
Packaging Upgrade: For extra protection, add a tiny silica gel packet to your envelopes or jars—these absorb moisture and keep seeds viable longer. You can find them in small quantities online or reuse ones from electronics packaging. Just a pinch goes a long way in preserving your seed stash for years.
Labeling System: Create a simple labeling code to track everything at a glance. I use a color-coded system: red pencil for heirloom varieties, blue for hybrids, and green for new experiments. Add a small sticker with the year to the corner—this helps you rotate older seeds first without digging through containers.
Pro Tips for Diy Seed Packets
- Here's what nobody tells you about making these eco-friendly seed packets work like a pro.
- Timing is Everything: Those 3-5 days of air-drying might feel slow, but rushing this step risks moldy seeds. Place yo...
- Viability Test Shortcut: When testing germination in Step 2, use a clear plastic bag instead of a sealed bag to monit...
Frequently asked questions
Got questions about saving your own seed packets?
You’re not alone! Here are answers to the most common queries to help you master zero-waste seed harvesting like a pro.
How do I know which seeds can be saved from my garden?
Not all plants produce viable seeds—focus on heirloom, open-pollinated, or non-hybrid varieties. Avoid saving seeds from hybrid plants (like many store-bought tomatoes or peppers), as they won’t grow true to type. Check seed packets for labels like "open-pollinated" or "OG" (open-grown).
When is the best time to harvest seeds from my plants?
Timing varies by plant, but most seeds are ready when the pods or fruit fully mature and dry on the plant. For example:
- Tomatoes: Let them stay on the vine until wrinkled and color-changing (e.g., green to yellow).
- Peppers: Harvest when they’re dry, papery, and starting to split open.
- Beans/Peas: Pick pods when they’re brown and crispy.
What’s the easiest way to store DIY seed packets?
Store seeds in airtight containers (like glass jars, envelopes, or resealable bags) with a silica gel packet or rice to absorb moisture. Label each with the plant name, harvest date, and germination tips. Keep them in a cool, dark place (like a fridge or basement) for up to 5 years.
How do I prevent cross-pollination if I’m saving seeds from multiple varieties?
Cross-pollination can mix traits, but you can minimize it by:
- Planting one variety per plant (e.g., separate tomato cages for each type).
- Isolating plants by 10–20 feet for wind-pollinated crops (like corn) or 1–2 miles for bees (like squash).
- Hand-pollinating with a paintbrush if growing rare varieties.
What if my homegrown seeds don’t sprout next year?
Don’t panic! Low germination could mean:
- Old seeds: Test viability by placing a few in damp paper towels—if they don’t sprout in 1–2 weeks, they’re likely past their prime.
- Improper drying: Seeds need full maturity and dryness before storage. Use a dehydrator or sunny windowsill to finish drying.
- Poor storage: Moisture or heat kills seeds. Store in a cool, dry place (below 40°F ideal).
Wrapping up and next steps
Creating your own DIY seed packets is a rewarding way to reduce waste, save money, and ensure a thriving garden next season!
With just a few simple materials, you’ve unlocked a sustainable habit that benefits both your wallet and the planet. Why not start small? Try saving seeds from your favorite herbs or veggies this year—you’ll be amazed at how easy (and fun!) it is.
Ready to take the next step? Grab a notebook, sketch your seed-saving plan, and mark your calendar for harvest time. Happy gardening—and here’s to a greener, zero-waste future! 🌱♻️