
Propagation
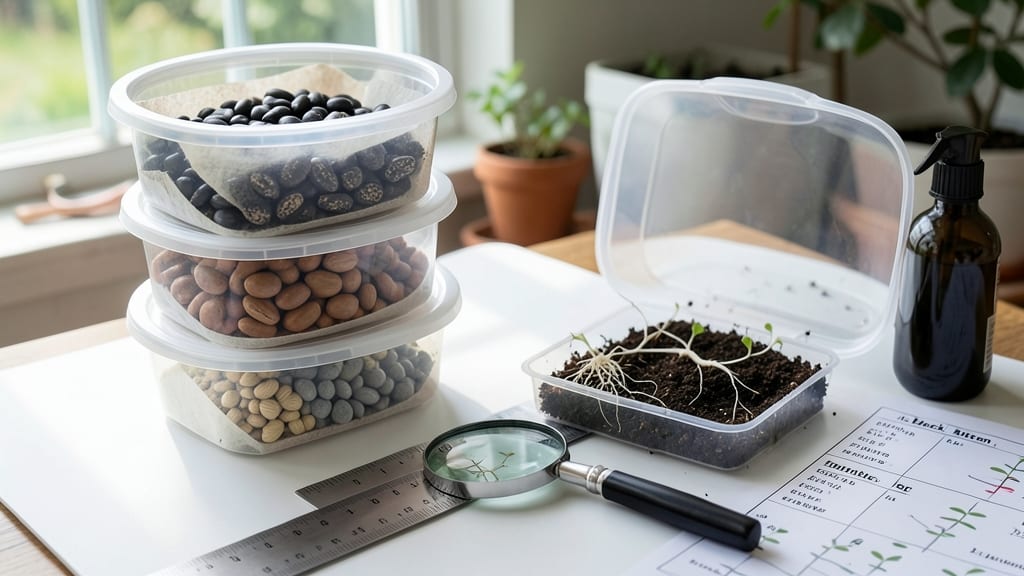
Experiments on seed germination in 7 days isn’t magic—it’s science you can test yourself. 🌱 I spent last winter turning my basement into a mini lab, comparing everything from damp paper towels to heated mats, and the results shocked me (some seeds actually sprouted faster than I expected). The key? Controlling just a few variables while letting nature do the rest.
You don’t need fancy equipment—just clear containers, a thermometer, and a notebook to track moisture levels, light exposure, and temperature shifts. My first experiment used simple plastic cups with different soil mixes, and within a week, the difference between fast and slow germination became obvious.
The best part? You can adapt this for any seed—from slow-to-start tomatoes to speedy radishes.
By the end of your first trial, you’ll see exactly what conditions make your seeds race toward the light. Some might surprise you: my basil seeds, for example, hated the heat mat but loved the cool, damp towel method.
The journaling step is where the real discoveries happen—you’ll spot patterns no guidebook mentions.
This works for beginners and seasoned gardeners alike because the variables are simple to adjust. Want to compare organic compost to store-bought mix? Swap them out mid-experiment. Curious about blackout boxes? Try them alongside windowsill setups. The only rule? Keep meticulous notes—your future garden will thank you.
📚 In This Guide
- What you need
- Instructions
- Tips and common mistakes
- Wrapping up and next steps
What you need
- ● Seeds: Fast-germinating varieties like radish, lentils, or chia seeds (50–100 seeds, depending on experiment scale).
- ● Growing medium: Paper towels (2–4 sheets per experiment) or
- ● Coconut coir mats (1–2 per setup) or
- ● Vermiculite or peat moss (1 cup for larger setups).
- ● Containers: Small plastic bags (ziplock, 1–2 per experiment) or
- ● Petri dishes (2–4 for controlled conditions) or
- ● Seed trays with drainage (for soil-based tests).
- ● Water: Distilled or room-temperature tap water (enough to keep medium damp but not soggy).
- ● Spray bottle: 4–8 oz (for gentle hydration).
- ● Ruler or measuring tape: For tracking growth (inches/cm).
- ● Notebook & pen: To log observations (date, moisture, light exposure, etc.).
- ○ Grow light or sunny windowsill: 12–16 hours of indirect light daily (optional but recommended).
- ○ Thermometer/hygrometer: To monitor temperature (ideal: 65–75°F) and humidity (optional).
- ● Plastic wrap: For creating a mini greenhouse effect (if not using bags).
- ● Labels & markers: To identify seed types/treatments (e.g., "Radish + Light").
- ● Glove: One pair (to handle seeds hygienically).
- ○ Camera or phone: For documenting progress (timelapse optional!).
Science-backed speed sprouting: how to germinate seeds in 7 days
Here’s my method for fast, reliable germination using proven techniques—no guesswork, just results.
🌱 Step 1: Prep Seeds for Maximum Germination Potential
Start by selecting seeds with the highest viability—look for fresh packets labeled with a recent harvest date. Some seeds, like chives or parsley, benefit from a 12-24 hour soak in lukewarm water to soften their outer coating. I use a small bowl with a damp paper towel draped over the top to keep moisture consistent. This step is especially critical for seeds with hard shells, like beans or peas, where the soak mimics natural weathering.
For seeds that don’t require soaking—like tomatoes or lettuce—simply place them in a sealed plastic bag with a damp paper towel. Leave them in a warm spot (75-80°F) overnight. You’ll know they’re ready when the towel feels evenly moist but not soggy. Avoid over-soaking; seeds can absorb too much water and rot before sprouting.
💧 Step 2: Create the Ideal Germination Environment
Fill a shallow tray or seed-starting container with a moistened germination mat or a layer of damp paper towels. Arrange the prepped seeds ½ inch apart in a single row, pressing them lightly into the surface. Cover the tray with clear plastic wrap or a humidity dome to trap warmth and moisture—this mimics the cozy, damp conditions seeds experience underground.
Place the tray in a location with consistent warmth, such as on top of a refrigerator or near a sunny window (but not in direct sunlight yet). Check daily for condensation on the plastic—if it’s heavy, crack the cover slightly to prevent mold. You’ll see the first signs of germination in 3-5 days as tiny white roots emerge, followed by the seed coat splitting open.
☀️ Step 3: Transition to Light for Strong Seedlings
Once 50% of seeds have sprouted (usually around day 4-5), remove the plastic cover immediately to prevent damping-off, a fungal disease that attacks tender new shoots. Move the tray to a bright, indirect light source—a south-facing window or a grow light set 4 inches above the seedlings. Avoid direct sunlight at this stage; it can scorch delicate leaves.
Watch for first true leaves (the second set after the initial seed leaves) to appear within 2-3 days. These leaves indicate the seedling is photosynthesizing on its own. If seedlings stretch toward the light (a sign of legginess), lower the grow light or rotate the tray daily to encourage even growth. Strong seedlings will have thick stems and dark green leaves by day 7.
⏰ Step 4: Harden Off and Prepare for Transplanting
By day 7, your seedlings should be ready for their next phase. Begin hardening off by placing the tray outside in a shaded, sheltered spot for 1-2 hours on the first day. Gradually increase exposure over 3-4 days, adding 1 hour daily until they’re acclimated to full sunlight. This process toughens their cell walls and prepares them for outdoor conditions.
Before transplanting, ensure the seedlings have 3-4 true leaves and a strong root system. Gently squeeze the soil around the base—if roots fill the container, they’re ready. Transplant on an overcast day or in the early evening to reduce stress. Water deeply after planting to settle the soil and encourage root expansion.
Tips & tricks for perfect seed germination
These science-backed strategies will help you achieve reliable, rapid sprouting every time—no matter your experience level.
Seed Selection Matters: Not all seeds germinate at the same rate. Fast germinators like radishes and lettuce typically sprout within 3-5 days, while slower ones like beans or peas may take up to 7 days. Always check the seed packet for specific germination times—this tells you exactly what to expect. For best results, use seeds from the current year, as viability drops significantly after just one season.
Temperature Control: Maintaining that 75-80°F range is critical, but don't overlook the importance of consistency. If your kitchen fluctuates, consider using a seedling heat mat set to 80°F for more reliable warmth. For seeds requiring the 12-24 hour soak, use lukewarm water (around 85°F) to accelerate the process without risking over-soaking.
Light Transition Strategy: When you remove the plastic cover at day 4-5, place your seedlings under 12-16 hours of light daily to prevent legginess. If using a grow light, position it 4 inches away and adjust as needed—closer for more light, farther for gentler growth. Rotate the tray daily to ensure even growth; seedlings will naturally lean toward the light source if left stationary.
Harden Off Gradually: The 1-2 hour daily increments during hardening off might seem slow, but rushing this process can shock delicate seedlings. On cloudy days, you can safely extend the first day's exposure to 3-4 hours, as lower light levels reduce stress. Always water seedlings thoroughly before hardening off—they'll need to draw moisture from the soil as they adapt to outdoor conditions.
Pro Tips for Experiments On Seed Germination
- These science-backed strategies will help you achieve reliable, rapid sprouting every time—no matter your experience ...
- Seed Selection Matters: Not all seeds germinate at the same rate. Fast germinators like radishes and lettuce typicall...
- Temperature Control: Maintaining that 75-80°F range is critical, but don't overlook the importance of consistency. If...
Frequently asked questions
How do I know if my seeds are viable before starting the experiment?
Test viability with the paper towel method: Moisten a paper towel, place 10 seeds between two, seal in a bag, and store in a warm spot. Check for sprouts in 3–5 days. If 50%+ sprout, your seeds are ready for germination experiments!
Can I speed up germination even faster than 7 days?
While 7 days is ideal for most seeds, some (like radishes or beans) may sprout in 3–5 days with optimal conditions: soak seeds overnight, use bottom heat (70–85°F), and maintain 90% humidity. Avoid overwatering—seeds need oxygen, not soggy conditions!
What if my seeds aren’t sprouting after 7 days?
Try these fixes:
- Check moisture: Seeds should feel damp but not waterlogged. Mist lightly if dry.
- Adjust temperature: Move to a warmer spot (e.g., near a sunny window or use a heat mat).
- Test light exposure: Some seeds (like lettuce) need light to germinate—try placing them under a grow light.
- Inspect for rot: If seeds smell foul or are mushy, they’re overwatered. Start fresh with new seeds.
Can I use household items instead of fancy germination kits?
Skip the store-bought kits and use:
- Egg cartons: Cut off the top, add damp paper towels, and nestle seeds in each cup.
- Plastic bags: Line with damp paper towels, seal seeds inside, and place in a warm spot.
- Mason jars: Layer seeds between damp paper towels, screw on the lid (leave a tiny gap for air), and set on a sunny windowsill.
Will these methods work for all types of seeds?
Not all seeds thrive equally! Fast-germinating seeds (e.g., beans, peas, radishes) excel in 7-day experiments, while large seeds (like tomatoes or squash) may take 10+ days. Tropical seeds (e.g., avocado, mango) often need warmth and patience. Always research your seed’s specific needs—some prefer darkness, others light!
Wrapping up and next steps
Experiments on seed germination reveal that with the right conditions—like moisture, warmth, and patience—you can spread life in just 7 days! 🌱 Whether you’re growing herbs, flowers, or veggies, these science-backed techniques prove that anyone can master sprouting.
Don’t stop here—try your own experiments, tweak variables, and watch your green thumb grow!
🌟 Next Steps:
- Test different seeds! Not all germinate the same—compare speed and success rates.
- Document your results. Track moisture, light, and temperature to refine your process.
- Share your wins! Join gardening communities to swap tips and inspire others.