
Propagation
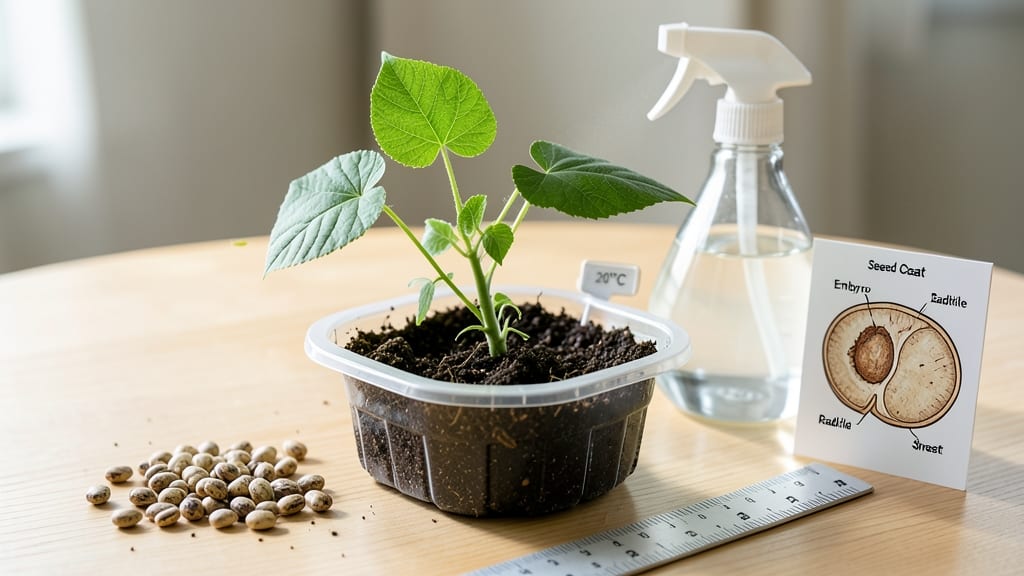
Let me explain seed germination—the magical journey from a tiny seed to your first green sprout, broken down into clear, actionable stages. 🌱 The process begins when water triggers the seed to wake up, breaking dormancy and kickstarting growth that unfolds in predictable stages: imbibition, cellular expansion, and finally, the radicle pushing through the shell.
Three things make or break germination: consistent moisture, stable warmth, and proper darkness (most seeds need it). Too dry or too cold, and the seed stays asleep; too hot or too bright, and it may rot before sprouting.
Think of it like creating the perfect microclimate inside your seed-starting container.
You'll see the first signs of life in 3-14 days, depending on the seed type—fast germinators like radishes pop up in a week, while heirloom tomatoes can take two. The radicle (that first white root) appears first, anchoring the seed before the shoot breaks through the soil.
Troubleshooting is half the fun: if seeds rot, reduce moisture; if they stay dormant, check temperature. With the right setup, you'll go from bare soil to baby plants faster than you'd expect. Here's how to nail every stage.
📚 In This Guide
- What you need
- Instructions
- Tips and common mistakes
- Wrapping up and next steps
What you need
- ● Seeds: Choose high-quality, fresh seeds (check the packet for viability dates). Quantity: 5–10 seeds per experiment (or as needed).
- ● Germination medium: Paper towels (2–3 sheets, unbleached and seed-safe) or
- ● Peat pellets (1–2 per seed) or
- ● Coco coir (pre-moistened, in a shallow tray or pot).
- ● Spray bottle (1, with a fine mist setting for gentle watering).
- ● Clear plastic bag or lid (to create a humidity dome; e.g., a ziplock bag or a plastic container with a vented lid).
- ● Small container or tray (6–8 inches wide, with drainage holes if using soil-based mediums).
- ○ Thermometer (optional but helpful) (to monitor soil/towel temps, ideally 65–75°F/18–24°C for most seeds).
- ● Grow lights or sunny windowsill (for post-germination light exposure).
- ● Seedling heat mat (for cold-weather germination of tropical seeds).
- ● Humidity tray (a shallow tray with water and pebbles to boost moisture levels).
- ● Plant labels & marker (to track seed types and germination dates).
- ● Fungicide (like hydrogen peroxide, 3%) (diluted to 1:9 ratio with water for sterilizing trays or towels).
Step-by-step science of seed germination
Here's how seeds break dormancy and become seedlings—science made simple for predictable success.
🌱 Step 1: Understand the Four Key Requirements
Every seed needs four essentials to germinate: water, oxygen, proper temperature, and light (or darkness, depending on the species). Water activates enzymes that break down stored nutrients, while oxygen fuels the metabolic processes that push the radicle (root) through the seed coat. Most seeds germinate best at 65-75°F, though some tropical varieties need 80-90°F.
Light requirements vary wildly—some seeds like lettuce need darkness to germinate, while others like snapdragons require light. Check your seed packet for specific instructions. I always keep a small notebook by my seed-starting station to jot down each variety's preferences, because forgetting this detail is how I've lost entire trays of seedlings.
💧 Step 2: Prepare the Seed Environment
Start by filling your containers with moistened seed-starting mix (never garden soil—it's too dense and may contain pathogens). Press the mix down lightly until it's firm but not compacted. The surface should feel like a damp sponge—water should bead up slightly but not pool. Too much moisture suffocates seeds, while too little prevents enzyme activation.
Place your containers in a warm, humid environment. A seedling heat mat set to 75°F works wonders, but even a sunny windowsill above a radiator can provide the needed warmth. Cover the containers with clear plastic wrap or a humidity dome to trap moisture. Check daily for condensation—if droplets form on the plastic, you've got perfect humidity levels.
☀️ Step 3: Monitor for the Radicle's Appearance
The first visible sign of germination is the radicle, or embryonic root, which emerges within 3-14 days depending on the species. You'll see it as a tiny white thread pushing through the seed coat. This is your cue that the seed has successfully broken dormancy and is actively growing.
Once the radicle appears, remove any covering immediately to prevent damping-off disease. The seedling now needs fresh air and light to develop properly. I like to use a small magnifying glass at this stage—watching that first root emerge is like witnessing a tiny miracle. Just don't overwater now; keep the soil consistently moist but never soggy.
🌿 Step 4: Transition to Light and Early Growth
When the first true leaves (cotyledons) appear—these are the first leaves that resemble the mature plant—it's time to move your seedlings to bright light. Place them under grow lights or in a south-facing window where they'll receive 14-16 hours of light daily. Leggy seedlings with pale stems mean your light source is too weak or too far away.
At this stage, you'll notice the hypocotyl (the stem between the seed leaves and the first true leaves) straightening as it reaches for light. This is when seedlings become vulnerable to temperature fluctuations. Keep them in a stable environment between 60-75°F during the day and 55-65°F at night. You'll see healthy growth when leaves are dark green and firm, not yellow or wilted.
Tips & tricks for perfect seed germination
Don't let seed-starting frustrations derail your gardening dreams—these science-backed tips will help you achieve reliable sprouts every time.
Temperature Precision: The 65-75°F range is your sweet spot for most seeds, but tropical varieties absolutely demand 80-90°F. I've learned this the hard way with basil seeds—when my kitchen stayed below 70°F, they simply refused to sprout. Consider using a seedling heat mat set to 75°F if your environment fluctuates. For tropical seeds, a warm spot like above your refrigerator (not inside!) can work wonders without needing specialized equipment.
Light Strategy: Here's what nobody tells you—some seeds like lettuce need complete darkness to germinate, while others like snapdragons require light. I keep a small notebook by my seed-starting station to jot down each variety's preferences, because forgetting this detail is how I've lost entire trays of seedlings. For light-sensitive seeds, cover your containers with a damp paper towel or place them in a dark cabinet until germination begins. Once the radicle appears, move them immediately to light.
Moisture Management: That "damp sponge" feeling in Step 2 is absolutely critical—water should bead up slightly but not pool. Too much moisture suffocates seeds by cutting off oxygen, while too little prevents enzyme activation. I use a spray bottle to mist the soil lightly every other day rather than watering from above, which can dislodge seeds. For extra insurance, place your containers on a tray of pebbles with water—this creates consistent humidity without over-saturating the soil.
Radicle Rescue: When that first tiny white thread (the radicle) emerges within 3-14 days, remove any covering immediately to prevent damping-off disease. This fungal infection thrives in humid, covered environments and can wipe out your seedlings overnight. I've saved many batches by acting at this precise moment—once you see that radicle, give your seedlings fresh air and light right away. Keep the soil consistently moist but never soggy during this vulnerable stage.
Pro Tips for Explain Seed Germination
- Don't let seed-starting frustrations derail your gardening dreams—these science-backed tips will help you achieve rel...
- Temperature Precision: The 65-75°F range is your sweet spot for most seeds, but tropical varieties absolutely demand ...
- Light Strategy: Here's what nobody tells you—some seeds like lettuce need complete darkness to germinate, while other...
Frequently asked questions
Got questions about seed germination?
You’re not alone—even experienced gardeners hit snags! Below, we tackle the most common queries to help you grow confidently.
How long does it take for seeds to germinate?
Germination time varies by seed type. Fast growers like radishes or lettuce sprout in 3–7 days, while slowpokes (e.g., beans, tomatoes) may take 7–21 days. Check the seed packet for specifics—consistent moisture and warmth (65–85°F) speed things up!
What if my seeds won’t germinate? Troubleshooting tips
Try these fixes if sprouts stay MIA:
- Check moisture: Soil should feel like a damp sponge—not soggy or dry. Mist lightly if needed.
- Test temperature: Use a heat mat for cool climates (many seeds need warmth).
- Verify depth: Plant too deep? Some seeds (like basil) need light to germinate—cover them lightly or spritz with water.
- Moisten a paper towel, place seeds between two layers, and roll it up.
- Store in a sealed plastic bag in a warm spot (e.g., on top of the fridge).
- Check daily—once sprouts appear (roots or shoots), transplant carefully into soil.
- Cool-loving seeds (e.g., lettuce, carrots): 60–70°F.
- Warm-loving seeds (e.g., peppers, cucumbers): 75–85°F.
- Hardy veggies (spinach, peas): Plant 4–6 weeks before last frost.
- Tender plants (tomatoes, basil): Wait until soil is at least 60°F and frost risk is gone.
- Check frost dates: Use your local USDA zone guide for a heads-up.
Old seeds? Test viability by soaking a few in water; if they sink, they’re likely still good.
Still stuck? Try scarifying (nick the seed coat) or soaking overnight for hard shells.Can I germinate seeds without soil?
Paper towel germination
is a great soil-free method:
Does temperature really affect germination?
Yes! Most seeds germinate best in a warm range (65–85°F), but some have preferences:
Too cold? Use a heat mat or bottom-water your pots to maintain warmth.
Pro tip: A clear plastic dome over seedlings traps heat and humidity—like a mini greenhouse!When is the best time to plant seeds outdoors?
Timing depends on your climate and seed type:
Wrapping up and next steps
Understanding seed germination unlocks the magic of growing your own plants—whether you're a gardening newbie or a seasoned green thumb! 🌱 From moisture and warmth to proper airflow, each step plays a vital role in coaxing life from tiny seeds.
Now that you’ve mastered the science, why not put it into action?
Ready to plant your first seeds? Start small with easy-to-germinate varieties like beans or marigolds, and track your progress. Every sprouted seed is a victory—so grab your tools, get growing, and watch your green thumb flourish! 🌟