
Propagation
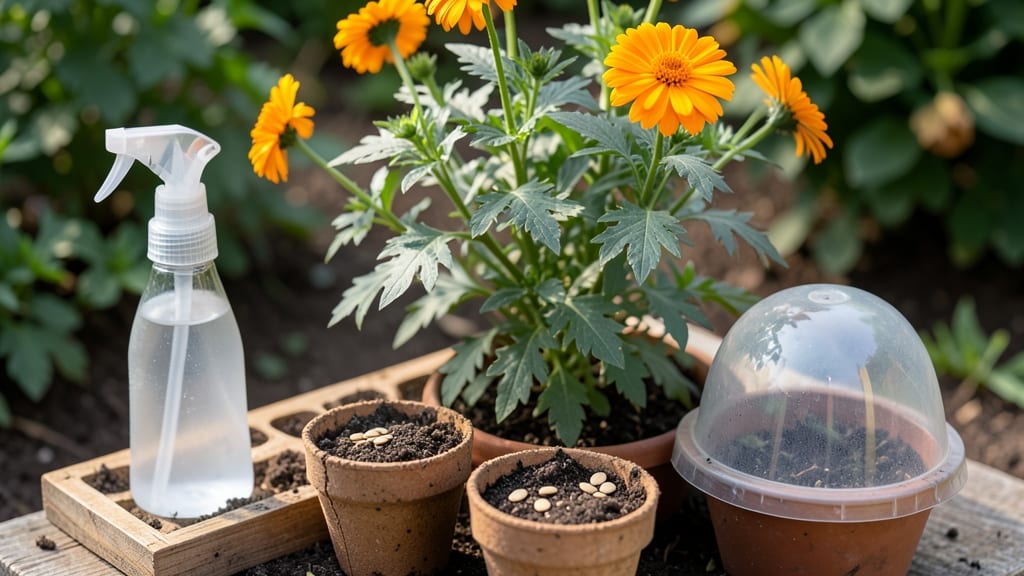
Calendula seeds in pots bloom into cheerful orange faces in just 6 weeks—no greenhouse needed. 🌱 I’ve grown them every spring, and the secret is starting them in well-draining soil with enough light, even indoors.
These little seeds are tiny but tough, and they reward patience with weeks of vibrant blooms that attract pollinators. The trick is keeping soil consistently moist (not soggy) and giving them 4-6 hours of sunlight daily.
Use 4-6 inch deep pots with drainage holes, and plant seeds just ¼ inch deep—they need light to germinate. Overcrowding stunts growth, so space them 1 inch apart if you’re starting indoors.
By week 3, you’ll see those first true leaves, and by week 6, your pots will burst with bright orange-yellow flowers. The plants stay compact, making them perfect for patios, windowsills, or small balconies. Plus, calendula’s mild pest-repelling properties keep nearby plants healthier. Common mistakes?
Overwatering (root rot is real) and underlighting (leggy seedlings). But once you nail the basics, these cheerful bloomers thrive year after year with minimal fuss. Ready to grow your own sunshine?
📚 In This Guide
- What you need
- Instructions
- Tips and common mistakes
- Wrapping up and next steps
What you need
- ● Calendula seeds: 1 packet (50-100 seeds, organic or heirloom varieties like ‘Bonanza’ or ‘Moonbeam’ for best results).
- ● Containers: 4-6-inch pots (with drainage holes) or a seed-starting tray with individual cells. Quantity: 1 pot per seedling (or 1 tray with 50+ cells).
- ● Seed-starting mix: 1 bag (5-10 quarts) of lightweight, sterile potting soil (avoid garden soil—it’s too dense!).
- ● Watering can or spray bottle: With a fine mist nozzle for gentle hydration.
- ○ Grow lights or sunny windowsill: A full-spectrum LED grow light (optional but recommended) or a south-facing window with 6+ hours of sunlight daily.
- ● Plastic wrap or humidity dome: To retain moisture during germination (1 small sheet or a clear lid for trays).
- ● Plant labels: Small sticks or tags + a marker to track varieties.
- ● Heat mat: Germinates seeds faster (70–75°F is ideal).
- ● Fertilizer: A balanced water-soluble fertilizer (5-10-5 ratio) or compost tea for young seedlings.
- ● Tweezers: For delicate seed placement (especially if seeds are tiny).
- ● Peat pellets or biodegradable pots: For easy transplanting later.
- ● Insecticidal soap: To fend off aphids or fungus gnats if pests appear.
Step-by-Step guide to growing calendula from seed in pots
Here’s how to coax those cheerful orange blooms from tiny seeds—no green thumb required.
🌱 Step 1: Prepare Pots and Seed Starting Mix
Fill 4-inch diameter pots with a sterile seed-starting mix (never garden soil—it’s too dense and may harbor fungal spores). Calendula roots are shallow but need excellent drainage, so I mix in 20% perlite to keep moisture balanced. Moisten the mix until it feels like a damp sponge—squeeze gently to test.
Press the soil down lightly with your fingers to remove air pockets, then create ¼-inch-deep furrows with a small stick or your index finger. Space these furrows about 1 inch apart—calendula seeds are tiny, and crowding them now will lead to weak, leggy seedlings later. Here’s the thing—calendula seeds are slow to germinate, so don’t rush the prep work.
🌱 Step 2: Sow Seeds and Maintain Ideal Germination Conditions
Scatter 3-4 seeds per pot along the furrows, pressing them in lightly so they make contact with the soil. Cover them with a thin layer of fine mix—no more than ⅛ inch—or they’ll take too long to emerge. Mist the surface with a spray bottle until the soil looks evenly damp but not soggy.
Place the pots in a humidity dome or seal them in a clear plastic bag to trap warmth and moisture. Calendula loves 70-75°F soil temperatures for germination, which can take 10-21 days—patience is key. I keep the pots in a warm, bright spot (like on top of the fridge) and check daily for condensation. If you see mold, remove the cover immediately and let the soil dry slightly before resealing.
☀️ Step 3: Provide Light and Thin Seedlings
Once seedlings emerge, remove the cover and move them to a south-facing window or under grow lights for 12-14 hours of light daily. Calendula seedlings are sensitive to legginess—if they stretch toward the light with pale stems, your light source isn’t strong enough. You’ll know they’re happy when the first true leaves (the second set after the initial cotyledons) appear deep green and sturdy.
When seedlings are 2 inches tall, thin to the strongest plant per pot by snipping the others at the base with clean scissors. This prevents competition and gives your calendula room to grow. Here’s where it gets fun—watch the cotyledons fall away as the true leaves take over. That’s your signal everything’s on track.
💧 Step 4: Harden Off and Transplant (If Needed)
Two weeks before your last frost date, start hardening off your calendula by placing the pots outside in partial shade for 1-2 hours the first day. Gradually increase exposure to full sun over 7-10 days, letting them adjust to wind and temperature swings. Calendula thrives in full sun, but young plants can scorch if moved too quickly.
If your pots are 6+ inches deep, you can keep calendula in them year-round—they’ll bloom continuously if deadheaded. If you’re transplanting to the garden, choose a spot with well-draining soil and 6+ hours of sun. Space plants 12-18 inches apart to allow airflow, which prevents powdery mildew. Water deeply at the base after transplanting to encourage root establishment.
✂️ Step 5: Maintain and Encourage Blooms
Once flowers appear, deadhead spent blooms by snipping them back to the nearest set of leaves. This redirects energy to new flowers and keeps calendula blooming throughout the season. Water at the base (not overhead) to prevent fungal issues, and fertilize lightly with a balanced organic fertilizer every 4-6 weeks—calendula is self-sufficient but responds well to gentle feeding.
Here’s the secret to long-lasting blooms: Pinch back leggy stems in early spring to encourage bushier growth. Calendula is drought-tolerant once established, but consistent moisture during the first few weeks after transplanting ensures strong roots. You’ll see those bright orange petals in 6-8 weeks from sowing—proof that patience pays off.
Tips & tricks for growing calendula in pots
Here's what nobody tells you about coaxing vibrant calendula blooms from tiny seeds—these tricks will help you avoid common pitfalls and get results faster.
Soil Preparation Secret: The 20% perlite mix in Step 1 isn't just about drainage—it creates tiny air pockets that prevent soil compaction. I like to sift the perlite through a fine mesh screen before mixing to avoid large chunks that could disrupt those delicate ¼-inch-deep furrows. Pro tip: If you don't have perlite, coarse sand works in a pinch, but it won't provide the same moisture balance. The goal is soil that feels like a damp sponge—if water runs through it immediately, add more mix.
Germination Game-Changer: Those 70-75°F soil temperatures in Step 2 are non-negotiable for speedy germination. I've found that placing pots on top of a refrigerator (not inside) creates the perfect warm spot without overheating. For extra insurance, use a seedling heat mat set to 75°F—it'll cut your 10-21 day wait time by nearly half. Watch for condensation daily, and if you see mold, remove the cover immediately to prevent seed rot.
Lighting Strategy: The 12-14 hours of light in Step 3 is crucial, but not all light sources are equal. If using grow lights, position them 6 inches above seedlings and adjust as they grow. I've learned the hard way that fluorescent bulbs (even full-spectrum) can cause legginess—compact fluorescent or LED grow lights work best. For window growers, rotate pots daily so all sides get equal light exposure. Leggy seedlings with pale stems mean your light isn't strong enough or consistent.
Thinning Technique: When thinning to the strongest plant in Step 3, don't just pull—use clean scissors to snip at the base. This prevents disturbing the roots of your remaining plant. I've found that the strongest seedling often has the darkest true leaves and most upright growth. If all seedlings look equally strong, choose the one with the most evenly spaced leaves. The cotyledons (first leaves) will naturally fall away as true leaves emerge—this is a good sign your thinning was successful.
Pro Tips for Growing Calendula From Seed In Pots
- Here's what nobody tells you about coaxing vibrant calendula blooms from tiny seeds—these tricks will help you avoid ...
- Soil Preparation Secret: The 20% perlite mix in Step 1 isn't just about drainage—it creates tiny air pockets that pre...
- Germination Game-Changer: Those 70-75°F soil temperatures in Step 2 are non-negotiable for speedy germination. I've f...
Frequently asked questions
Got questions about growing calendula from seed in pots? You’re not alone! Here are some of the most common concerns—plus quick, practical answers to help you succeed.
How long does it take for calendula seeds to germinate?
Calendula seeds are slow to sprout—typically 10 to 21 days at 65–75°F (18–24°C). Keep soil moist (not soggy) and patient! If using soaked seeds (optional), germination may speed up by 3–5 days. Avoid overwatering, or seeds might rot.
Can I grow calendula in pots indoors all year?
Yes! Calendula thrives indoors with 4–6 hours of sunlight daily (a sunny windowsill or grow light works). Use pots with drainage holes and keep soil consistently moist. In winter, supplement with a grow light to prevent leggy growth. Just ensure temperatures stay above 50°F (10°C).
Why aren’t my calendula seeds sprouting?
Common culprits:
- Cold soil: Seeds need warmth to germinate—try a seedling heat mat if your home is chilly.
- Dampness issues: Too much water = rot; too little = dry seeds. Aim for moist but not waterlogged soil.
- Old seeds: Store-bought seeds last 1–2 years. Test a few seeds in a damp paper towel to check viability.
What’s the best pot size for growing calendula?
Start with 4-inch pots for seedlings, then transplant to 6–8 inch pots (or larger) when plants are 2–3 inches tall. Calendula has shallow roots, so depth matters more than width. Use pots with drainage holes to prevent root rot—terracotta or fabric pots work great!
Can I grow calendula from seed in small spaces or apartments?
Calendula is perfect for small spaces—even hanging baskets or 6-inch pots work. Choose compact varieties like ‘Bonanza’ or ‘Touch of Class’ for bushier growth. Place pots near a sunny window or under LED grow lights for 6+ hours/day. Rotate pots weekly for even growth!
Pro Tip:
Struggling with slow germination? Try the “wet paper towel method”:
- Moisten a paper towel and place seeds inside.
- Seal in a plastic bag and keep in a warm spot (like on top of the fridge).
- Check daily—once sprouts appear (5–7 days), plant in soil.
Wrapping up and next steps
Growing calendula from seed in pots is a rewarding journey that brings vibrant color and natural beauty to your space in just six weeks! With the right containers, soil, and care, you’ll enjoy cheerful blooms perfect for gardens, salads, or homemade remedies. 🌸
Ready to dive in? Start by gathering your supplies, follow the steps with patience, and soon you’ll be harvesting those sunny petals. Why not experiment with different varieties or share your newfound skills with fellow plant lovers? Happy growing!