
Propagation
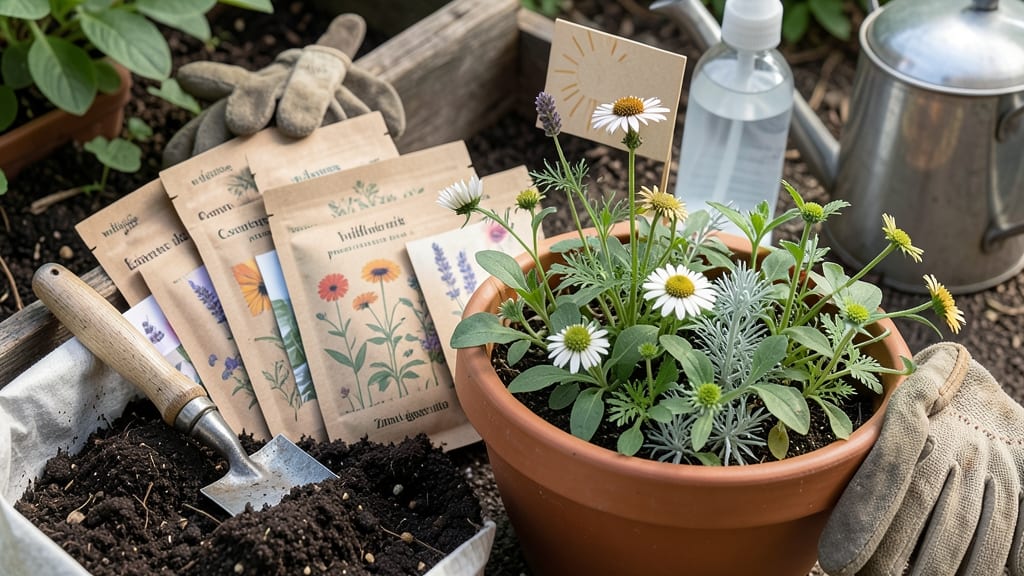
Growing wildflowers from seed in pots lets you turn a sunny windowsill into a buzzing pollinator paradise—no yard required. ✨ I’ve filled my kitchen with cheerful blooms using nothing but a few pots, some seeds, and a little patience.
The secret is mimicking the wildflowers’ natural conditions: loose soil, bright light, and minimal fuss. You’ll need shallow containers (at least 6 inches deep), well-draining potting mix, and a mix of native wildflower seeds.
Plant them just below the soil surface—no need to bury them deep—and keep the mix lightly moist until sprouts appear. Most varieties thrive in full sun, so a south-facing window or grow light works perfectly.
In just a few weeks, you’ll see delicate leaves unfurl, followed by vibrant blooms that attract bees, butterflies, and hummingbirds. The best part? These plants need almost no care once established—just occasional watering and deadheading to keep them flowering all season.
This method works for balconies, patios, or even office windows. Start with a small pot to test your setup, then expand as you see what grows best in your space. Happy planting!
📚 In This Guide
- What you need
- Instructions
- Tips and common mistakes
- Wrapping up and next steps
What you need
- ● Wildflower seeds: Choose a pre-mixed wildflower blend (e.g., cosmos, zinnias, or native wildflowers) or single-species seeds. Aim for 1-2 teaspoons per pot (about 5-10g).
- ● Containers: Pots with drainage holes (4-6" diameter for small varieties, 8-12" for taller blooms). 3-5 pots per batch works well.
- ● Potting soil: A lightweight, well-draining seed-starting mix (avoid garden soil—it’s too dense!). A 10-12 quart bag covers 3-4 pots.
- ● Watering can or spray bottle: A fine-mist sprayer (for gentle hydration) or a small watering can with a narrow spout.
- ● Grow lights or sunny windowsill: A south-facing window (6+ hours of sunlight daily) or a LED grow light (12-16 hours/day if indoors).
- ● Plastic wrap or humidity dome: A clear plastic bag or store-bought seedling dome to retain moisture.
- ● Seed-starting trays: For organized germination (holds 12-24 small pots).
- ● Fertilizer: A balanced liquid fertilizer (5-5-5 NPK ratio) or worm castings for nutrient boosts.
- ● Tweezers: For precise seed placement (especially tiny seeds!).
- ● Labels & markers: To track varieties (wildflowers can look alike at first!).
- ● Decorative stones or mulch: For a polished look once blooms emerge.
Step-by-Step instructions for growing wildflowers from seed in pots
Here's how to coax cheerful wildflowers from tiny seeds into vibrant window displays—no greenhouse needed.
🌱 Step 1: Choose the Right Containers and Soil Mix
Wildflower seeds need airy soil to germinate, so skip heavy garden soil. Use a lightweight seed-starting mix (I like the one labeled "for wildflowers and annuals") and add one part perlite to every three parts mix for extra drainage. Fill your containers—4-inch pots work well for 4 plants—leaving ½ inch of space at the top. Tap gently to settle the mix without compacting it.
Wildflowers hate soggy roots, so containers must drain well. If yours don't have holes, drill ¼-inch holes in the bottom. Line the bottom with ¼-inch gravel first—this prevents soil from washing out while still allowing excess water to escape. Moisten the mix lightly with warm water until it feels like a wrung-out sponge: damp but not dripping.
🌱 Step 2: Scatter Seeds and Cover Lightly
Wildflower seed packets often contain a mix of tiny species, so don't count individual seeds. Instead, sprinkle them sparingly over the soil surface—think "dusting" rather than planting. Most wildflower seeds need light to germinate, so never bury them. Just press them gently into the soil with your fingertip so they make contact.
Here's the thing—wildflower seeds are often very fine. I like to pour them from the packet onto a small piece of paper first, then sprinkle that over the pots to avoid losing seeds to the air. Cover the entire pot with a clear plastic dome or seal it in a ziplock bag to create a mini greenhouse. Place the pots in a warm spot (65-75°F)—a sunny windowsill or under a grow light.
💧 Step 3: Maintain Moisture and Wait for Sprouts
Check the soil daily but only water when the top ¼ inch feels dry. Mist lightly with a spray bottle—you want the soil to stay consistently moist, not soggy. Wildflower seeds often germinate unevenly, so you might see the first sprouts in 7-14 days, with stragglers popping up for 3-4 weeks. Don't be tempted to move the pots until all seeds have sprouted—this ensures even growth.
Once you see first true leaves (the second set after the initial seed leaves), remove the plastic immediately. Condensation under the dome can cause damping-off, a fungal disease that collapses tiny seedlings overnight. Place the pots under bright, indirect light for the first week—direct sun can scorch delicate new plants.
☀️ Step 4: Gradually Acclimate to Sun and Wind
Wildflowers love sun, but young seedlings need to build strength first. After 2 weeks, move them to a south-facing window where they'll get 4-6 hours of morning sun. Watch for leggy growth—thin, stretched stems mean they need more light. If this happens, move them closer to the window or add a grow light for 12-14 hours daily. Strong seedlings have thick stems and deep green leaves spaced ½ inch apart.
When seedlings reach 2 inches tall, start hardening them off. Place them outside in a shaded, sheltered spot for 1 hour the first day, then gradually increase time over 7-10 days. By day 7, they should tolerate full sun and gentle breezes. This prevents shock when you eventually transplant them to the garden—or keep them in pots as window-box blooms.
✂️ Step 5: Thin and Care for Established Plants
Once seedlings have 3-4 true leaves, thin them so each plant has at least 3 inches of space. Use clean scissors to snip excess seedlings at soil level—never pull, or you'll disturb roots. The thinned seedlings make great microgreens for salads (if your wildflower mix is edible). Water deeply at the base after thinning to help remaining plants establish strong roots.
Wildflowers in pots need regular deadheading to encourage more blooms. Once flowers fade, snip the spent blossoms just above the first set of leaves with clean pruners. This redirects energy to root growth and future flowers. Fertilize lightly every 4-6 weeks with a balanced, water-soluble fertilizer (half-strength) to keep them blooming all season.
Tips & tricks for sunny window blooms
Here's what nobody tells you about growing wildflowers that'll actually make the difference between thriving plants and sad, leggy seedlings.
Soil Mix Matters: That lightweight seed-starting mix is your secret weapon, but don't skip the perlite! The 1:3 ratio with perlite creates perfect air pockets for those tiny roots to breathe. I've tried regular potting soil before, and the seeds either rot or take forever to sprout. Pro tip: If you can't find wildflower-specific mix, blend regular seed-starting mix with 20% coconut coir—it mimics the airy texture wildflowers crave. The key is keeping that mix loose and never compacted, even when tapping the pots.
Light Trick for Germination: Most wildflower seeds need light to germinate, but here's the thing—too much light too soon can scorch them. After you've scattered those seeds in Step 2 and covered them with plastic, place the pots in a warm spot (65-75°F) but keep them out of direct sunlight for the first 3-4 days. Once you see those first sprouts, then move them to brighter light. I learned this the hard way when my first batch of seeds turned into crispy little snacks from too much sun too early.
Hardening Off Like a Pro: The 7-10 day hardening off process in Step 4 is where most people rush and regret it. Start with just 1 hour outside on day 1, but here's what I do differently: I place the pots in dappled shade under a tree or on a covered patio. This gradual transition prevents shock better than full sun. Watch for leaves that look wilted or pale—they're telling you to slow down. By day 7, when they're ready for full sun, you'll notice the stems have thickened and the leaves are a deeper green. That's when you know they're tough enough for your window boxes.
Deadheading Done Right: When you're ready to snip those spent blooms in Step 5, here's the trick: Use clean pruners and cut just above the first set of leaves, but not too close. I aim for about ¼ inch above the leaves. This little detail makes all the difference in how quickly new blooms appear. And here's another secret—if you're growing edible wildflowers, those snipped blooms make beautiful garnishes for salads or cocktails. Just let them dry completely first.
Pro Tips for Growing Wildflowers From Seed In Pots
- Here's what nobody tells you about growing wildflowers that'll actually make the difference between thriving plants and sad, leggy seedlings.
- Soil Mix Matters: That lightweight seed-starting mix is your secret weapon, but don't skip the perlite!
- Light Trick for Germination: Most wildflower seeds need light to germinate, but here's the thing—too much light too soon can scorch them.
Frequently asked questions
Got questions about growing wildflowers from seed in pots?
You’re not alone—here are answers to the most common ones to help you bloom like a pro!
Can I grow wildflowers from seed in pots year-round?
Most wildflowers thrive best when sown in early spring or fall, mimicking their natural growing seasons. If you’re in a mild climate, you can try sowing in late winter, but avoid freezing temperatures or peak summer heat. For indoor pots, a sunny windowsill works year-round, but outdoor pots need seasonal timing for best results.
How deep should I plant wildflower seeds?
Wildflower seeds are tiny and light-sensitive, so only press them lightly into the soil—about ¼ inch deep (or just cover them with a sprinkle of soil). Some varieties, like poppies, may even need no covering at all. Gently pat the soil to ensure contact, then mist with water to encourage germination.
Why aren’t my wildflower seeds germinating?
Common culprits include too much moisture (leading to rot), poor drainage, or inconsistent warmth. Ensure your pots have drainage holes, use well-draining soil, and keep them in a consistently warm spot (around 65–75°F). If seeds stay dry, try a light misting instead of soaking.
Can I reuse pots or soil from last year’s wildflowers?
Reusing pots is fine if they’re clean, but sterilize them with a 10% bleach solution to prevent disease. Soil, however, should be replaced or refreshed—old soil may harbor pests or depleted nutrients. Mix in compost or a slow-release fertilizer to give new seeds a nutrient boost.
What if my wildflowers grow too tall for their pots?
Some wildflowers, like cosmos or sunflowers, can outgrow small pots quickly. If this happens, transplant them outdoors into a garden bed or larger container. Alternatively, choose dwarf varieties (like miniature sunflowers) or prune them to encourage bushier growth. Just avoid cutting into the flower buds!
Wrapping up and next steps
Growing wildflowers from seed in pots is a rewarding way to bring vibrant color and life to your space—no sprawling garden required! 🌸 With the right containers, soil, and a little patience, you’ll soon enjoy a flourishing mini-meadow on your windowsill or balcony. Start small, experiment with varieties, and watch your green thumb grow!
Ready to take the next step? Once your wildflowers bloom, consider:
- 🌿 Expanding your collection—try growing from cuttings or saving seeds for next year!
- 🎨 Creating a pollinator-friendly display by adding more pots or a small garden bed.