
Propagation
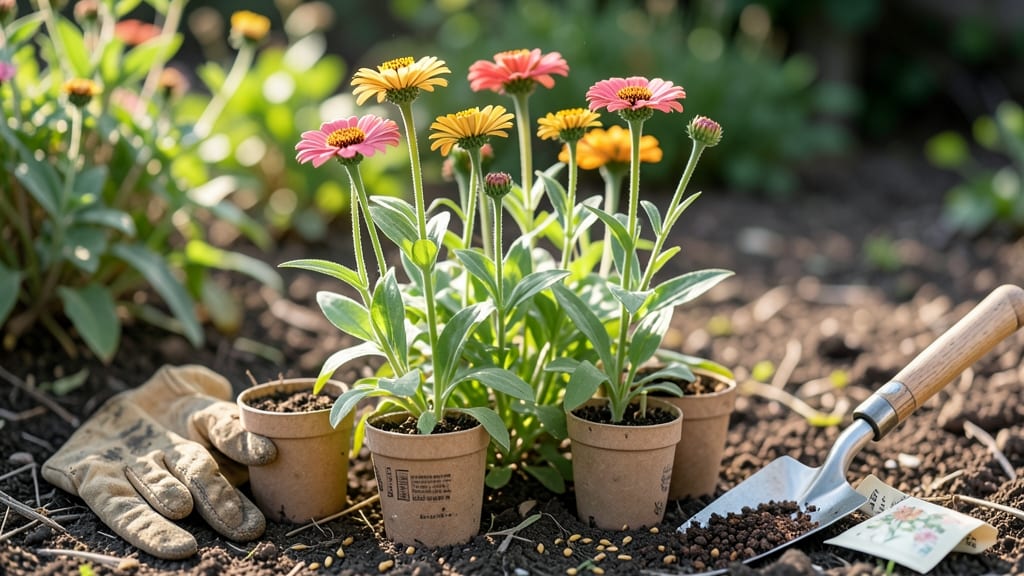
Growing zinnias from seed outdoors transforms your garden into a riot of color by summer. 🌻 I've planted them every year since my first failed attempt with store-bought seedlings—now my beds burst with blooms by July without the fuss.
The secret starts with soil that drains well and seeds planted just below the surface, where they'll pop up reliably even in hot weather.
You only need three things: a sunny spot (at least 6-8 hours of direct light), loose soil mixed with compost, and patience for those first tiny leaves. Zinnias thrive in average garden soil but hate soggy roots, so amending with compost prevents the leggy, weak seedlings that frustrate beginners.
Once sprouted, they grow fast—60 days to full bloom is standard, but heat-loving varieties often flower even sooner.
The payoff is worth every minute: clusters of daisy-like blooms in every color imaginable, from fiery reds to deep purples, that attract butterflies and hummingbirds all season.
Deadheading spent blooms keeps them producing until frost, and they self-seed like crazy—meaning next year's garden practically plants itself. Even my black thumb can't kill these.
Works in containers or garden beds, from zone 3 to 11, and handles drought once established. The only real challenge is keeping them upright in windy spots—staking or planting in groups solves that instantly. Ready to grow a garden that looks like a postcard?
📚 In This Guide
- What you need
- Instructions
- Tips and common mistakes
- Wrapping up and next steps
What you need
- ● Zinnia seeds: Choose heat-loving varieties like ‘Benary’s Giant’ or ‘Profusion’ (1–2 packets for a small garden, 3+ for larger patches).
- ● Well-draining potting mix: 1–2 cubic feet (for seed-starting trays or small pots).
- ● Seed-starting trays or biodegradable pots: 72-cell trays or 2–3" pots (1–2 trays per packet of seeds).
- ● Outdoor garden bed or containers: 12"+ deep pots or a sunny garden spot with 6+ hours of sunlight daily.
- ○ Balanced fertilizer (5-10-5): 1–2 tbsp per plant at transplanting (optional but helpful).
- ● Gloves & hand trowel: For gentle seed handling and soil prep.
- ● Spray bottle: To mist seeds lightly (avoid oversaturating!).
- ○ Row cover or shade cloth: 30–50% shade for seedlings if temps exceed 85°F (optional but lifesaving in hot climates).
- ● Mulch (straw or shredded leaves): 1–2 inches to retain moisture (after germination).
- ● Last frost date: Wait until soil temps are consistently 50°F+ (zinnias hate cold!). Check your local USDA zone.
- ● Sunny spot: Zinnias thrive in full sun—no compromises!
- ● Patience: 60 days to bloom, but worth every minute! 🌸
Step-by-Step instructions for growing zinnias from seed outdoors
Here's the simple method I use to get vibrant zinnias blooming in just 60 days—no fuss, no fuss.
🌱 Step 1: Prepare the Soil and Plant Seeds After Last Frost
Zinnias thrive in well-draining soil, so work in a handful of compost or aged manure to enrich the area where you'll plant. Loosen the top 6 inches of soil with a garden fork to create a soft bed for roots. I like to rake the surface smooth—this prevents seeds from sinking too deep during planting.
Scatter seeds ¼ inch deep in rows spaced 12-18 inches apart. Zinnias germinate best in warm soil (60-70°F), so wait until nighttime temperatures stay above 50°F—usually 2-4 weeks after your last frost date. If you plant too early, seeds may rot in cold, wet soil.
💧 Step 2: Keep Soil Moist Until Germination
Water gently but thoroughly after planting to settle the seeds into the soil. Use a fine spray nozzle or watering can to avoid displacing seeds. Keep the soil consistently moist until germination, which typically takes 7-14 days. You'll know it's time to water again when the top inch of soil feels dry to the touch.
Once seedlings emerge, reduce watering slightly—zinnias are drought-tolerant once established. Overwatering now can cause damping-off, a fungal disease that collapses seedlings overnight. If you see stems wilting or turning brown at the base, pull affected plants immediately to prevent spread.
☀️ Step 3: Thin Seedlings and Provide Full Sun
When seedlings reach 2-3 inches tall and have 2-3 true leaves, thin them to stand 6-12 inches apart, depending on the variety. I use scissors to snip unwanted seedlings at soil level—this avoids disturbing roots of remaining plants. Zinnias need full sun (6+ hours daily) to bloom vigorously, so choose a south-facing spot or the sunniest area in your garden.
If your zinnias start stretching toward the light with long, weak stems, they need more sun. Move them to a sunnier location immediately. You'll see strong, compact growth within a few days of proper light exposure. Pinch back the tips of young plants to encourage bushier growth—just snip the top set of leaves with clean scissors.
✂️ Step 4: Deadhead and Fertilize for Continuous Blooms
Start deadheading spent blooms when they begin to fade. Simply pinch or cut the flower head off just above the next set of leaves. This redirects the plant's energy into producing new blooms instead of setting seed. I deadhead every 3-4 days during peak bloom time to keep my zinnias looking fresh and flowering continuously.
Feed plants lightly with a balanced fertilizer (10-10-10) every 4-6 weeks during the growing season. Too much fertilizer leads to lush foliage but fewer blooms. Water at the base of plants in the morning to keep leaves dry—this prevents fungal diseases like powdery mildew, which loves humid conditions.
⏰ Step 5: Harvest and Enjoy Your Bold Blooms
Harvest zinnias in the morning after the dew has dried. Cut stems at a 45-degree angle just above a leaf node to encourage branching. Place cut flowers in a bucket of cool water immediately to extend their vase life. You'll get the most vibrant colors and longest-lasting blooms by harvesting regularly.
Zinnias are annuals, so they'll die back with the first frost. To save seeds for next year, let a few flowers mature completely on the plant. The seed heads will dry and turn papery—simply rub them between your fingers to release the seeds. Store them in a cool, dry place until your next planting season.
Tips & tricks for growing zinnias from seed outdoors
Here's what nobody tells you—these little details make all the difference in your zinnia-growing journey.
Soil Temperature Matters: The instructions mention planting when nighttime temps stay above 50°F, but here's the thing: soil temperature is even more critical. Use a soil thermometer to confirm your soil is at least 60°F before planting—zinnias won't germinate properly in cooler conditions. If your garden soil runs cold, consider using black plastic mulch a week before planting to warm it up naturally.
The Thinning Technique: When thinning seedlings in Step 3, I've found that using clean, sharp scissors is a game-changer. Snipping at soil level prevents disturbing the roots of your remaining plants, which gives you stronger, healthier zinnias. Pro tip: Thin on a cloudy day to reduce stress on the plants from direct sunlight during this sensitive stage.
Deadheading Discipline: Those 3-4 day deadheading intervals in Step 4 are non-negotiable for continuous blooms. Set a phone reminder or tie it to your existing garden routine—like right after watering. I like to use small garden shears for this task; they make quick work of spent blooms without damaging the stems. The key is consistency—miss a day or two, and you'll notice fewer new flowers appearing.
Harvesting Hack: For the longest vase life, harvest zinnias in the morning when their stems are fully hydrated from overnight dew. Immediately place them in a bucket of cool water—this helps maintain their vibrant colors. I also like to remove the lower leaves from the stems before arranging; this prevents bacterial growth in the water and keeps your bouquets fresh longer.
Pro Tips for Growing Zinnias From Seed Outdoors
- Here's what nobody tells you—these little details make all the difference in your zinnia-growing journey.
- Soil Temperature Matters: The instructions mention planting when nighttime temps stay above 50°F, but here's the thing: soil temperature is even more critical.
- The Thinning Technique: When thinning seedlings in Step 3, I've found that using clean, sharp scissors is a game-changer.
Frequently asked questions
Got questions?
Growing zinnias from seed is easy once you know the basics. Here are answers to the most common queries to help you grow bold, vibrant blooms with confidence!
When is the best time to plant zinnia seeds outdoors?
Plant zinnia seeds after the last frost when soil temperatures reach at least 60°F (15°C). For most U.S. climates, this means late spring to early summer (May–June). Zinnias are frost-sensitive, so avoid planting too early—wait until nighttime temps stay above 50°F (10°C).
How long does it take for zinnia seeds to germinate?
Zinnia seeds typically germinate in 5–10 days under ideal conditions (warm soil, consistent moisture, and sunlight). Keep seeds moist but not soggy—overwatering can cause rot. Once sprouted, seedlings emerge quickly and grow fast!
Why aren’t my zinnia seeds sprouting?
Common culprits include cold soil, poor drainage, or seeds planted too deep (they need light to germinate!). Try pressing seeds lightly into soil (no deeper than ¼ inch) and keeping them warm. If mold appears, reduce moisture and improve airflow.
Are zinnias prone to pests or diseases?
Zinnias attract aphids, spider mites, and Japanese beetles, but they’re generally low-maintenance. Remove pests by hand or spray with neem oil. For fungal issues (like powdery mildew), ensure good airflow and avoid overhead watering. Deadhead spent blooms to encourage more flowers!
Can I grow zinnias from seed indoors first?
Yes! Start seeds 4–6 weeks before the last frost in biodegradable pots. Use a seed-starting mix and keep them under grow lights (or in a sunny window). Transplant seedlings outdoors when they’re 2–3 inches tall and hardened off (acclimated to outdoor conditions).
Wrapping up and next steps
Growing zinnias from seed is a rewarding and easy way to add vibrant color to your garden in just two months! With minimal effort—sunny spots, well-draining soil, and consistent watering—you’ll be enjoying bold blooms that attract pollinators and brighten any space. Don’t wait for spring—start now!
Ready to dive in? Grab your seeds, pick a sunny patch, and let nature do the rest. Your future garden will thank you! 🌸🌿