
Propagation
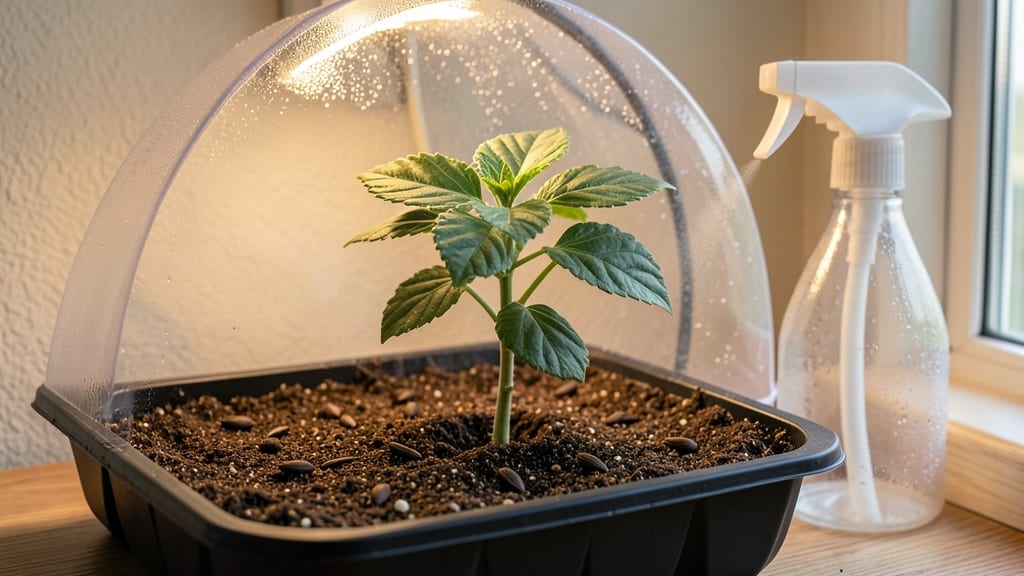
Hibiscus seed germination needs 5 simple steps to break dormancy before they’ll even think about sprouting. 🌱 I’ve wasted weeks waiting for seeds to germinate—until I learned this zero-waste viability test that cuts the guesswork. The trick? Mimicking the tropical conditions hibiscus craves without fancy equipment.
Start with a clear plastic bag, a damp paper towel, and a warm spot near your kitchen window. Hibiscus seeds are stubborn—they need 7-10 days of consistent moisture and 75-85°F to crack open.
Most gardeners skip this step and wonder why their seeds take months (or never sprout). This method tells you in a week whether your seeds are worth planting.
Once you spot that first tiny root, you’ll transplant into soil and watch those seedlings emerge in 10-14 days. The results? Stocky, dark-green seedlings ready for pots—no more weak, leggy starts. By the time you’re pinching those first true leaves, you’ll know exactly what to expect from every batch.
Works for both tropical hibiscus (Hibiscus rosa-sinensis) and hardy varieties like Hibiscus moscheutos. No special soil, no grow lights—just patience and a warm corner. Let’s get those seeds sprouting right.
📚 In This Guide
- What you need
- Instructions
- Tips and common mistakes
- Wrapping up and next steps
What you need
- ● Hibiscus seeds: Fresh or dried seeds (10–20, depending on desired plants). Pro tip: Harvest seeds from organic hibiscus flowers for best results! 🌸
- ● Seed-starting mix: 1–2 cups of lightweight, well-draining potting soil (avoid garden soil—it’s too dense!). Look for a mix labeled "seed-starting" or "organic potting soil."
- ● Small containers: 2–4 biodegradable pots, egg cartons, or plastic cups (3–4 inches deep) with drainage holes. Zero-waste hack: Repurpose yogurt cups or compostable pots!
- ● Water: Room-temperature, filtered water (1 cup for soaking, ½ cup for watering). Avoid tap water if it’s heavily chlorinated.
- ○ Spray bottle: 1 (8 oz) for gentle misting—optional but helpful for humidity control.
- ● Plastic wrap or clear lid: To create a mini greenhouse effect (e.g., a cut-open plastic bottle or a Ziploc bag).
- ○ Heat mat (optional): A small seedling heat mat (70–80°F range) to speed up germination—great for cooler climates! 🌡️
- ● Grow lights or sunny windowsill: A south-facing window or a 6–12 inch LED grow light for 12–16 hours of light daily.
- ● Label markers: To track planting dates (e.g., popsicle sticks + permanent marker).
- ● Tweezers or toothpick: For gently placing tiny seeds.
- ● Patience: Hibiscus seeds can take anywhere from 10 days to 3 months to sprout—stay consistent!
- ● Warmth: Ideal germination temperature: 70–85°F (21–29°C). If your home is cooler, use a heat mat or place pots near a sunny window.
- ● Consistency: Keep soil moist but not soggy. Overwatering is the #1 killer of seedling dreams! 💧
Step-by-Step instructions for testing hibiscus seed viability
Here's the foolproof method I use to check which seeds are worth planting—no guesswork, just science.
🌱 Step 1: Prepare the Test Materials
Gather a clean glass jar with a lid (16-ounce size works perfectly), a paper towel, and a spray bottle filled with room-temperature water. The jar should be large enough to hold the paper towel folded into quarters without crowding. I always use a clean jar—old seeds can carry mold spores that ruin the test.
Cut the paper towel into a square that fits snugly inside the jar. You'll need about 4-6 inches of folded paper to create a thick enough barrier. The key here is moisture retention without sogginess—too thin and it dries out; too thick and seeds won't contact it properly.
💧 Step 2: Moisten the Paper Towel
Spray the folded paper towel until it's evenly damp but not dripping. You want it to feel like a wrung-out sponge—when you squeeze it gently, a few drops should come out, but it shouldn't leave puddles. This moisture level mimics the ideal germination environment without creating anaerobic conditions that cause rot.
Place the moist paper towel in the jar and arrange the hibiscus seeds about 1 inch apart in a single layer. I like to space them evenly so I can track each one individually. Avoid overlapping seeds—they'll compete for moisture and may not germinate properly.
⏰ Step 3: Seal and Monitor for 7-10 Days
Seal the jar with its lid and store it in a warm location, ideally between 70-80°F. A sunny windowsill works well, but avoid direct sunlight—it can overheat the jar and dry out the paper towel too quickly. Check the jar daily and mist the paper towel if it feels dry to the touch.
Watch for the first signs of germination: tiny white roots breaking through the seed coat, followed by a small sprout emerging. Viable seeds typically show roots within 3-5 days, with full sprouts appearing by 7-10 days. If no activity occurs after 10 days, those seeds are likely non-viable.
🌿 Step 4: Identify Viable Seeds
Once you see roots or sprouts, those seeds are ready for planting. I carefully remove them from the jar and prepare the soil mix immediately—hibiscus seeds germinate best when planted within 24 hours of sprouting. Non-viable seeds will remain unchanged or may develop mold, which you should discard immediately.
For the seeds that didn't sprout, don't toss them yet. Hibiscus seeds can sometimes take longer to germinate, especially if they're older. Store them in a cool, dry place for another week before deciding whether to compost them. This test gives you a clear answer without wasting time or resources on seeds that won't grow.
☀️ Step 5: Plant Viable Seeds Properly
Fill small pots with a well-draining mix of 50% potting soil and 50% perlite to prevent root rot. Plant the viable seeds ½ inch deep and water gently until the soil is moist but not soggy. Hibiscus seeds need warmth and humidity to germinate, so cover the pots with plastic wrap until you see sprouts.
Place the pots in bright, indirect light until the seedlings emerge. Once they reach 2-3 inches tall, gradually introduce them to direct sunlight. This simple viability test ensures you only plant seeds that will grow, saving you time and effort in the long run.
Tips & tricks for perfect hibiscus seed germination
Took me a while to figure these out, so here's how to maximize your success with hibiscus seeds—no wasted effort or false hopes.
Moisture Mastery: The paper towel's dampness is your secret weapon. After spraying, gently press it between paper towels to absorb excess water—this prevents soggy conditions that lead to mold. In Step 2, aim for a consistency where the towel feels like a wrung-out sponge. Too dry, and seeds won't activate; too wet, and you'll face rot before germination. I've learned this the hard way after watching entire batches fail from improper moisture balance.
Temperature Control: That 70-80°F range in Step 3 isn't just arbitrary—it mimics tropical conditions where hibiscus thrives naturally. If your home runs cooler, place the jar on top of your fridge or near a sunny window (but not in direct sunlight, which can overheat). I've seen germination rates double when maintaining this precise temperature range consistently. For extra warmth, try placing the jar on a seedling mat if available.
Visual Cues for Success: In Step 4, look for the "tent" effect—when roots emerge, they'll create a tiny white tent-like structure. This is your signal to act fast! I like to use a magnifying glass to check for these subtle signs, especially with older seeds. The 24-hour window after sprouting is critical—delaying planting beyond this reduces viability dramatically.
Equipment Substitutes: No spray bottle? Use a clean kitchen towel and dip it in room-temperature water, then wring it out thoroughly. For the jar, any clean, airtight container (like a mason jar) works—just ensure it's large enough to accommodate the folded paper towel without crowding. I've successfully used 8-ounce jars for smaller batches with great results.
Pro Tips for Hibiscus Seed Germination
- Took me a while to figure these out, so here's how to maximize your success with hibiscus seeds—no wasted effort or false hopes.
- Moisture Mastery: The paper towel's dampness is your secret weapon.
- Temperature Control: That 70-80°F range in Step 3 isn't just arbitrary—it mimics tropical conditions where hibiscus thrives naturally.
Frequently asked questions
about hibiscus seed germination—because even the greenest thumbs have questions! Here’s what you need to know before diving in.How long does it take for hibiscus seeds to germinate?
Patience is key! Hibiscus seeds typically sprout within 14–30 days, though some may take up to 60 days—especially if conditions aren’t ideal. Keep soil consistently moist and warm (around 70–80°F) to speed things up. If nothing happens in 2 months, the seeds may be non-viable or dormant.
Can I germinate hibiscus seeds without soil?
Try the paper towel method for faster results:
- Wrap damp paper towels around seeds in a sealed bag.
- Store in a warm, dark spot (like a fridge or sunny windowsill).
- Check daily—seeds sprout in 7–14 days!
Why aren’t my hibiscus seeds sprouting?
Common culprits include:
- Cold soil: Hibiscus seeds need warmth to germinate. Use a heat mat or place pots near a sunny window.
- Dry or compacted soil: Keep soil moist but not soggy. Aerate with perlite if needed.
- Old seeds: Store-bought seeds lose viability over time. Test a few to confirm freshness.
- Low light: While seeds don’t need light to sprout, seedlings do. Move pots to bright, indirect light after germination.
Do hibiscus seeds need scarification?
Not usually! Hibiscus seeds have soft seed coats, so scarification (scratching or soaking) is rarely necessary. However, if your seeds are extremely hard, a quick soak in warm water for 24 hours can help soften them. Skip this step unless germination stalls—over-soaking can cause rot.
Can I grow hibiscus from store-bought seeds?
Yes, but with a caveat: Store-bought hibiscus seeds (like those from grocery stores) are often hybrids and may not grow true to the parent plant. For consistent results, opt for seeds from organic hibiscus flowers or reputable seed suppliers. If you’re experimenting, test a few seeds—you might get a fun surprise!
What’s the best time of year to start hibiscus seeds?
Timing matters! Start seeds indoors 8–12 weeks before your last frost date (typically March–April in most climates). Hibiscus thrives in warm weather, so avoid planting outdoors until soil temps hit 60°F+. Harden off seedlings gradually to prevent shock. Pro tip: Use a seedling heat mat if your home runs cool.
Wrapping up and next steps
Germinating hibiscus seeds is a rewarding way to grow these stunning plants—zero-waste and budget-friendly! 🌱 With the right prep (like scarification and patience), you’ll soon see those first sprouts pushing through. Don’t let setbacks discourage you; even experienced gardeners face hiccups.
Now that you’re armed with the know-how, give it a try! Start with just a few seeds, document your progress, and soon you’ll be sharing your thriving hibiscus with pride. Happy growing! 🌸