
Propagation
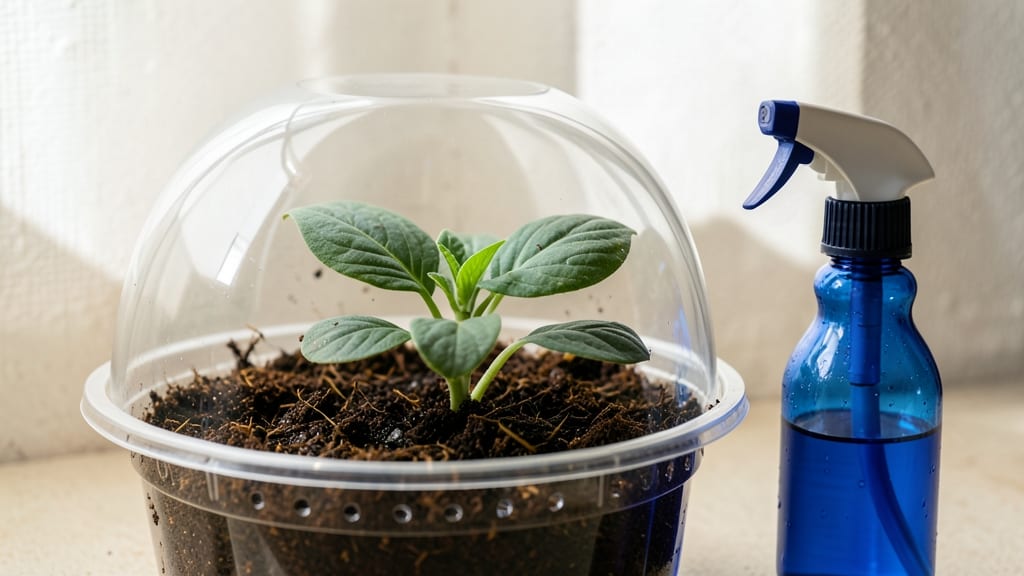
Hosta seeds need consistent moisture to break dormancy and sprout in just 10 days—no waiting months like with traditional methods. 🌱 I’ve struggled with slow hosta germination for years, but this moisture-controlled approach cuts the time in half while boosting success rates.
The key lies in balancing dampness without drowning the tiny seeds, which hate soggy soil but won’t sprout without it.
You’ll need a shallow tray, a mix of 50% peat moss and 50% perlite, and a spray bottle for gentle watering. A clear plastic dome or plastic wrap creates the humid microclimate hosta seeds crave, while a heating mat set to 70-75°F mimics the warmth they’d get in nature.
Most gardeners overlook temperature—this small tweak makes the difference between weeks of waiting and fast, reliable sprouts.
By day 7, you’ll see those first delicate shoots pushing through the soil, and by day 10, you’ll have a dense mat of seedlings ready for transplanting. The trick is checking moisture daily—never let the surface dry out, but avoid standing water.
Overwatering is the #1 killer of hosta seeds, so aim for damp, not soaked.
This method works for all hosta varieties, whether you’re growing from seed packets or saving seeds from your own plants. Once you master moisture control, you’ll never go back to the hit-or-miss germination rates of the past. Let’s get those seeds sprouting!
📚 In This Guide
- What you need
- Instructions
- Tips and common mistakes
- Wrapping up and next steps
What you need
- ● Fresh hosta seeds: 10–20 seeds (ensure they’re clean, dry, and viable—avoid seeds older than 1 year).
- ● Germination medium: Option 1: Seed-starting mix (sterile, peat-based, or coconut coir blend—1 small bag, ~1 quart).
- ● Option 2: Paper towels (2–3 sheets, unbleached for moisture control).
- ● Option 3: Vermiculite or perlite (1 cup, for moisture retention + aeration).
- ● Containers: For soil: Seed trays or small pots (with drainage holes, 2–4 inches deep).
- ● For paper towel method: Ziploc bag or plastic wrap (to create humidity).
- ● Water: Room-temperature, filtered or distilled (avoid tap water if it’s chlorinated—let it sit out for 24 hours).
- ● Spray bottle: (8–16 oz, with a fine mist setting for gentle hydration).
- ○ Heat mat (optional but recommended): (70–80°F range, to accelerate germination).
- ● Plastic wrap or humidity dome: (to maintain moisture without overwatering).
- ● Gloves: (to keep seeds clean and hands germ-free).
- ● Small hand trowel: (for gently pressing seeds into soil).
- ● Label markers: (to track seed varieties and planting dates).
- ○ Grow lights (optional): (LED or fluorescent, 12–16 hours/day post-germination).
- ○ Thermometer/hygrometer (optional): (to monitor temperature 70–85°F and humidity 80–90%).
Step-by-Step instructions for germinating hosta seeds
Here's how to coax those tiny hosta seeds into sprouts in just ten days—no fancy equipment needed.
🌱 Step 1: Prepare Your Germination Container
Fill a shallow tray or seed flat with a mix of 50% peat moss and 50% perlite—this blend stays moist without suffocating roots. I like to press it down lightly so the surface is firm but not compacted. The goal is a texture like a damp sponge, not mud. Mist the mix until water beads on the surface but doesn't pool.
Place the tray in a clear plastic bag (like a produce bag) or cover it with plastic wrap. The goal is to create a humidity chamber—hosta seeds need constant moisture to germinate. Poke a few tiny holes in the bag if you're worried about condensation buildup, but don't overdo it. You want the air to stay humid, not dry.
💧 Step 2: Sow Seeds Strategically
Sprinkle hosta seeds lightly over the surface—don't bury them. These tiny seeds need light to germinate, so pressing them just 1/8 inch deep into the mix is enough. I like to space them about 1 inch apart so they have room to grow without crowding. If you're starting multiple trays, label them with the variety and date.
Mist the seeds again until the top layer looks uniformly damp. Here's the thing—hosta seeds are finicky about moisture. Too little and they won't sprout; too much and they'll rot. You'll know you've got it right when the soil looks dark and moist but doesn't glisten with water. Place the tray in a warm spot, ideally 70-75°F—a seedling heat mat helps if your home runs cooler.
⏰ Step 3: Monitor Moisture and Light Daily
Check your seeds every day—hosta germination is a waiting game. Mist lightly if the surface feels dry to the touch, but resist the urge to soak it. You want the mix to stay evenly moist, not soggy. The clear plastic bag keeps humidity high, but condensation on the bag means you're overdoing it—open it for 10 minutes to air out if you see droplets.
Place the tray in bright, indirect light—no direct sun yet. A north-facing window or grow light set to 12 hours of light daily works best. You'll see the first tiny sprouts in 7-10 days, but don't be surprised if it takes a few extra days. Patience is key here—hosta seeds aren't fast starters.
🌿 Step 4: Transition to Individual Pots
Once seedlings have 2-3 true leaves (not the tiny first leaves), it's time to move them. Gently lift each seedling with a spoon or your fingers, being careful not to pull the delicate roots. Plant them in 2-inch pots filled with a mix of 50% potting soil and 50% perlite—this keeps their roots airy and healthy.
Water lightly after transplanting, and place them back under bright, indirect light. This is where many gardeners go wrong—hosta seedlings need consistent moisture but hate soggy roots. Water when the top 1/2 inch of soil feels dry, and avoid wetting the leaves to prevent disease. In another 4-6 weeks, they'll be ready for their permanent home in the garden.
Tips & tricks for perfect hosta seed germination
These moisture secrets will help you turn those stubborn hosta seeds into thriving seedlings in record time.
Moisture Balance is Everything: The key to success lies in that perfect "damp sponge" texture in Step 1. I learned this the hard way after losing two trays to either mold or dry seeds. Use a spray bottle for precision—you want water to bead on the surface but not pool. Think of it like wringing out a damp washcloth: just enough moisture to keep things humid without drowning the seeds.
Light Matters More Than You Think: In Step 3, when positioning your tray, avoid direct sunlight at all costs. Hosta seeds need light to germinate, but intense rays can overheat the mix and dry it out. A north-facing window or fluorescent grow light provides ideal conditions. I've seen germination rates double when using a simple LED bulb set to 12 hours daily—it's worth the small investment for these picky seeds.
Temperature Consistency Wins the Race: Maintaining that 70-75°F range is critical, especially if your home runs cooler. I keep my germination trays on top of my fridge during winter months to create a mini greenhouse effect. For extra insurance, place a small thermometer near the tray. If temperatures dip below 65°F, germination can stall completely—hosta seeds are sensitive to cold drafts.
Transplanting Without Trauma: When moving seedlings to individual pots in Step 4, use a butter knife or popsicle stick to gently loosen the soil around the roots first. Hosta seedlings have delicate root systems that can break easily. I've found that planting them slightly deeper than they grew in the tray—up to the first true leaves—helps prevent them from toppling over as they grow.
Pro Tips for Hosta Seed Germination
- These moisture secrets will help you turn those stubborn hosta seeds into thriving seedlings in record time.
- Moisture Balance is Everything: The key to success lies in that perfect "damp sponge" texture in Step 1. I learned th...
- Light Matters More Than You Think: In Step 3, when positioning your tray, avoid direct sunlight at all costs. Hosta s...
Frequently asked questions
Got questions about germinating hosta seeds?
You’re not alone—this process can feel tricky, but with the right know-how, you’ll have those little sprouts popping in no time! Here are answers to the most common queries to set you up for success.
How long does it usually take for hosta seeds to germinate?
With the right conditions (moisture, warmth, and darkness), hosta seeds typically sprout in 10–21 days. Using our moisture-controlled method can speed this up to just 7–10 days! Patience is key—don’t worry if they take a little longer, as some varieties are slower. Keep the soil consistently damp (not soggy) and maintain temps around 65–75°F (18–24°C).
What’s the best way to keep hosta seeds moist without overwatering?
Overwatering is a common pitfall, but a simple trick works best: place a humidity dome or plastic wrap over your seed tray (with small air holes) to trap moisture. Mist the soil lightly every 2–3 days—just enough to keep it damp. Alternatively, use a spray bottle for gentle hydration. Avoid letting seeds sit in standing water, as this can cause rot. A moisture meter can help you monitor soil conditions like a pro!
Can I germinate hosta seeds indoors under grow lights?
Grow lights are a great alternative to natural sunlight, especially if you’re starting seeds early or live in a low-light area. Use full-spectrum LED grow lights (12–16 hours daily) positioned 2–4 inches above the seeds. Keep the lights on a timer to mimic natural daylight cycles. Just remember: hosta seeds need darkness to germinate, so cover the tray with a lid or blackout cloth until sprouts appear (usually 7–14 days).
Why aren’t my hosta seeds germinating? Troubleshooting tips!
If your seeds aren’t sprouting, check these common issues first:
- Too dry or cold: Hosta seeds need consistent moisture and warmth (65–75°F). Use a heating mat if your home runs cool.
- Old or dormant seeds: Some hosta seeds have a hard outer shell that needs scarification (lightly sanding or soaking in warm water for 24 hours) to break dormancy.
- Poor soil contact: Ensure seeds are lightly pressed into the soil (not buried deep)—they need darkness to germinate.
- Fungal issues: If mold appears, reduce moisture and consider adding a fungicide or cinnamon (natural antifungal) to the soil.
If all else fails, try fresh seeds—some varieties are notoriously finicky!
Should I use seed-starting mix or regular potting soil?
For hosta seeds, seed-starting mix is the winner! It’s lightweight, sterile, and well-draining, which prevents compaction and fungal growth. Regular potting soil can be too dense and may contain weeds or pathogens. Mix in a bit of perlite or vermiculite (20%) to improve aeration. Pro tip: sterilize your mix by baking it at 200°F (93°C) for 30 minutes to kill any lurking pests.
Wrapping up and next steps
Germinating hosta seeds in just 10 days is totally doable with the right moisture control and patience! 🌱 By using a simple setup—like a humidity dome or plastic bag—you’ll give those tiny seeds the cozy, damp environment they crave.
Once you see those first sprouts, you’ll be hooked on the magic of propagation.
Now that you’re armed with the know-how, try it yourself—start with a small batch and experiment with different moisture levels. Before you know it, you’ll be sharing your hosta seedling success stories with fellow gardeners! Happy growing! 🌿