
Propagation
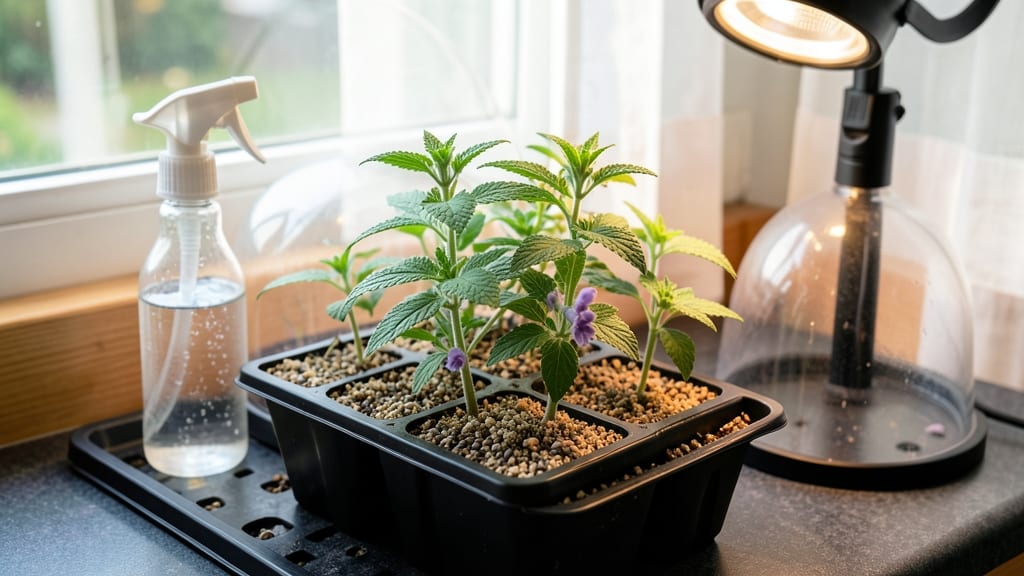
Growing catnip from seed indoors is faster than you think—germination happens in just 7-14 days when you follow this simple routine. 🌱 I’ve grown catnip indoors for years, and the key is keeping the soil warm and moist without overcomplicating things.
Most people assume it’s tricky, but with the right setup, you’ll have lush, fragrant plants ready for your cat (or pest-repellent garden) in weeks.
You’ll need just three supplies: catnip seeds (available online or at garden centers), a shallow container with drainage, and a grow light or sunny windowsill. The soil should be light and airy—mix equal parts potting soil and perlite to prevent soggy roots.
Plant seeds ¼ inch deep and keep them in a warm spot (around 70°F) until sprouts appear. This method cuts out the guesswork of outdoor planting.
Once sprouted, your seedlings will need bright light for 12-14 hours daily to stay sturdy. If they stretch too tall (leggy growth), it’s a sign they need more light or less space. Water gently at the soil level—never let them sit in water—to keep roots healthy.
Within 6-8 weeks, you’ll have a full-sized plant, and your cat will thank you for the fresh, fragrant leaves.
This method works for any indoor space, from sunny kitchens to basement setups with grow lights. The plants thrive in containers, making them perfect for renters or small spaces.
Plus, catnip doubles as a natural pest deterrent—plant it near your garden’s edges to keep mosquitoes and flies away. Ready to grow yours?
📚 In This Guide
- What you need
- Instructions
- Tips and common mistakes
- Wrapping up and next steps
What you need
- ● Catnip seeds: 1 packet (about 50–100 seeds, non-GMO preferred for organic growth). Look for Nepeta cataria seeds.
- ● Seed-starting trays or small pots: 2–4 (4-inch diameter or larger) with drainage holes. Biodegradable pots work great!
- ● Seed-starting mix: 1 bag (sterile, well-draining blend like pro-mix or coconut coir). Avoid garden soil—it’s too dense!
- ● Grow lights or sunny windowsill: A full-spectrum LED grow light (12–16 hours/day) or a south-facing window (6+ hours of sunlight).
- ● Spray bottle: For gentle watering (avoid over-saturating seeds).
- ○ Humidity dome or plastic wrap: To create a mini greenhouse effect (optional but highly recommended for germination).
- ○ Misting bottle (optional): For maintaining moisture without disturbing seeds.
- ● Tweezers or toothpick: For delicate seed placement (catnip seeds are tiny!).
- ● Fertilizer: A balanced liquid fertilizer (5-5-5 or 10-10-10) diluted to half-strength once seedlings sprout.
- ○ Thermometer (optional): Ideal germination temp: 70–75°F (21–24°C). A heat mat (optional) can speed things up!
- ● Pruning shears: For trimming leggy seedlings later.
- ● Larger pots (6+ inches): For transplanting once seedlings are 2–3 inches tall.
Step-by-step instructions for growing catnip from seed indoors
Here's how I get catnip sprouting in just days—not weeks—using simple supplies and a few clever tricks.
🌱 Step 1: Prep Seeds and Containers for Fast Germination
Catnip seeds germinate quickly, but they need a little help breaking dormancy first. Soak the seeds in warm water for 12 hours—this softens their tough outer shell and speeds up sprouting. I use a small bowl or even a damp paper towel folded over them. Just make sure the water stays lukewarm (not hot) to avoid shocking the seeds.
Fill your 4-inch pots (or a seed tray) with sterile seed-starting mix—never garden soil, which can harbor fungus. Press the mix down lightly so it’s firm but not compacted. Moisten it until damp to the touch, like a wrung-out sponge. The goal is even moisture without soggy spots. I like to tap the pots gently on the table to settle the soil before planting.
🌱 Step 2: Plant Seeds Shallow and Keep Them Warm
Sow the seeds ¼ inch deep—any deeper and they’ll struggle to reach the light. I use a toothpick to poke tiny holes in the soil, then drop 2-3 seeds per pot (just in case). Cover lightly with a sprinkle of mix, then mist the surface with water until it’s damp but not dripping.
Here’s the trick for fast germination: place the pots in a warm spot (around 75°F). A seedling heat mat works wonders, but even a sunny windowsill over a radiator can do the trick. Cover the pots with clear plastic wrap to trap warmth and moisture—this mimics the cozy conditions catnip loves. Check daily for condensation; if it’s heavy, lift the wrap for 10 minutes to prevent mold.
💧 Step 3: Watch for Sprouts and Adjust Light
Germination happens in 5-7 days, but don’t be surprised if you see tiny green sprouts in just 3 days—that’s catnip’s superpower! Once they emerge, remove the plastic wrap immediately to prevent damping-off (a fungal disease that collapses seedlings overnight). You’ll know it’s time when the first tiny leaves (cotyledons) peek through the soil.
Move the pots to a bright spot with 6+ hours of indirect light—south or west-facing windows are ideal. If your space is dim, supplement with a grow light kept 4 inches above the plants. Leggy seedlings (stretched, pale stems) mean more light is needed. Pinch the tips if they grow too tall—this encourages bushier growth and stronger plants.
🌿 Step 4: Thin and Care for Bushy Plants
When seedlings have 2-3 sets of true leaves (the bigger leaves after the first tiny ones), thin them to the strongest plant per pot. Snip the weaker ones at the base with scissors—this avoids disturbing the roots. Water gently at the base (not overhead) to keep soil evenly moist but not soggy. Catnip hates wet feet, so ensure pots have drainage holes.
Fertilize lightly 2 weeks after thinning with a balanced liquid fertilizer (like 10-10-10) diluted to half-strength. I feed mine every 4 weeks during the growing season. By 8-10 weeks, your catnip will be lush and ready to share with your feline friends—or harvest for your own use!
Tips & tricks for perfect indoor catnip growth
These little tricks will help you turn those tiny seeds into thriving catnip plants in record time—no green thumb required.
Soaking Secret: The 12-hour soak isn't just about speed—it's about breaking dormancy. I like to place my bowl of seeds in a warm spot (like near the kitchen sink) while soaking, which helps maintain that perfect lukewarm temperature. Pro tip: If you forget to soak overnight, don't panic—just extend the soak to 24 hours. The seeds will still germinate, though you might lose that "superpower" 3-day sprout advantage.
Container Prep Pro Tip: When filling your 4-inch pots, press the sterile seed-starting mix down gently but firmly—this creates ideal contact between seeds and soil. I find tapping the pots 3-4 times on the table helps settle the mix without compacting it too much. This prevents air pockets that could trap moisture and lead to mold. And remember, those drainage holes? They're not optional—catnip hates soggy feet!
Lighting Strategy: For that crucial 6+ hours of indirect light, I've found that placing pots on a rotating tray (even just turning them 180 degrees every few days) helps prevent lopsided growth. If you're using a grow light, keep it 4 inches above the plants and adjust the height as they grow—too close can scorch those delicate leaves. Watch for those leggy seedlings as your early warning system for insufficient light.
Thinning Technique: When thinning to the strongest plant per pot, I use clean scissors to snip at the base rather than pulling. This prevents disturbing the roots of your remaining seedling. The 2-3 sets of true leaves rule is key—waiting too long can lead to overcrowding, while thinning too early might remove your best performer before it shows its strength.
Pro Tips for Grow Catnip From Seed Indoors
- These little tricks will help you turn those tiny seeds into thriving catnip plants in record time—no green thumb req...
- Soaking Secret: The 12-hour soak isn't just about speed—it's about breaking dormancy. I like to place my bowl of seed...
- Container Prep Pro Tip: When filling your 4-inch pots, press the sterile seed-starting mix down gently but firmly—thi...
Frequently asked questions
about growing catnip from seed indoors—because even the best gardeners need a little extra help! Here are answers to the most common queries to keep your catnip journey smooth and stress-free.How long does it take for catnip seeds to germinate indoors?
Catnip seeds typically germinate in 7–14 days when kept warm (around 70–75°F) and moist. For faster results, use a seedling heat mat or place pots on top of your fridge. Patience is key—don’t disturb the soil while waiting!
Can I grow catnip indoors year-round, or do I need seasonal adjustments?
Yes! Catnip thrives indoors year-round if you provide 12–16 hours of bright light daily (grow lights work great). In winter, supplement with artificial light to prevent leggy growth. Just keep temperatures steady (60–75°F) and avoid drafts.
Will my cat destroy my catnip plants before they mature?
Absolutely—cats can be relentless! Start with a small batch or use a cat-proof grow tent with mesh sides. Alternatively, grow catnip in a hanging planter or elevated shelf until harvest. Bonus: Let your cat sniff a leaf or two to satisfy their curiosity!
What if my catnip seeds don’t sprout? Troubleshooting tips?
No sprouts? Check these fixes:
- Moisture: Keep soil damp (not soggy) but not waterlogged.
- Temperature: Seeds need warmth—try a heat mat or sunny windowsill.
- Freshness: Old seeds (over 1 year) may fail—buy new ones!
- Light: Seeds need darkness to germinate; cover with a thin cloth if needed.
Can I use catnip seeds from a store-bought bag for growing?
Yes! Store-bought catnip seeds (from pet stores or seed packs) work perfectly for growing. Just ensure they’re organic, non-GMO seeds labeled for planting. Avoid pre-packaged "catnip treats"—those are often processed and won’t sprout.
Wrapping up and next steps
Growing catnip from seed indoors is a rewarding and low-fuss project—perfect for cat lovers and green thumbs alike! 🌱 With the right setup, you’ll enjoy fast germination and a thriving plant that’ll keep your feline friends rolling in no time.
Now that you’re armed with the how-to, why not expand your indoor garden? Try experimenting with companion plants like basil or mint next, or share your newfound skills with fellow plant enthusiasts. Happy growing!