
Lawn
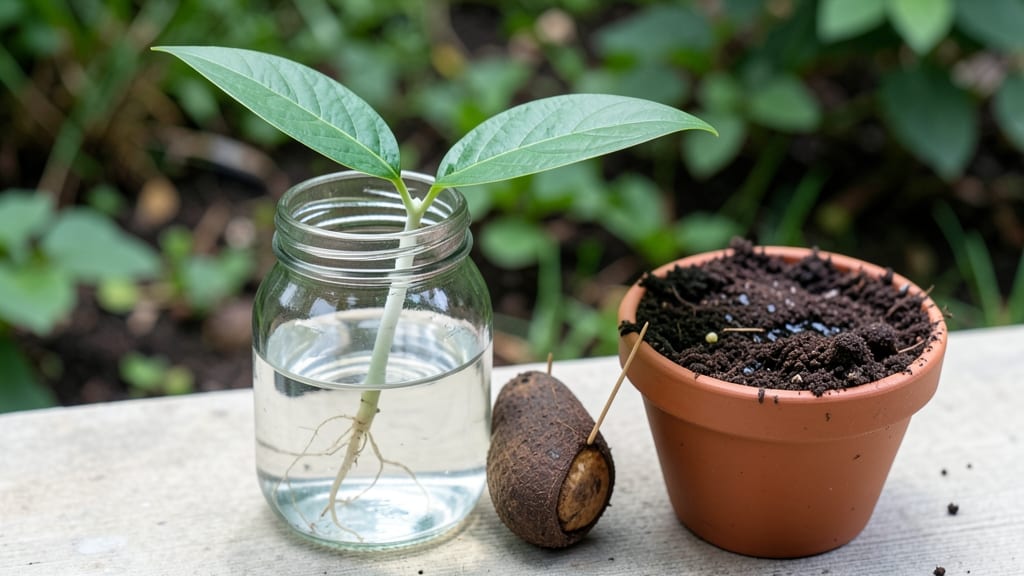
Growing an avocado tree from a seed is easier than you think—just patience and a little water. 🌱 I’ve sprouted three this way, and the first green shoot feels like magic after weeks of watching that pit float. The best part?
You’re turning kitchen scraps into a living plant that could grow into a 60-foot tree. Start with a clean seed and a glass of water—no fancy tools needed. The roots appear in 2-6 weeks, and once they’re 3-4 inches long, you can transfer to soil.
My first attempt took 5 weeks, and while some seeds never sprout, most do with consistent care. You’ll end up with a lush, glossy-leaved sapling that thrives in bright light.
Keep the soil moist but not soggy, and watch as it grows into a striking houseplant—or even a future outdoor tree. The process is simple, but the reward is undeniably satisfying. Works for any avocado pit, no matter the variety.
Here’s how to do it without losing hope along the way!
📚 In This Guide
- What you need
- Instructions
- Tips and common mistakes
- Wrapping up and next steps
What you need
- ● 1 ripe avocado (pick one with a firm but soft pit—perfect for sprouting!)
- ● 1 avocado seed (pit) (cleaned and prepped—see next steps!)
- ● Toothpicks (3-4) (for balance—wooden or plastic, ~2 inches long)
- ● Small glass or jar (wide-mouth, ~8–12 oz, to hold water)
- ● Water (room temperature, filtered if possible)
- ● Well-draining potting soil (4–6 inches deep, mix with perlite or sand for aeration)
- ● Small pot or container (4–6 inches in diameter, with drainage holes)
- ● Knife or spoon (for scooping out the pit)
- ● Paper towels (to keep the pit moist during early stages)
- ○ Spray bottle (for gentle watering—optional but helpful!)
- ● Plastic wrap or lid (to create a humidity dome)
- ● Grow lights or sunny windowsill (6+ hours of indirect light daily)
- ● Fertilizer (balanced, diluted) (once leaves appear, ~every 2–4 weeks)
Step-by-Step instructions for sprouting an avocado seed
Turn that kitchen scrap into a thriving tree with this simple, zero-waste method.
🌱 Step 1: Prepare the Seed for Planting
Start with a fresh avocado pit—one that still has some flesh attached. Rinse it thoroughly to remove any remaining pulp. The key here is patience: you'll need to let the seed dry out slightly for about 2-3 days at room temperature. Place it on a paper towel in a warm spot until the outer skin feels slightly leathery but not brittle.
Here's the trick: insert 3-4 toothpicks around the middle of the pit, spacing them evenly. You're creating a little hammock to suspend it over water without letting it sit directly in the liquid. The toothpicks should be sturdy enough to hold the weight but not pierce too deeply—about ½ inch in should do it. This prevents rot while keeping the base moist.
💧 Step 2: Suspend and Hydrate the Seed
Fill a shallow glass or jar with enough water to reach about 1 inch deep at the bottom. Gently lower the toothpick-suspended pit so the bottom ⅓ of the seed sits in the water. The top should remain dry. Place the container in a warm spot with bright, indirect light—think kitchen counter near a window, but not direct midday sun yet.
Change the water every 2-3 days to prevent bacterial growth. You'll know it's working when you see roots emerging from the bottom within 2-4 weeks. Watch for the first tiny white root to appear—this is your signal that germination has begun. If the water gets cloudy before roots appear, dump it and refresh with clean water immediately.
☀️ Step 3: Encourage Root and Shoot Growth
Once roots reach about 2-3 inches long, it's time to move the pit to a more permanent growing setup. Fill a small pot—4-6 inches deep—with well-draining potting mix. Make a hole in the center about 2 inches deep and gently place the pit so the roots are covered but the top half remains exposed.
Press the soil lightly around the roots to secure them without compacting. Water gently until it drains from the bottom, then place the pot in bright, indirect light again. You'll see a shoot emerge from the top within 1-3 weeks. This is where many people quit—don't! The first leaves might look strange, but stay patient. Once the shoot reaches 6 inches tall, you can gradually introduce it to more direct sunlight for a few hours daily.
🪴 Step 4: Transition to Soil and Care for Your Seedling
After the shoot has 3-4 true leaves (not just the initial spiky ones), it's ready for its final pot. Choose a 6-8 inch pot with drainage holes and fill it with fresh potting mix. Dig a hole deep enough to bury about half the pit while keeping the top exposed. Press the soil gently around the base to support the seedling.
Water thoroughly after transplanting, then maintain 1 inch of soil moisture at all times. Place the pot in a spot with 6+ hours of indirect sunlight daily. Avoid cold drafts or temperature swings—avocado seedlings thrive in 65-80°F conditions. You'll know you're doing well when the seedling grows new leaves every 2-3 weeks. This is your reward for sticking with it!
Tips & tricks for growing an avocado seed sprout
Here's what nobody tells you about keeping your avocado seed alive through every stage.
The Drying Secret: That 2-3 day drying period in Step 1 is critical—don't rush it. Place your avocado pit on a paper towel in a warm spot where it can breathe. I learned this the hard way after watching two pits rot from being too damp. The skin should feel slightly leathery when you gently press it, not slick or sticky.
Toothpick Placement Matters: When inserting those 3-4 toothpicks in Step 1, space them evenly around the middle of the pit. I recommend using wooden toothpicks—they're sturdy enough to hold the weight without breaking. Push them in about halfway (½ inch) to prevent them from falling out while keeping the base of the pit exposed to water. This balance is what prevents rot while encouraging root growth.
Water Quality Check: In Step 2, always use room-temperature water—not cold from the tap. Cold water can shock the seed and slow germination. Also, change that water every 2-3 days religiously. Cloudy water means bacteria is growing, which can drown your roots before they even start. I keep a small spray bottle nearby to rinse the roots when changing water to remove any buildup.
Light Transition Strategy: When moving your seedling to soil in Step 3, start with bright indirect light for at least 2 weeks before introducing direct sunlight. I place my pot near an east-facing window where it gets morning sun but not harsh afternoon rays. Gradually increase direct sunlight exposure by 1-2 hours per week once the shoot reaches 6 inches. This slow transition prevents sunburn on delicate new leaves.
Pro Tips for Make An Avocado Seed Sprout
- Here's what nobody tells you about keeping your avocado seed alive through every stage.
- The Drying Secret: That 2-3 day drying period in Step 1 is critical—don't rush it. Place your avocado pit on a paper ...
- Toothpick Placement Matters: When inserting those 3-4 toothpicks in Step 1, space them evenly around the middle of th...
Frequently asked questions
Got questions about sprouting an avocado seed? You’re not alone! Here are answers to the most common queries to help you grow your own avocado tree with confidence.
How long does it take for an avocado seed to sprout?
Patience is key! Most avocado seeds take 2–6 weeks to sprout, depending on warmth, humidity, and care. Keep the toothpick method setup in a warm, bright spot (not direct sunlight) and check for tiny roots or a crack in the seed—signs it’s waking up!
What if my avocado seed won’t sprout?
Don’t worry—seeds need the right conditions. If yours isn’t sprouting after 6 weeks, try these fixes:
- Warmth: Move it to a spot above 70°F (21°C), like near a sunny window or under a grow light.
- Moisture: Ensure the seed stays damp (not soggy) by misting daily or wrapping the base in a damp paper towel.
- Patience: Some seeds take months—keep checking!
Can I grow an avocado tree indoors?
Avocado trees thrive indoors with bright, indirect light (a south-facing window is ideal). Use a well-draining pot and rotate the plant weekly for even growth. Just be prepared for slower growth—indoor trees may take years to bear fruit compared to outdoor varieties.
What do I do once the seed sprouts?
Once you see roots or a shoot, it’s time to transplant! Gently place the seed in a small pot with well-draining soil (like a mix of potting soil and perlite). Keep the soil moist but not waterlogged, and place it in bright, indirect light. Prune any brown or mushy roots to prevent rot.
Can I eat the avocado seed if it doesn’t sprout?
Nope! While avocado seeds are non-toxic, they’re bitter and fibrous—not edible. Plus, they’re packed with persin, a compound that can cause mild stomach upset in some people. Stick to composting or repurposing the seed for crafts (like jewelry or planters) instead!
Wrapping up and next steps
Growing an avocado seed into a thriving plant is a rewarding zero-waste project that connects you to nature—literally! 🌱 With just a little patience and care, you’ve turned kitchen scraps into a living reminder of sustainability.
Now that your seedling is sprouting, it’s time to celebrate this tiny victory and keep nurturing it toward becoming a full-grown tree.
Ready for the next step? Transplant your seedling into a pot with well-draining soil and give it a sunny spot to flourish. Who knows? You might just be growing the future shade tree for your garden! 🌳