
Lawn
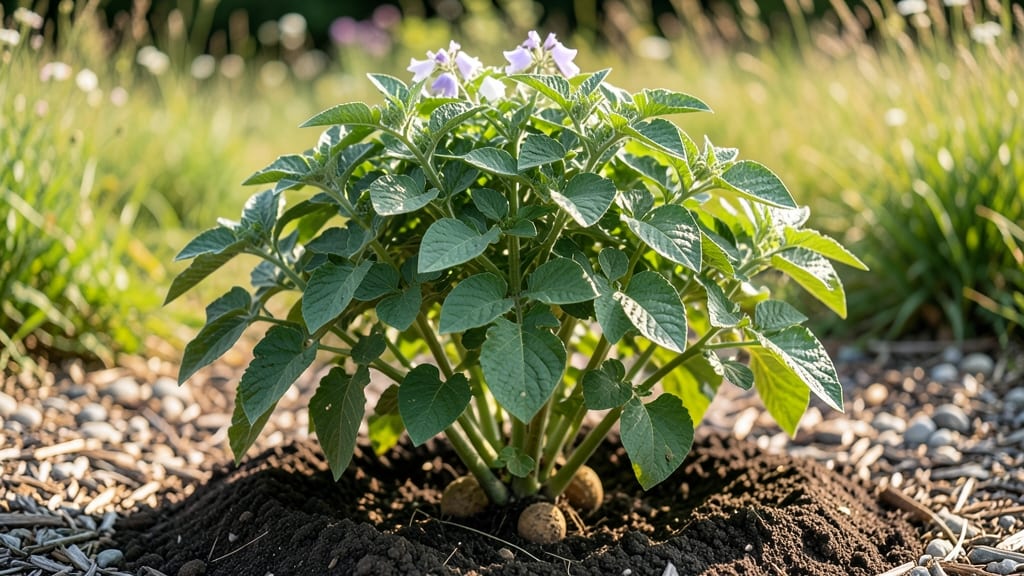
Huckleberry Gold seed potatoes turn your harvest into next year's planting stock with just a few simple steps. 🌱 These aren't your average spuds—they're a blight-resistant variety that keeps producing even when conditions get tough, and their zero-waste approach means every tuber gets a second life in the soil.
Start with certified disease-free seed potatoes, and plant them 4-5 inches deep in loose, well-draining soil when the ground reaches 45°F. They thrive in full sun (6+ hours daily) and need consistent moisture—think of it like keeping a damp sponge, not a swamp.
The key to saving sprouts is letting a few tubers mature fully while others stay small enough to replant.
By harvest time, you'll have both dinner on the table and next year's planting potatoes ready to go. The secret? Cure the tubers in a cool, dark place for 2 weeks before storing, which hardens their skins and prevents rot.
Even if pests or disease strike, you'll still have viable sprouts to replant.
Works in zones 3-8, making it perfect for early spring or fall planting. The first year sets you up for years of free seed potatoes—just save the smallest, healthiest tubers from each harvest. Here's how to make it work without wasting a single potato.
📚 In This Guide
- What you need
- Instructions
- Tips and common mistakes
- Wrapping up and next steps
What you need
- ● Huckleberry Gold seed potatoes – 1–2 lbs (450–900g) (ensure they’re organic or untreated for best results).
- ● Sharp knife or potato cutter – For slicing sprouts cleanly.
- ● Paper towels or newspaper – 2–3 sheets (to keep cuttings dry).
- ● Small containers or resealable bags – 2–4 (for storing cuttings).
- ● Labeling tags or markers – To track variety and sprouting progress.
- ○ Glass jars or plastic bins – Optional (for better airflow if storing cuttings long-term).
- ○ Hydrogen peroxide (3%) or cinnamon – Optional (1 tsp per container) to prevent rot.
- ○ Grow lights or sunny windowsill – Optional (if sprouting indoors before planting).
- ○ Gardening gloves – Optional (to keep hands clean while handling potatoes).
Step-by-Step instructions for saving Huckleberry Gold potatoes as seed
Turn this year’s harvest into next year’s plants with minimal effort—just follow these simple steps.
🌱 Step 1: Cure the Potatoes Before Storing
After digging, let the potatoes cure for 2-3 weeks in a dark, dry place at 50-60°F. This toughens their skins and prevents rot during storage. I spread mine on a wire rack in my garage—just enough space so they don’t touch. Avoid washing them first; dirt acts as a natural barrier against moisture.
Check weekly for soft spots or sprouts. If you see any, remove those potatoes immediately—they won’t store well. The goal is to let the skins harden while keeping the tubers firm. After curing, gently brush off excess dirt with your hands (no water!). Store them in a paper bag or mesh sack in a cool, dark corner.
☀️ Step 2: Choose the Healthiest Tubers for Seed
In late winter, examine your stored potatoes for the plumpest, firmest ones with 2-3 eyes (the little dimples where sprouts emerge). Avoid any that feel soft, shriveled, or have mold. I pick the medium-sized ones—they’ve got enough energy stored to grow strong roots and shoots next season.
Set aside 4-6 potatoes per plant you want to grow (since not all will sprout). Cut the larger ones into chunks with at least 1-2 eyes per piece, but let the cut ends dry for 24 hours before planting. This prevents rot. I use a clean knife and lay the pieces on paper towels to dry—no need for fancy equipment.
🌿 Step 3: Pre-Sprout for Faster Growth
About 4-6 weeks before your last frost date, place your selected potatoes in a bright, cool spot (like a sunny windowsill) to encourage sprouting. The ideal temperature is 50-60°F—too warm and they’ll grow leggy stems. You’ll see tiny white sprouts in 2-3 weeks.
Once sprouts reach 1-2 inches long, they’re ready to plant. If they grow too long before going in, they’ll flop over—so time this step carefully. I keep mine in a shallow tray with a damp paper towel to prevent drying out. Avoid watering them directly; excess moisture invites rot.
🪴 Step 4: Plant Sprouted Potatoes Directly
Dig trenches 4-6 inches deep and 12 inches apart in well-drained soil. Space rows 3 feet apart to allow for bushy growth. Place each potato chunk with the sprouts facing up, then cover lightly with soil. Water gently but don’t soak the area—you want the soil moist but not soggy.
Mulch with 2-3 inches of straw to retain moisture and regulate soil temperature. This is especially important if your spring weather swings between cold nights and warm days. The mulch also keeps the soil from crusting over, which can smother young sprouts. Water lightly every 3-4 days until you see green leaves breaking through.
⏰ Step 5: Monitor and Maintain Through Harvest
Once plants emerge, water deeply 1-2 times per week, depending on rainfall. Huckleberry Golds need consistent moisture but hate soggy roots. You’ll know they’re happy when the foliage is dark green and vigorous. Fertilize lightly with compost tea or a balanced organic fertilizer when flowers appear to encourage tuber formation.
Harvest when the plants flower and the leaves start yellowing, usually 90-120 days after planting. Dig carefully with a fork to avoid puncturing the tubers. Cure them again for 1-2 weeks in a dark, well-ventilated spot before storing. Now you’ve got a zero-waste cycle—next year’s seed potatoes are already growing!
Tips & tricks for perfect Huckleberry Gold seed potatoes
Took me a while to figure these out, so here goes—these tricks will help you avoid common pitfalls and get the best sprouts next season.
Storage Wisdom: The 2-3 week curing period at 50-60°F is non-negotiable for toughening skins, but I’ve learned the hard way that humidity matters too. If your storage area feels damp, add a small box of baking soda to absorb excess moisture. This prevents the potatoes from developing soft spots that ruin your seed stock. I also label my paper bags with the date—this helps me track which potatoes are freshest when selection time comes around.
Selection Tip: When choosing your seed potatoes in Step 2, don’t just look for eyes—feel for firmness. A potato that’s slightly soft or has a hollow sound when tapped won’t produce strong sprouts. I tap each one gently against my palm; a good seed potato makes a solid "thunk." Also, save the medium-sized ones—they’ve got the perfect balance of stored energy for both roots and shoots.
Pre-Sprout Strategy: The 4-6 week pre-sprouting window before your last frost date is crucial, but timing varies by climate. If you’re in a warmer zone, start earlier to avoid leggy sprouts. I keep my sprouting potatoes on a seedling heat mat set to 60°F—this gives me more control than a windowsill. Once sprouts hit 1-2 inches, I transfer them to egg cartons for easier handling when planting. This keeps the delicate sprouts from breaking during transplant.
Planting Technique: When planting in Step 4, don’t bury the potato chunks too deep—they need access to light for photosynthesis to start early. I use a trowel to make small pockets just 2-3 inches deep, then cover with soil. For extra insurance, I sprinkle a pinch of wood ash around each planting hole—this adds potassium and helps prevent scab disease, which can be devastating to young potato plants.
Pro Tips for Huckleberry Gold Seed Potatoes
- Took me a while to figure these out, so here goes—these tricks will help you avoid common pitfalls and get the best s...
- Storage Wisdom: The 2-3 week curing period at 50-60°F is non-negotiable for toughening skins, but I’ve learned the ha...
- Selection Tip: When choosing your seed potatoes in Step 2, don’t just look for eyes—feel for firmness. A potato that’...
Frequently asked questions
How do I know when my Huckleberry Gold potatoes are ready to harvest for seed?
Harvest your seed potatoes when the foliage starts to yellow and die back—usually 2–3 weeks after flowering. Avoid digging too early (small tubers won’t sprout well) or too late (they’ll shrivel). Cure them in a dark, cool (40–50°F) spot for 2 weeks to toughen skins before storing.
Can I plant Huckleberry Gold potatoes directly from the grocery store?
Technically yes, but it’s risky! Store-bought potatoes may carry diseases or be treated to prevent sprouting. For best results, use certified seed potatoes (like Huckleberry Gold) or grow your own from last year’s harvest. If you must use grocery potatoes, chit them first (place in light to sprout eyes) and plant only organic, untreated tubers.
What’s the best way to store my seed potatoes until next spring?
Store them in a cool (35–40°F), dark, humid (85% humidity) space—like a basement or unheated garage. Use burlap sacks or cardboard boxes (not plastic!) to prevent rot. Check monthly for soft spots or sprouts; remove any damaged potatoes immediately. Pro tip: Sprinkle them lightly with sand or peat moss to reduce moisture.
How many times can I reuse Huckleberry Gold potatoes as seed?
Ideally, use them for 2–3 seasons max. After that, diseases (like blight) or genetic weakening may reduce yields. If you’re reusing, inspect for pests/diseases before planting and rotate crops to avoid soil depletion. For long-term growing, order fresh seed potatoes every few years.
What if my Huckleberry Gold potatoes sprout but don’t grow well?
Common culprits: poor soil (add compost!), too much nitrogen (leads to leafy but no tubers), or inconsistent watering. Ensure they get 5–6 hours of sun and well-draining soil. If sprouts wilt, check for blight (remove affected plants) or overwatering. Pro tip: Plant in hills or mounds to improve drainage.
Are there organic alternatives to chemical treatments for seed potatoes?
Yes! Soak potatoes in 1% hydrogen peroxide solution (30 mins) or garlic spray (1 part garlic juice to 10 parts water) to deter fungi. For pests, try neem oil or diatomaceous earth. Always rinse before planting. Bonus: Planting marigolds nearby can naturally repel pests!
Wrapping up and next steps
Growing Huckleberry Gold seed potatoes is a rewarding way to reduce waste and ensure a plentiful harvest next season! By saving your best tubers, you’re not just saving money—you’re embracing a sustainable, zero-waste gardening practice.
Whether you’re a seasoned gardener or just starting out, this method is simple, cost-effective, and full of potential.
Ready to plant the seeds of success? 🌱 Start small with a few tubers, experiment with your setup, and watch your garden thrive. Happy growing—and here’s to next year’s bumper crop! 🥔✨