
Size
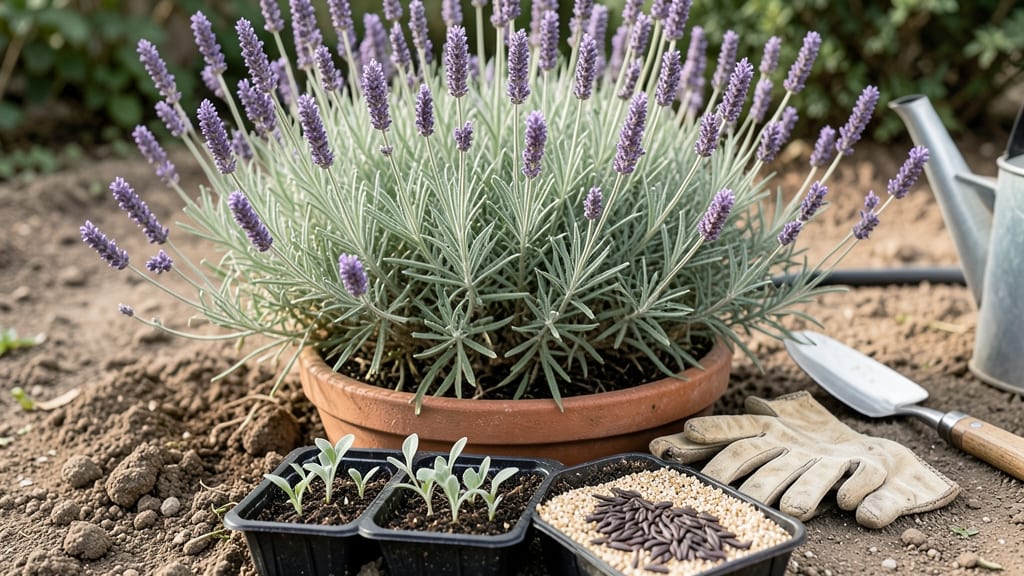
Growing a garden from lavender seed means fragrant purple blooms in just two years—not the three or four years you’d wait with store-bought plants. 🌿 I’ve started lavender from seed three times now, and the first whiff of those buds opening is worth every bit of patience.
The key? Mimicking the Mediterranean climate they love, even in your backyard.
Start with a well-draining soil mix—lavender hates soggy roots—and plant seeds just 1/8 inch deep in early spring. A sunny spot with 6+ hours of direct light daily is non-negotiable, and watering only when the top inch of soil is dry keeps seedlings from rotting.
Most beginners overwater, which is why so many give up before the first blooms appear.
By late summer of the second year, you’ll see those silvery-green spikes pushing through, followed by clusters of purple flowers that smell like a Provence summer. The plants stay productive for decades with minimal care—just trim back after flowering and avoid heavy fertilizers. Once established, they’re nearly indestructible.
Perfect for borders, pollinator gardens, or even container growing. Here’s how to avoid the common pitfalls that trip up new gardeners—like slow germination and leggy seedlings—so you end up with a thriving lavender patch instead of a graveyard of failed attempts.
📚 In This Guide
- What you need
- Instructions
- Tips and common mistakes
- Wrapping up and next steps
What you need
- ● Lavender seeds: Choose Lavandula varieties like Lavandula angustifolia (English lavender) or Lavandula x intermedia (hybrid lavender). Buy 1–2 packets (50–100 seeds each) for a small garden or 5+ packets for larger plantings.
- ● Seed-starting trays or pots: 4–6" deep with drainage holes. Use 1–2 trays (50+ cells each) or 6–12 individual pots for better spacing.
- ● Seed-starting mix: Lightweight, well-draining mix (avoid garden soil). 1–2 bags (1–2 cubic feet) for trays or 1 bag (0.5 cubic feet) for pots.
- ● Grow lights or sunny windowsill: Lavender seeds need 12–16 hours of light daily. A full-spectrum LED grow light works best if natural light is limited.
- ● Misting spray bottle: For gentle watering (16 oz or larger).
- ● Plastic wrap or humidity dome: To retain moisture while seeds germinate.
- ● Heat mat: Speeds up germination (set to 70–75°F).
- ● Fertilizer: Low-nitrogen, balanced (10-10-10) or organic fertilizer for seedlings (use sparingly!).
- ● Transplanting tools: Small trowel (2–3" wide) and biodegradable pots for easier outdoor transfer.
- ● Well-draining soil: Mix 50% garden soil + 50% perlite/sand for outdoor planting.
- ● Mulch: Gravel or pebbles to retain moisture and deter weeds (lavender hates soggy roots!).
Step-by-Step guide to growing lavender from seed
Here's how to cultivate fragrant lavender perennials from seed—tested through multiple seasons in my garden.
🌱 Step 1: Prepare Seeds and Planting Medium
Lavender seeds have a hard outer coating that requires stratification to break dormancy. I mix the seeds with damp sand in a sealed container and refrigerate them for 4-6 weeks—this mimics winter conditions and triggers germination. Keep the sand moist but not soggy during this time.
While the seeds stratify, prepare a well-draining planting mix. Combine equal parts sandy loam, perlite, and compost to create a loose, airy medium. Lavender roots need excellent drainage, so avoid heavy clay or peat-based mixes that retain too much moisture. Fill seed trays or small pots with this blend, leaving ½ inch of space at the top.
🌱 Step 2: Sow Seeds and Provide Warmth
After stratification, sow seeds ⅛ inch deep in the prepared mix. I use a small spoon to create shallow furrows and place seeds ¼ inch apart—they germinate slowly, so spacing them properly prevents overcrowding later. Cover lightly with additional mix and mist gently with water until the surface feels barely damp.
Place the trays in a warm, bright location with 70-75°F soil temperatures. A seedling heat mat works wonders here, as lavender seeds need consistent warmth to sprout. Expect germination in 2-4 weeks, though some varieties may take longer. Keep the soil evenly moist but never soggy—lavender seedlings are prone to damping-off if conditions are too wet.
☀️ Step 3: Transplant Seedlings to Individual Pots
Once seedlings develop 2-3 sets of true leaves (the second pair after the initial cotyledons), it's time to transplant them into 3-inch pots. Handle seedlings carefully—they have delicate roots. Use the same well-draining mix from Step 1 and plant each seedling 1 inch deep, firming the soil gently around the base.
Place the pots in a sunny spot with 6+ hours of direct light daily. If growing indoors, supplement with a grow light to prevent leggy growth. Lavender seedlings need strong light to develop sturdy stems. You'll notice healthy seedlings have compact, dark green foliage and short internodes (spaces between leaves). If stems stretch excessively, they're not getting enough light.
🪴 Step 4: Harden Off and Plant Outdoors
Two weeks before your last frost date, begin hardening off seedlings by placing them outdoors in a sheltered spot for 1-2 hours daily. Gradually increase exposure over 10-14 days, moving them to sunnier locations and introducing them to wind. This process toughens seedlings, preventing transplant shock when they go into the garden.
Choose a sunny, well-drained spot for lavender with full sun exposure. The plants thrive in USDA Zones 5-9 and prefer slightly alkaline soil with a pH of 6.5-7.5. Space plants 18-24 inches apart to allow for mature growth. After planting, water deeply but reduce irrigation once established—lavender is drought-tolerant and overwatering causes root rot.
⏰ Step 5: Maintain Through First Season
During the first growing season, focus on establishing strong root systems. Water only when the soil feels completely dry to the touch, typically every 2-3 weeks in warm climates. Avoid fertilizing—lavender prefers lean soil and excessive nutrients promote weak growth. Prune lightly in early spring to shape plants and remove dead stems.
Watch for signs of stress: yellowing leaves indicate overwatering, while pale, sparse foliage suggests insufficient light. Lavender blooms best on mature plants, so avoid heavy pruning until the second year. By the end of the first season, your seedlings will have developed deep roots and sturdy stems, ready to produce fragrant blooms in years to come.
Tips & tricks for perfect lavender seed growth
These practical insights will help you navigate the unique challenges of growing lavender from seed—where patience and precision pay off big time.
Stratification Success: When refrigerating your seeds for the required 4-6 weeks, I recommend placing a small piece of damp paper towel in the container with the seeds. This creates a more consistent moisture environment than relying solely on the sand. Check weekly to ensure the sand remains just barely damp—lavender seeds won't germinate if dried out during stratification. The key is mimicking winter's slow moisture release, not creating a soggy environment.
Seedling Light Requirements: The 6+ hours of direct light daily mentioned for Step 3 is non-negotiable, but here's what I've learned: If you're growing indoors without natural sunlight, use a full-spectrum grow light positioned 6 inches above the seedlings. Lavender seedlings will stretch dramatically (a condition called etiolation) if they don't get enough light, and these elongated stems rarely recover. Rotate your trays daily for even growth—you'll notice one side leaning toward the light if you don't.
Transplanting Technique: When transplanting to 3-inch pots in Step 3, I've found that gently pressing the soil around the base of each seedling creates better root-to-soil contact. Use a chopstick or pencil to make a small hole, then place the seedling at the correct 1-inch depth before firming the soil. This prevents air pockets that can cause transplant shock. Water thoroughly after transplanting, but let the top inch of soil dry out before watering again—this prevents damping-off disease that plagues lavender seedlings.
Hardening Off Strategy: For the 10-14 day hardening off period in Step 4, I recommend starting with just 30 minutes outdoors on day one, even if the instructions suggest 1-2 hours. Gradual exposure prevents stress shock. Place your seedlings in a spot that gets morning sun but afternoon shade initially, then slowly move them to full sun. Watch for wilting—this is a sign they're getting too much sun too soon. Healthy seedlings should show slight darkening of their leaves but maintain their compact shape during this process.
Pro Tips for Lavender Seed Grow A Garden
- These practical insights will help you navigate the unique challenges of growing lavender from seed—where patience an...
- Stratification Success: When refrigerating your seeds for the required 4-6 weeks, I recommend placing a small piece o...
- Seedling Light Requirements: The 6+ hours of direct light daily mentioned for Step 3 is non-negotiable, but here's wh...
Frequently asked questions
Got questions about growing lavender from seed? You’re not alone! Here are some of the most common queries—plus quick, practical answers to help you cultivate a thriving, fragrant garden.
How long does it take for lavender seeds to germinate?
Lavender seeds can be slow to sprout—typically 2 to 4 weeks in ideal conditions (warmth, consistent moisture, and indirect light). Some varieties take even longer (up to 6 weeks). Patience is key! Use a heating mat to speed up germination if needed.
When is the best time to plant lavender seeds?
For best results, sow lavender seeds indoors 8–12 weeks before your last frost date (early spring). If planting outdoors, wait until late spring or early summer after soil temperatures reach at least 70°F (21°C). Lavender hates cold soil!
Why aren’t my lavender seeds sprouting? Troubleshooting tips?
Lavender seeds need light to germinate—don’t bury them deep (just press them into soil). Other common issues:
- Too cold: Use a heat mat or move to a warmer spot.
- Too wet: Keep soil moist but not soggy (overwatering drowns seeds).
- Old seeds: Lavender seeds lose viability quickly—use fresh seeds for best results.
Can I grow lavender from seed if I live in a humid climate?
Lavender thrives in dry, well-drained soil and struggles in humidity. If you’re in a damp area, try:
- Planting in containers with excellent drainage (terracotta pots work well).
- Choosing dwarf varieties (like ‘Hidcote’ or ‘Munstead’) that tolerate slightly more moisture.
- Mulching with gravel or sand to improve airflow around roots.
How do I know if my lavender seedlings are healthy?
Healthy lavender seedlings have:
- Small, rounded leaves (not elongated or yellowing).
- Sturdy stems (not leggy or weak).
- No signs of mold or rot (check soil moisture if leaves look mushy).
Thin seedlings to 3–4 inches apart once they sprout to prevent overcrowding. Pinch back leggy stems to encourage bushiness!
Wrapping up and next steps
Growing lavender from seed is a rewarding journey that fills your garden with fragrance and beauty—and yes, it’s totally doable! Whether you’re a seasoned gardener or just starting, these tips will help you nurture thriving lavender plants that bloom year after year.
The key? Patience, proper care, and a little love for your green thumb. 🌱
Now that you’re armed with the know-how, take the next step: pick a sunny spot, grab those seeds, and let your garden transform into a lavender paradise. Happy planting—your future blooms are waiting! 🌸