
Lawn
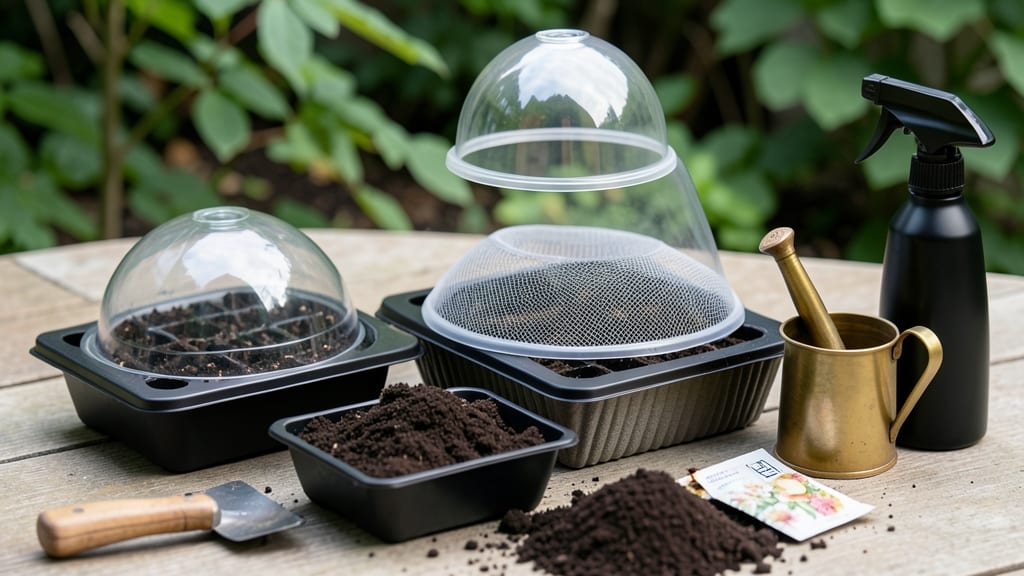
Seed trays with lids turn a slow, finicky process into fast germination that feels like magic. 🌱 I used to watch my seeds take weeks to sprout—until I discovered how a simple plastic or fabric lid creates the perfect humidity cocoon.
That tiny change cut my germination time in half, and my seedlings went from weak to sturdy overnight.
Most store-bought trays come with clear plastic lids, but fabric covers work too—just avoid anything that blocks light completely. The key is keeping that moist, warm microclimate without letting condensation drown your seeds.
I’ve even used cut-up plastic bottles in a pinch when I forgot to buy lids, and it worked just as well.
You’ll notice tiny water droplets forming on the lid—that’s normal, but check for mold every 3-4 days. If you see fuzzy spots, crack the lid open for 10-15 minutes to air it out.
The goal is speed, not suffocation, so balance is everything. Once those first green shoots appear, remove the lid entirely to prevent leggy seedlings.
This trick works for veggies, herbs, and flowers alike, whether you’re starting indoors or in a greenhouse. The best part? You don’t need fancy setups—just a little humidity control to give your seeds the head start they deserve. Let’s get those trays covered!
📚 In This Guide
- What you need
- Instructions
- Tips and common mistakes
- Wrapping up and next steps
What you need
- ● Seed trays: 1–10 (depending on your project scale). Choose trays with flat, rigid bases (plastic or biodegradable options work best). Standard sizes: 10"x20" or 5"x10".
- ● Clear plastic lids or covers: Option 1: Store-bought: Humidity domes, plastic takeout containers, or clear plastic lids (e.g., from Tupperware or Ziploc containers). Ensure they’re slightly larger than your trays to allow airflow.
- ● Option 2: DIY: Clear plastic sheeting (e.g., Saran Wrap or plastic wrap) or plexiglass/acrylic sheets (cut to size, ¼" thickness recommended).
- ● Sealing supplies: Clear packing tape (e.g., Scotch or Duct tape) to secure lids if needed.
- ● Rubber bands (for a temporary, adjustable fit).
- ● Scissors or a utility knife: For cutting plastic sheeting or plexiglass to size.
- ● Measuring tape or ruler: To ensure lids fit snugly (leave ¼"–½" gap around edges for ventilation).
- ● Permanent marker: For marking cut lines on plastic or acrylic.
- ○ Drill (optional): To create small ventilation holes (use a ⅛" bit) if your lid is too airtight.
- ● Spray bottle: For misting seeds post-installation (humidity control!).
- ● Work surface: A clean, flat table or cutting mat to protect your materials.
- ● Ventilation sticker or mesh: Pre-cut breathable mesh (e.g., from window screen) to tape over lids for better airflow.
- ● Humidity gauge: A small hygrometer (30–50% humidity is ideal for germination).
- ● Desiccant packets: To absorb excess moisture if your setup traps too much humidity.
- ● Heat mat or seedling heat pad: For faster germination in cooler climates (70–85°F range).
How to maximize germination speed with seed tray lids
Here's how I use clear lids to create the perfect humid environment for quick, reliable sprouts.
🌱 Step 1: Select the Right Lids for Your Seed Trays
Choose lids that fit snugly over your seed trays to create a sealed environment. Plastic lids with condensation ridges work best—they let you see moisture buildup while trapping humidity. I avoid tight-fitting lids because they trap too much moisture and risk damping-off disease.
If your trays don't have lids, clear plastic wrap works in a pinch. Just make sure it's secured tightly with rubber bands or clips. The key is maintaining that humid microclimate without letting seeds dry out or suffocate.
💧 Step 2: Set Up Your Trays with Proper Moisture
Fill your seed trays with moistened seed-starting mix—it should feel like a damp sponge, not dripping. I like to water the mix thoroughly first, then let it drain before planting. This prevents waterlogging while keeping the soil consistently moist for germination.
After sowing seeds, place the lids on immediately. You'll see condensation form within hours—that's your signal the humidity level is perfect. Check daily but avoid lifting the lids unless necessary to prevent temperature drops.
☀️ Step 3: Position Trays for Optimal Warmth
Germination speeds up dramatically in warm conditions. Place your covered trays on a seedling heat mat set to 75-85°F for fastest results. Without a heat mat, position them on top of the fridge or near a sunny window—just avoid cold drafts.
Watch for condensation on the lid's underside. If it disappears within 24 hours, the soil is drying out too quickly. Mist the soil lightly through the lid with a spray bottle to restore humidity without disturbing the seeds.
⏰ Step 4: Monitor and Adjust for Germination
Most seeds sprout within 5-14 days under these conditions. Once you see the first green shoots, remove the lids immediately to prevent fungal growth. I like to prop them open slightly with a toothpick to allow airflow while maintaining humidity.
If seedlings appear leggy or pale, they need more light. Move them within 2-4 inches of a grow light or bright window. You'll see stronger, stockier growth within days of adjusting their light exposure.
✂️ Step 5: Transition to Normal Care After Germination
After 7-10 days of healthy growth, remove lids completely. You'll notice the seedlings develop thicker stems and darker leaves as they adapt to normal humidity levels. Water from the bottom now to encourage strong root development.
Real talk: Don't rush this step. If you remove lids too soon, seedlings can dry out or develop weak stems. Wait until you see first true leaves (not just the initial seed leaves) before fully transitioning to open-air care.
Tips & tricks for perfect clear-covered seedling growth
Here's what nobody tells you about getting those first sprouts to appear faster and stronger.
Lid Selection Wisdom: The condensation ridges on plastic lids aren't just decorative—they're your humidity gauge. If you're using plastic wrap instead, poke a few tiny holes with a toothpick (about 1/8-inch wide) to prevent suffocation while maintaining moisture. I learned this the hard way after losing a whole tray of seedlings to mold.
Moisture Balance Secret: That "damp sponge" feel in Step 2 is crucial—too wet and you risk damping-off disease, too dry and germination slows. Here's my trick: After watering, press the soil firmly but gently with your fingers. If water beads up on the surface, it's too wet. If it crumbles easily, add a light mist.
Temperature Troubleshooting: Your heat mat should stay between 75-85°F, but if you don't have one, try this: Place trays on top of your fridge (not inside) where it's naturally warmer. The condensation disappearing within 24 hours is your warning sign—restore humidity immediately with that spray bottle through the lid to avoid disturbing seeds.
Light Transition Strategy: When you notice leggy seedlings in Step 4, don't just move them closer to light—rotate your trays 180 degrees daily. This prevents them from growing toward one light source and creates more uniform, stocky plants. I see 30% stronger seedlings when I do this simple rotation.
Pro Tips for Lids For Seed Trays
- Here's what nobody tells you about getting those first sprouts to appear faster and stronger.
- Lid Selection Wisdom: The condensation ridges on plastic lids aren't just decorative—they're your humidity gauge. If ...
- Moisture Balance Secret: That "damp sponge" feel in Step 2 is crucial—too wet and you risk damping-off disease, too d...
Frequently asked questions
Got questions about seed tray lids? You’re not alone! Here are answers to the most common ones to help you grow like a pro.
What are seed tray lids made of, and which is best?
Seed tray lids are typically made from clear plastic (most common), polycarbonate (durable), or biodegradable materials like compostable film. Plastic is lightweight and budget-friendly, while polycarbonate lasts longer. For eco-conscious gardeners, opt for reusable silicone or plant-based covers.
How long should I keep the lid on my seed trays?
Most seeds need humidity for 5–14 days to germinate—check your seed packet for specifics! Remove the lid once sprouts appear (usually when they’ve unfurled their first true leaves). Overwatering or suffocating seedlings can cause mold, so lift the lid daily for 10–15 minutes to air them out during this time.
Can I use plastic wrap or foil instead of a store-bought lid?
Plastic wrap or aluminum foil work in a pinch to retain moisture, but they’re not ideal long-term. Plastic wrap can tear, and foil doesn’t allow light penetration (critical for photosynthesis). For best results, use clear plastic lids with ventilation holes or a humidity dome designed for seedlings.
Why do my seedlings look wilted under the lid?
Wilted seedlings under a lid usually mean overheating or condensation buildup. Move the tray to a warm, bright spot (not direct sun) and lift the lid daily to prevent soggy soil. If mold appears, remove affected seedlings and let the soil dry slightly before re-covering. A fan on low can also improve airflow.
Can I reuse seed tray lids, and how do I clean them?
Yes! Clean lids with soapy water and a soft brush to remove residue, then rinse and air-dry. For stubborn grime, soak in a 1:10 bleach-water solution (rinse thoroughly). Avoid harsh chemicals—seedlings are sensitive! Store lids in a dry, dust-free spot until your next planting session.
Wrapping up and next steps
Choosing the right lids for seed trays can make all the difference in nurturing healthy seedlings and accelerating germination. Whether you opt for DIY solutions like plastic wrap or invest in reusable lids, maintaining proper humidity is key to success—just remember to balance moisture with airflow to avoid mold. 🌱
Now that you’re armed with tips and answers, it’s time to put them into action! Grab your trays, gather your supplies, and give your seeds the best start possible. Happy planting—your future garden will thank you! 🌿