
Lawn
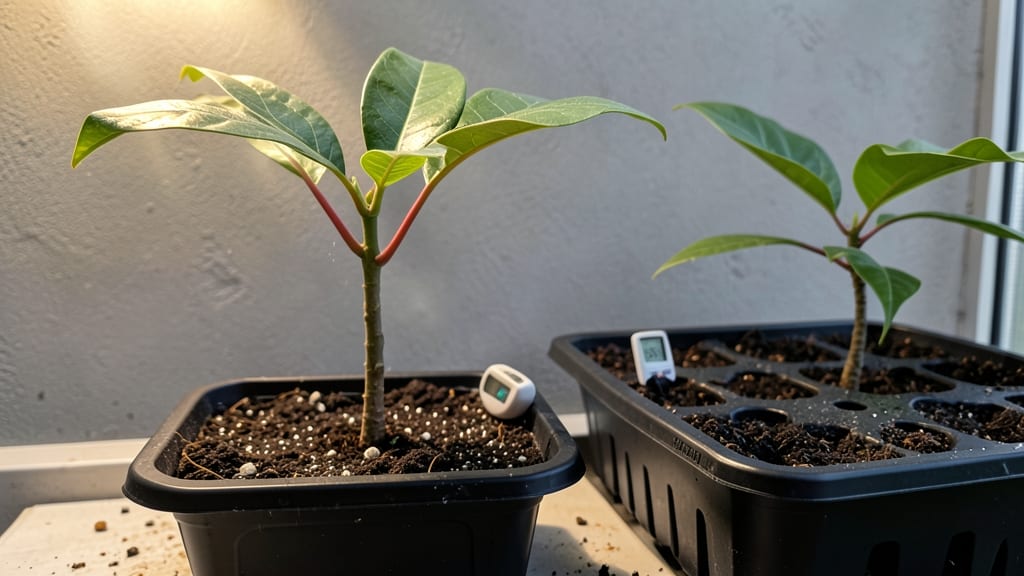
Growing a mango tree from seed reveals the fascinating stages of mango seed growth—one that starts with a single pit and ends with a 30-day-old sapling reaching for the sun. 🌱 The first few weeks reveal nature’s precision: from the moment the seed cracks open to the moment true leaves appear, every stage matters.
I’ve watched my own mango seedlings go from a stubborn sprout to a sturdy 6-inch sapling in just a month, and the process is simpler than you’d think.
The journey begins with germination, where the seed’s energy kicks in, breaking through its shell in 7-14 days. You’ll spot a tiny white root first, followed by a shoot that fights its way upward—like a tiny explorer claiming new territory.
Then comes the seedling stage, where those first leaves (called cotyledons) unfurl, soaking up light to fuel growth. By day 21, you’ll see the real leaves forming, signaling the plant’s shift into independent growth.
What’s most exciting is how fast progress happens once you provide the right care: warmth, moisture, and bright (but indirect) light. By day 30, your sapling will be strong enough to transplant, with a woody stem and leaves that look shockingly mature.
The key is patience—rushing this stage is how seedlings get leggy or weak. With the right touch, you’ll have a thriving young tree ready for its next adventure in the ground.
This method works anywhere with a sunny windowsill or greenhouse, and the best part? You’re not just growing a plant—you’re nurturing a future fruit tree. Let’s break down each stage so you can guide your seedling from start to sapling without a hitch.
📚 In This Guide
- What you need
- Instructions
- Tips and common mistakes
- Wrapping up and next steps
What you need
- ● Mango seeds: 2-3 fresh, plump seeds (harvested from organic, ripe mangoes for best results).
- ● Small pots or containers: 3-4 (6-inch diameter or larger), with drainage holes. Plastic nursery pots or biodegradable peat pots work well.
- ● Well-draining potting mix: 1 bag (look for a blend labeled for seedlings or cacti/succulents). Avoid heavy garden soil—it retains too much moisture.
- ● Watering can or spray bottle: With a fine mist nozzle for gentle hydration.
- ○ Plastic wrap or clear lid: To create a mini greenhouse effect (optional but helpful for humidity).
- ● Grow lights or sunny windowsill: A south-facing window or a 12-16 hour daily light source (grow lights are ideal for consistent growth).
- ○ Humidity tray (optional but recommended): A shallow tray filled with pebbles and water to maintain moisture levels.
- ● Seedling heating mat: Keeps soil warm (70-80°F) to speed up germination.
- ● Fertilizer: A diluted balanced liquid fertilizer (5-5-5 or 10-10-10) for the first feeding after sprouting.
- ● Pruning shears: Small, sharp scissors for trimming excess growth or damaged leaves.
- ● Label markers: To track planting dates and seed varieties.
- ● Garden twine or stakes: For supporting taller saplings as they grow.
Step-by-Step guide to mango seed growth stages
Watch your mango seed transform from a tiny sprout to a sturdy sapling in just 30 days—here's how to guide it.
🌱 Step 1: Prepare and Plant the Seed
Start with a fresh, plump mango seed—avoid dried or shriveled ones. Scrub off any remaining fruit flesh, then let it dry completely for 24 hours to prevent mold. Place the seed horizontally in a small pot filled with moistened seed-starting mix, burying about half of it in the soil. The exposed half helps the seedling emerge upward.
Use a spray bottle to mist the soil until damp but not soggy. Cover the pot with a clear plastic bag or wrap it loosely with plastic wrap to create a humid environment. Place it in a warm spot, ideally 75-85°F, like on top of a refrigerator or near a sunny window. You'll see the first signs of growth—tiny roots pushing through the soil—in about 7-14 days.
🌿 Step 2: Encourage Early Growth and Light Exposure
Once the seedling breaks through the soil, remove the plastic cover immediately to prevent mold and allow airflow. Place the pot under bright, indirect light—a south-facing window works well. Avoid direct sunlight at this stage, as it can scorch the delicate new leaves. You'll notice the first true leaves (not the initial seed leaves) appear in about 2-3 weeks.
Water the soil gently when the top inch feels dry to the touch. Overwatering at this stage can cause the seedling to rot, so it's better to underwater slightly. Rotate the pot every few days to ensure even growth toward the light. If the seedling starts to lean, it's a sign it needs more light or a different position.
☀️ Step 3: Strengthen the Sapling for Outdoor Transition
By 4-6 weeks, your seedling should have a sturdy stem and several sets of true leaves. Gradually introduce it to outdoor conditions by placing it in a shaded area for 1-2 hours daily. Over the next week, slowly increase its time outside, eventually moving it to full sun for a few hours a day. This process, called hardening off, helps the sapling adjust to outdoor temperatures and light.
Ensure the sapling gets 6-8 hours of sunlight daily once fully outdoors. Use a small pot with drainage holes to prevent waterlogging, and fertilize lightly with a diluted balanced fertilizer (like 10-10-10) every 4-6 weeks. Watch for signs of stress, such as yellowing leaves or wilting, which may indicate overwatering or insufficient light.
⏰ Step 4: Monitor and Maintain the Sapling
Over the next 30 days, your sapling will grow rapidly. Prune any yellow or damaged leaves to encourage healthy growth, and ensure the soil remains moist but not waterlogged. If the sapling outgrows its pot, transplant it into a larger container with fresh potting mix to support its root development.
Keep an eye out for pests like aphids or spider mites, which can weaken young plants. If you spot any, treat them with a mild insecticidal soap or neem oil spray. By the end of the month, your sapling should be strong enough to handle outdoor conditions, though it may take a few more years to bear fruit. Patience and care now will set the foundation for a healthy mango tree!
Tips & tricks for perfect mango seed growth
Here's what nobody tells you about nurturing your mango seedling—these tricks make all the difference.
Seed Selection: The freshness of your mango seed is everything. I've learned the hard way that seeds from overripe fruit often fail to sprout. Look for plump, firm seeds with no cracks or soft spots—these are your best bet for successful germination. If you're using store-bought mangoes, choose ones that still have some firmness to the touch.
Temperature Matters: While the instructions call for 75-85°F, I've found that consistency is more important than hitting that exact range. If your home runs cooler, place the pot on top of your refrigerator or near a heat vent. In warmer climates, you might need to move it to a cooler spot during the day. The key is keeping it warm but not hot—think cozy, not sauna-like.
Light Transition Strategy: When you're moving your sapling outdoors in Step 3, don't rush it. Start with just 30 minutes in the shade on day one, then gradually increase by 30 minutes each day. I've seen seedlings go into shock when suddenly exposed to full sun—they'll wilt dramatically and take days to recover. This slow approach mimics natural conditions and gives your plant time to adjust.
Pest Prevention: The best defense against pests is a healthy plant. In Step 4, I recommend inspecting your sapling weekly for early signs of trouble. Yellowing leaves often mean overwatering, while sticky residue on leaves indicates aphids. Neem oil isn't just for treating problems—use it preventatively every two weeks as a spray. The mild scent deters pests without harming your plant.
Pro Tips for Mango Seed Growth Stages
- Here's what nobody tells you about nurturing your mango seedling—these tricks make all the difference.
- Seed Selection: The freshness of your mango seed is everything.
- Temperature Matters: While the instructions call for 75-85°F, I've found that consistency is more important than hitting that exact range.
Frequently asked questions
Got questions about growing mango seeds into saplings?
You’re not alone! Here are answers to the most common queries—from impatient gardeners to first-time planters.
How long does it take for a mango seed to sprout?
A mango seed typically sprouts within 14–30 days after planting, depending on warmth and moisture. If you’ve waited 4+ weeks with no signs of life, check for rot (soft, foul-smelling seed) or adjust conditions—like moving it to a warmer spot (75–85°F) or ensuring consistent dampness (not soggy!). Patience is key!
Can I speed up the germination process?
Yes! Try these tricks:
- Soak the seed in water for 24 hours before planting to soften the shell.
- Use a seedling heat mat (or a sunny windowsill) to maintain warmth.
- Plant the seed pointy-end up in a well-draining mix (pearlite + potting soil).
What do I do if my mango seed only grows a tiny sprout but no leaves?
Don’t panic—this is normal! The first stage is a radicle (root) followed by a shoot. Once the shoot breaks the soil, yellow leaves (cotyledons) will appear within days. If growth stalls:
- Ensure it gets bright, indirect light (no harsh sun yet!).
- Keep soil moist but not waterlogged (overwatering causes rot).
- Fertilize lightly with diluted fish emulsion after true leaves form (not before!).
How do I transplant a young mango sapling without killing it?
Timing and care are everything! Wait until the sapling has 3–4 true leaves and is at least 6 inches tall. Then:
- Water it 24 hours before to reduce shock.
- Use a small pot (6–8 inches) with drainage holes and well-draining soil.
- Gently loosen roots and bury up to the first leaves (not the stem!).
- Avoid direct sun for 1 week post-transplant to help it recover.
Can I grow a mango tree from seed in cold climates?
Mango trees love heat (USDA Zones 10–11) and won’t survive frost outdoors in colder areas. However, you can:
- Grow it as a houseplant in a sunny window or under grow lights.
- Move it outdoors in summer (if temps stay above 50°F) and bring it back inside before fall.
- Choose cold-hardy varieties like ‘Julie’ or ‘Cogshall’ (though they’re rare).
Wrapping up and next steps
Watching a mango seed transform into a thriving sapling in just 30 days is a rewarding journey—one that blends patience, care, and a touch of green magic! 🌱 From the first tiny sprouts to sturdy leaves, each stage teaches you the art of nurturing life.
Whether you're a gardening newbie or a seasoned green thumb, this process is your ticket to growing something truly special.
Ready to take the next step? Plant that seed today and let nature work its wonders. Once your sapling is strong, consider transplanting it into your lawn or garden—where it can flourish for years to come! 🌿