
Lawn
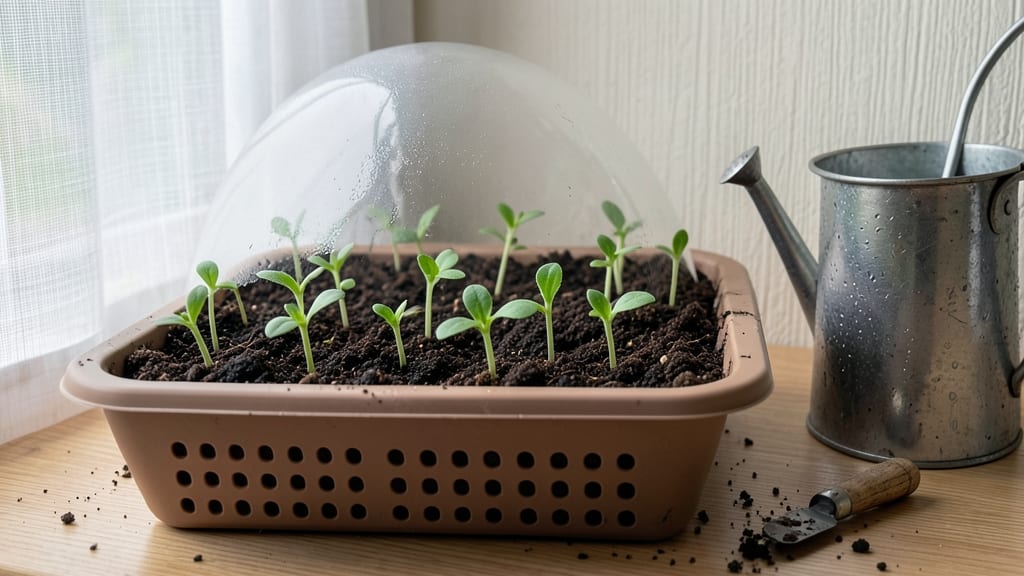
Marigold seeds sprout faster when you mimic their tropical roots—warm soil and consistent moisture are the game-changers. 🌱 I’ve struggled with slow germination until I learned the secret: pre-warming the soil and keeping it damp (not soggy) speeds up those first tiny leaves in just 5-10 days—half the time of waiting weeks for stubborn seeds.
The magic happens in a shallow tray with well-draining soil, covered lightly with plastic or a damp paper towel to trap humidity. Too much water drowns them; too little stalls growth.
Most gardeners overlook the 70-75°F soil temp requirement—marigolds won’t budge without it, so a heat mat or sunny windowsill does the trick.
Once sprouted, you’ll see vibrant green seedlings with tiny serrated leaves within a week. Thin them to 2 inches apart to avoid competition, and move them to brighter light immediately—they stretch like overcaffeinated toddlers if kept in dim conditions. Patience here pays off with blooms by summer.
Troubleshooting is simple: no sprouts after 14 days? Test seed viability or try fresh seeds. Yellow leaves? Overwatering. Leggy stems? More light. These tricks turn finicky marigolds into reliable, cheerful garden stars every season.
📚 In This Guide
- What you need
- Instructions
- Tips and common mistakes
- Wrapping up and next steps
What you need
- ● Marigold seeds – Choose Tagetes varieties like French Marigold or African Marigold. Aim for 10–20 seeds (adjust based on desired plant count).
- ● Seed-starting mix – A lightweight, well-draining peat-free potting soil (e.g., Miracle-Gro Seed Starting Potting Mix). Use 1–2 cups per container.
- ● Containers – Small pots (3–4 inches deep), seed trays, or even recycled containers with drainage holes. 1–2 containers will suffice for 10–20 seeds.
- ● Water spray bottle – For gentle hydration without disturbing seeds.
- ● Clear plastic wrap or humidity dome – To retain moisture during germination.
- ● Grow lights or sunny windowsill – Marigolds need 6–8 hours of light daily for optimal sprouting.
- ○ Heating mat (optional) – Speeds up germination (70–75°F is ideal).
- ● Plant labels – To track varieties if growing multiple types.
- ● Fertilizer (diluted) – A balanced 10-10-10 or fish emulsion can boost early growth.
- ● Tweezers – For careful seed placement in small containers.
Step-by-step guide to germinating marigold seeds quickly
Here's how to coax those stubborn marigold seeds into sprouting within days—not weeks.
🌱 Step 1: Prep Seeds for Faster Germination
Marigold seeds have tough outer shells that slow germination. To speed things up, soak them in warm water (around 80°F) for 12-24 hours before planting. Place them in a small bowl or jar and let them sit—you'll see them plump up noticeably. This softens the seed coat so moisture can penetrate more easily.
After soaking, gently pat them dry with a paper towel. Now they're ready to plant. I like to do this the night before I plan to sow so the seeds are prepped and ready to go in the morning. This step alone can cut germination time in half, from 10-14 days to just 5-7 days.
💧 Step 2: Plant in Warm, Moist Soil
Fill your seed trays or small pots with a lightweight seed-starting mix—never garden soil, which can compact and suffocate young roots. Moisten the soil until it's damp but not soggy, then press it down gently to create a firm planting surface. Marigolds prefer warmth, so place your trays on a seedling heat mat set to 75-80°F if your home runs cooler.
Plant seeds ¼ inch deep—any deeper and they'll struggle to reach the surface. Space them ½ inch apart in rows about 1 inch apart to avoid overcrowding later. I tap the back of a spoon lightly against the seed packet to release one seed at a time, ensuring even spacing. Cover them with a fine mist of water to settle the soil around the seeds.
☀️ Step 3: Provide Consistent Warmth and Humidity
Cover the trays with clear plastic wrap or a humidity dome to trap warmth and moisture. Marigolds germinate best in 70-80°F soil temperatures, so if your home is cooler, a heat mat is worth the investment. Check daily for condensation on the plastic—this is normal, but if it feels damp to the touch, remove the cover for 10 minutes to prevent mold.
Keep the soil consistently moist but never waterlogged. I use a spray bottle to mist the surface rather than pouring water, which can dislodge seeds or create uneven moisture. Within 3-5 days, you should see tiny green shoots pushing through the soil. If you don't see sprouts by 7 days, gently press the soil with your finger—if it's dry, add a light mist and check again in 24 hours.
✂️ Step 4: Thin and Transplant Seedlings
Once seedlings develop 2-3 true leaves (not just the initial cotyledons), it's time to thin them. Use small scissors to snip the weaker seedlings at soil level, leaving the strongest one in each spot. This prevents competition for nutrients and gives your marigolds room to grow. I like to transplant the thinned seedlings into their own 2-3 inch pots filled with fresh potting mix to give them a head start.
After thinning, move the seedlings to a sunny windowsill or under grow lights for 12-14 hours daily. If you notice seedlings stretching toward the light with long, thin stems, they need more intensity—adjust the light so it's 2-3 inches above the plants. Harden them off by placing them outside in a sheltered spot for 1-2 hours daily a week before transplanting outdoors, where they'll thrive in full sun.
Tips & tricks for fast marigold germination
Real talk: marigold seeds are stubborn little things, but these tricks will help you beat the clock and get those vibrant sprouts popping up faster than you'd expect.
Soak Smart: When you're soaking those seeds for 12-24 hours in warm water, don't just toss them in and forget about them. The water should stay around 80°F—too cold and the seeds won't soften properly, too hot and you risk damaging them. I like to use a small jar and swirl it gently every few hours to keep the water evenly warm. After soaking, give them a quick rinse and pat them dry with a paper towel—this prevents mold from forming when you plant them.
Heat Mat Hack: If your home runs cooler than 70°F, that seedling heat mat set to 75-80°F becomes your best friend. I've seen germination times cut in half when using this—sometimes even faster! If you don't have a heat mat, place your seed trays on top of your refrigerator (not inside) for gentle warmth. The key is maintaining consistent warmth during those critical first 7 days when sprouts are trying to emerge.
Lighting Strategy: When you're ready to move seedlings to grow lights, position them 2-3 inches above the plants for the first week. I've learned this the hard way—too far away and they stretch like they're reaching for heaven, too close and they'll burn. After a week, you can gradually increase the distance to 4-6 inches. This prevents that classic "leggy seedling" syndrome that can weaken your marigolds before they even bloom.
Pro Tips for Marigold Seed Sprouts
- Real talk: marigold seeds are stubborn little things, but these tricks will help you beat the clock and get those vib...
- Soak Smart: When you're soaking those seeds for 12-24 hours in warm water, don't just toss them in and forget about t...
- Heat Mat Hack: If your home runs cooler than 70°F, that seedling heat mat set to 75-80°F becomes your best friend. I'...
Frequently asked questions
Got questions about growing marigold seed sprouts?
You’re not alone! Here are some of the most common queries—plus quick, practical answers to help you nurture those vibrant blooms from day one.
How long does it take for marigold seeds to sprout?
Marigold seeds typically sprout within 7–14 days under ideal conditions (warm soil, consistent moisture, and sunlight). For faster results, pre-soak seeds for 4–6 hours or use a heat mat to keep soil temps between 70–85°F. Patience pays off—don’t give up if sprouts take longer!
Can I plant marigold seeds too early in the season?
Yes, but with caution! Marigolds thrive in warm soil, so wait until after the last frost and soil temps reach at least 60°F. If your climate is chilly, start seeds indoors 4–6 weeks before transplanting or use row covers to protect young sprouts. Cold soil slows germination and can lead to rot.
What if my marigold seeds won’t sprout?
Try these fixes:
- Check moisture: Keep soil damp (not soggy) but not waterlogged.
- Test seed viability: Soak seeds in warm water for 24 hours—if they sink, they’re likely good.
- Adjust light: Seeds need 6–8 hours of sunlight daily (or grow lights).
- Try fresh seeds: Old seeds (over 1 year) may lose viability.
Are there faster-growing marigold varieties?
For quick blooms, opt for French marigolds (e.g., ‘Bonanza’ or ‘Jingle Bells’) or African marigolds (e.g., ‘Crackerjack’). These varieties often sprout in 5–7 days and reach maturity faster than others. Check seed packets for “days to bloom” estimates to plan ahead!
Can I use marigold sprouts in cooking like other microgreens?
While marigold leaves and flowers are edible (and used in teas or garnishes), the sprouts themselves aren’t typically eaten like microgreens. However, young marigold foliage is safe to harvest for culinary use—just avoid bitter varieties like Tagetes minuta. Always confirm edibility before consuming!
What’s the best way to thin marigold seedlings?
Thin seedlings when they’re 2–3 inches tall, leaving 12–18 inches between plants (check variety spacing). Use scissors to snip at soil level to avoid disturbing roots. Replant thinned sprouts or compost them—just don’t pull, which can uproot neighbors. Space wisely to prevent crowding and boost flower production!
Wrapping up and next steps
Growing marigold seed sprouts is a rewarding journey that brings vibrant color and natural beauty to your garden—without the fuss! 🌱 With the right soil, warmth, and a little patience, you’ll soon enjoy fast germination and lush blooms.
Whether you’re a seasoned gardener or just starting, your efforts will pay off in cheerful, pest-repelling flowers.
Ready to take the next step? Grab your supplies, follow the tricks you’ve learned, and watch those sprouts pop up in no time. Happy planting! 🌸