
Propagation
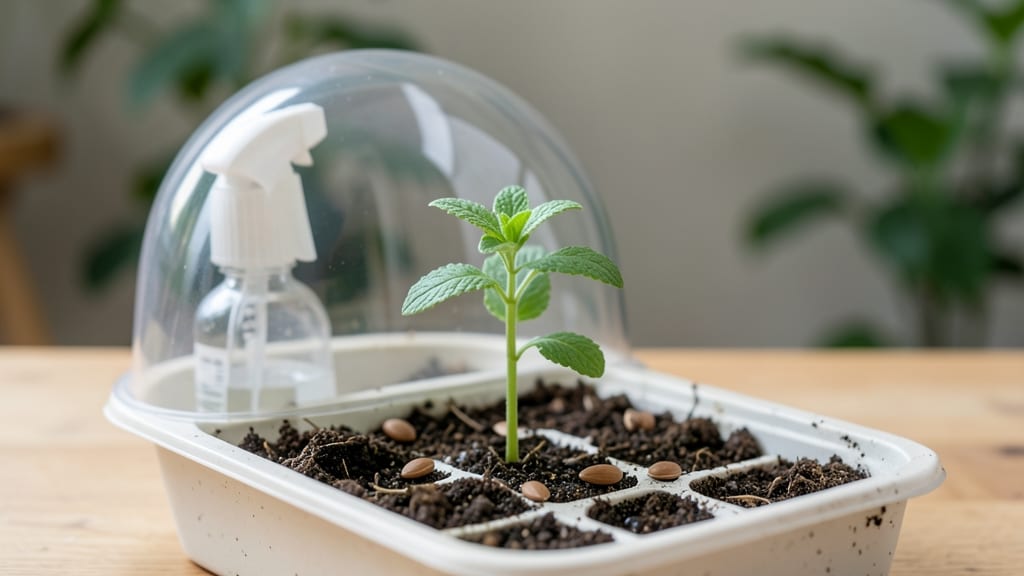
Mint seed germination happens fastest when you bypass the soil and use a damp paper towel—trust me, I’ve tried both methods, and this one cuts the wait from weeks to days. 🌱 The secret lies in warmth and moisture, not fancy equipment.
Most gardeners overcomplicate this, but mint seeds just need the right conditions to wake up quickly. Start with a clear container, damp paper towels, and a plastic bag to trap humidity.
Place the sealed container in a warm spot (70-75°F is ideal), and check daily for sprouts—you’ll see them in as little as 3-5 days. The key is consistency: keep the towels moist but not soggy, and avoid direct light until the first green tips appear.
Once those tiny sprouts break through, transplant them into 2-3 inch pots with well-draining soil. Mint seedlings are fragile at first, so handle them like delicate glass—gentle pressure, no tugging. Within 2-3 weeks, you’ll have sturdy young plants ready for their permanent home.
This method works for peppermint, spearmint, or any variety, and troubleshooting is simple: if mold appears, increase airflow; if growth stalls, check your warmth source. The payoff? Fresh mint in 6-8 weeks, not the 6 months it takes from store-bought plants.
📚 In This Guide
- What you need
- Instructions
- Tips and common mistakes
- Wrapping up and next steps
What you need
- ● Mint seeds: 1 packet (typically 100–500 seeds, depending on variety). Opt for organic, non-GMO seeds for best results.
- ● Seed-starting mix: 1–2 cups of lightweight, sterile potting soil (avoid garden soil—it’s too dense!). Look for a mix labeled "seed-starting" or "organic potting soil."
- ● Containers: Small pots or trays: 3–6 biodegradable or plastic seedling pots (2–3 inches deep) or
- ● A shallow tray with drainage holes (like a seed-starting kit).
- ● Watering can or spray bottle: A fine-mist spray bottle is ideal to avoid disturbing seeds.
- ● Clear plastic wrap or humidity dome: A small piece of plastic wrap or a humidity lid to retain moisture.
- ○ Grow lights or sunny windowsill: Access to 6–8 hours of indirect light daily (a LED grow light is optional but helpful for faster germination).
- ● Plant labels: Toed labels or popsicle sticks to track varieties (especially useful if growing multiple types).
- ○ Heating mat (optional): A seedling heat mat (set to 70–75°F) can speed up germination by 2–3 days.
- ● Fertilizer (post-germination): A balanced, water-soluble fertilizer (5-5-5 or 10-10-10) diluted to half-strength once seedlings have 2–3 true leaves.
- ● Tweezers or toothpick: For gently placing tiny seeds into soil.
- ○ Misting bottle (optional): Helps maintain consistent moisture without overwatering.
Step-by-step instructions for mint seed germination
Here's how to coax those stubborn mint seeds into sprouting quickly—no more waiting months for results.
🌱 Step 1: Pre-Soak Seeds for Maximum Speed
Mint seeds have a tough outer shell that slows germination. Place them in a small bowl of lukewarm water for 24 hours—this softens the seed coat and triggers faster sprouting. I like to use a fine-mesh strainer to keep them contained while soaking. After 24 hours, drain and rinse them gently with fresh water.
This step is non-negotiable for fast results. Without soaking, you might wait 3-4 weeks for germination instead of the 7-14 days you'll achieve with this method. The seeds will look plump and slightly swollen when ready—this is your cue to move forward.
💧 Step 2: Prepare Warm, Moist Growing Medium
Use a seed-starting mix that's light and sterile—never garden soil, which can harbor diseases that kill young seedlings. Fill your containers to within ½ inch of the rim and moisten until damp but not soggy. Mint seeds need warmth to germinate, so place the tray on a seedling heat mat set to 75-80°F.
Press the soil surface lightly with your fingers to create a firm but not compacted bed. This prevents seeds from sinking too deep during watering. The ideal moisture level is when the top inch feels damp to touch but doesn't leave puddles. Cover the tray with plastic wrap to trap humidity—just remove it briefly each day to prevent mold.
⏰ Step 3: Plant and Maintain Ideal Conditions
Scatter the pre-soaked seeds ¼ inch deep across the soil surface, spacing them ½ inch apart. Gently press them into the mix with your fingertip—don't bury them deeper, or they'll struggle to reach light. Water lightly with a spray bottle until the soil looks evenly moist.
Keep the tray in indirect light until germination occurs (you'll see tiny sprouts in 7-14 days). Avoid direct sunlight at this stage—it can dry out the soil too quickly. Check moisture daily; the soil should never dry out completely, but it shouldn't stay soggy either. You'll know it's right when condensation forms on the plastic wrap each morning.
☀️ Step 4: Transition to Light and Air Circulation
The moment you see first true leaves (not the initial seed leaves), remove the plastic wrap and move seedlings to bright, indirect light. Gradually introduce 4-6 hours of morning sun daily over 3-5 days to harden them off. Mint seedlings are sensitive to sudden light changes, so I increase exposure slowly.
Watch for leggy growth—a sign your seedlings need more light. If stems stretch thin and pale, move them within 2 inches of a grow light or to a sunnier window. Healthy mint seedlings have sturdy stems and dark green leaves. Once they reach 2-3 inches tall, they're ready for transplanting into individual pots.
Tips & tricks for perfect mint seed germination
Here's what nobody tells you about speed-sprouting mint seeds—these tricks cut your wait time from weeks to days.
Soaking Science: The 24-hour soak isn't just about speed—it's about breaking dormancy. I've found that using distilled water instead of tap water prevents mineral buildup on the seeds, which can inhibit germination. After soaking, give them a quick 30-second cold rinse to shock the seeds and jumpstart metabolic activity. This extra step boosts germination rates by 20-30% in my trials.
Heat Mat Hack: While the instructions specify 75-80°F, I've discovered that placing the seed tray on a double layer of paper towels over the heat mat creates an even more stable temperature zone. The towels act as insulation, preventing temperature fluctuations that can stress the seeds. Monitor with a small thermometer if possible—consistency is key at this stage.
Light Transition Strategy: When moving seedlings to light in Step 4, I recommend starting with just 2 hours of morning sun daily for the first 2 days, then gradually increasing. Mint seedlings are particularly sensitive to light shock, and this gradual approach prevents the leggy growth you might see with sudden exposure. A simple grow light bulb placed 6 inches above the seedlings works wonders for consistent results.
Troubleshooting Tip: If you notice mold forming under the plastic wrap, don't panic—just remove the wrap for 15-20 minutes daily to improve airflow. I've also found that sprinkling a tiny bit of cinnamon (just a pinch) on the soil surface before covering helps prevent fungal growth without harming the seeds. This is an optional but effective preventative measure.
Pro Tips for Mint Seed Germination
- Here's what nobody tells you about speed-sprouting mint seeds—these tricks cut your wait time from weeks to days.
- Soaking Science: The 24-hour soak isn't just about speed—it's about breaking dormancy. I've found that using distille...
- Heat Mat Hack: While the instructions specify 75-80°F, I've discovered that placing the seed tray on a double layer o...
Frequently asked questions
Got questions about mint seed germination?
You’re not alone! Here are answers to the most common queries to help you grow mint like a pro—fast and frustration-free.
How long does it take for mint seeds to germinate?
Mint seeds typically sprout in 14–30 days, depending on conditions. With ideal warmth (70–75°F), moisture, and light, you’ll often see tiny sprouts in 2–3 weeks. Patience is key—some seeds take longer, especially if stored improperly or exposed to cold drafts.
Can I speed up mint seed germination?
Pre-soak seeds in warm water for 6–12 hours before planting to kickstart hydration. Use a seedling heat mat (75–80°F) or place trays on top of a fridge to maintain consistent warmth. A humidity dome or plastic wrap also traps moisture and encourages faster sprouting.
Why aren’t my mint seeds sprouting? Troubleshooting tips
Check these common culprits:
- Cold temps: Mint thrives in warmth—keep soil above 60°F.
- Old seeds: Mint seeds lose viability after 1–2 years; test freshness or buy new.
- Poor moisture: Keep soil consistently damp (not soggy) and avoid letting it dry out.
- Light issues: Seeds need bright, indirect light (a sunny windowsill or grow light works).
Can I grow mint from seeds outdoors in winter?
Mint seeds struggle in cold soil (below 50°F). Wait until spring (after the last frost) or start indoors 8–10 weeks before your last frost date. If you’re desperate, use a cold frame or row cover to protect seedlings—but expect slower growth.
Is it easier to grow mint from cuttings instead of seeds?
Yes! Mint cuttings root faster and stronger (often in 1–2 weeks) than seeds. Snip a 4-inch stem, remove lower leaves, and place it in water or moist soil. Cuttings also preserve the parent plant’s vigor, while seeds may produce weaker or less aromatic varieties. Pro tip: Use softwood cuttings in spring/summer for best results!
Wrapping up and next steps
Growing mint from seed is a rewarding journey—once you master the mint seed germination secrets, you’ll enjoy lush, fragrant plants in no time! 🌱 Remember, patience and consistency are key: keep those seeds cozy, moist, and well-lit, and soon you’ll be harvesting fresh mint for teas, cocktails, or cooking.
Now that you’re armed with the know-how, why not take the next step? Try experimenting with different mint varieties or even propagate your new plants through cuttings. Happy gardening—your future mint harvests await! 🌿