
Lawn
Your modern sprout seed bombs could turn a cracked sidewalk into a lush green carpet in just 7 days—no gardening experience required. 🌱 I’ve thrown these clay-and-seed balls into neglected urban corners, and within a week, tiny shoots break through like nature’s own surprise party.
The secret lies in the right mix of clay, compost, and seeds, all compressed into a ball that’s easy to toss and impossible to kill.
You’ll need just three simple ingredients: air-dry clay (or coconut coir), organic compost, and your choice of fast-growing seeds like clover, wildflowers, or microgreens.
The beauty of this method is its flexibility—whether you’re guerrilla gardening in a city park or restoring a bare patch of soil, these seed bombs work anywhere. No fancy tools, no greenhouse needed, just throw and forget (well, mostly forget).
By day 7, you’ll see tiny green sprouts pushing through concrete cracks or bare soil, proving that even the toughest spaces can bloom with a little help. The best part?
These seed bombs are eco-friendly, biodegradable, and perfect for teaching kids (or skeptical neighbors) how easy it is to grow life from almost nothing. Once you try them, you’ll never look at a patch of dirt the same way again.
Ready to turn your urban jungle into a thriving ecosystem? These seed bombs are your secret weapon—foolproof, fast, and fun. Let’s get those sprouts growing!
Whether you’re reviving a forgotten corner or just experimenting at home, this method delivers results without the fuss. Grab your supplies and let’s make some magic happen.
📚 In This Guide
- What you need
- Instructions
- Tips and common mistakes
- Wrapping up and next steps
What you need
- ● Seeds: Fast-growing varieties like clover, alfalfa, radish, or sunflower (1–2 tbsp per batch). Opt for organic, non-GMO seeds for best germination.
- ● Clay: Air-dry clay (1 cup per batch). Avoid sand or soil—it won’t hold the seed bombs together!
- ● Compost: High-quality, organic compost (½ cup per batch). Look for worm castings or coconut coir for extra nutrients.
- ● Water: Room-temperature, filtered water (as needed for mixing). Avoid tap water if it’s heavily chlorinated.
- ● Medium-sized mixing bowl (stainless steel or glass preferred).
- ● Spoon or spatula for stirring (wooden or silicone works best).
- ● Cookie scoop or small measuring cups (for portioning).
- ● Baking sheet or tray lined with parchment paper.
- ○ Optional: Mold (silicone molds, egg cartons, or even ice cube trays for shaping).
- ● Mycorrhizal fungi: Boosts root growth—add 1 tsp per batch.
- ● Beneficial microbes: Like Azospirillum or Trichoderma for stronger plants.
- ● Slow-release fertilizer: A pinch of kelp meal or fish emulsion for a nutrient kick.
- ● Dyes or natural pigments: Use beet juice or turmeric for colored seed bombs (fun for kids!).
Step-by-Step instructions for creating modern sprout seed bombs
Here's how to craft these eco-friendly, high-germination seed bombs using simple materials.
🌱 Step 1: Mix the Clay and Compost Base
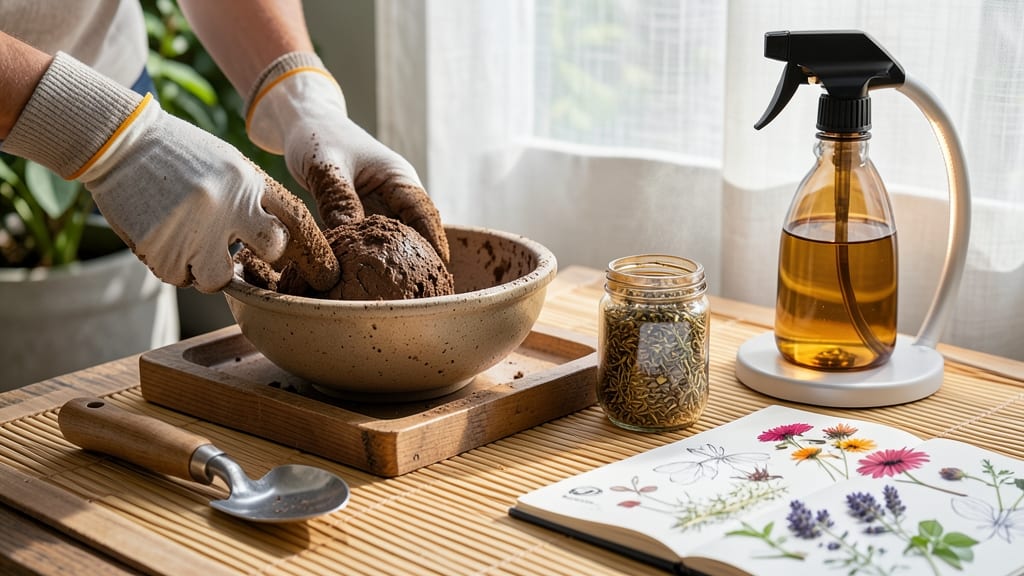
Start by combining 1 cup of air-dry clay with ½ cup of compost in a bowl. The clay acts as the binding agent, while the compost provides essential nutrients for your sprouts. Break up any clumps in the clay first—it should be crumbly and fine-grained. I like to use my hands to mix thoroughly, working the materials together until they form a smooth, dough-like consistency.
Add 1 tablespoon of coconut coir to the mixture. This helps retain moisture and prevents the seed bombs from cracking as they dry. The coir also adds a bit of structure, making the bombs easier to handle once formed. Keep mixing until everything is evenly distributed—you should see small fibers of coir dispersed throughout the clay-compost blend.
💧 Step 2: Add Water and Form the Seed Bombs
Gradually add ¼ cup of water to the mixture, one tablespoon at a time, while stirring. The goal is to create a paste that holds together when squeezed but isn’t sticky. If it feels too dry, add a little more water; if it’s too wet, sprinkle in a bit more clay. The texture should be like wet sand—moldable but not crumbly.
Once the mixture is ready, wet your hands slightly to prevent sticking. Roll small balls, about 1 inch in diameter, using your palms. Place each ball into a paper egg carton to keep them separate while they dry. This is where the "modern" twist comes in—no messy hands or uneven shapes. The egg carton also makes it easy to label different seed bomb types if you're making multiple varieties.
☀️ Step 3: Embed the Seeds and Dry Completely
Make a small indentation in the center of each seed bomb using your thumb. Gently press 3-5 seeds into the indentation—common choices include clover, alfalfa, or sunflower. The seeds should be just below the surface, not buried too deep. Cover the seeds with a tiny bit of the clay mixture to protect them while the bombs dry.
Let the seed bombs dry in a well-ventilated area for 2-3 days. They should harden completely, turning a light brown color. You’ll know they’re ready when they feel solid to the touch and no longer leave marks on your fingers. Avoid direct sunlight during drying—it can cause cracking. Once fully dry, carefully remove them from the egg carton and store them in a cool, dry place until you’re ready to plant.
🌿 Step 4: Plant and Monitor Germination
To plant, simply toss the seed bombs into a prepared garden bed, container, or even a crack in pavement. Water lightly after planting to settle the soil around them. The clay shell will break down naturally, releasing the seeds and compost. You’ll see sprouts emerge within 3-7 days, depending on the seed type and weather conditions.
Keep the soil moist but not soggy during germination. The compost in the bombs provides a nutrient boost, so you won’t need to fertilize right away. Once the sprouts reach 2-3 inches tall, thin them if needed to give each plant enough space to grow. These seed bombs are perfect for reviving neglected areas—just toss and forget until you see green!
Tips & tricks for perfect sprout seed bombs
Here's what I learned after making dozens of these—tricks that guarantee better germination and easier handling.
Mixing Tip: In Step 1, if your clay feels too powdery, add a pinch of 1 tablespoon of water at a time while mixing. The goal is a consistency like damp sand—it should hold together when squeezed but not be sticky. Too much water causes cracking later, while too little makes rolling difficult. I learned this the hard way after watching my first batch crumble apart!
Seed Placement Secret: When embedding seeds in Step 3, press them just below the surface—about ¼ inch deep. This ensures they'll have enough moisture to sprout without being buried too deep in the clay. I like to make a small well with my thumb, place the seeds, then cover with a tiny bit of the clay mixture to protect them during drying. This technique gives you that 3-7 day germination window mentioned in the instructions.
Drying Strategy: For the 2-3 day drying period in Step 3, I recommend placing your egg carton on a wire rack over a tray. This allows airflow underneath while keeping dust out. If your kitchen is humid, prop a small fan nearby to speed up drying. The bombs should feel solid when done—if they're still soft, they need more time. Avoid direct sunlight, as it can cause uneven drying and cracking.
Planting Hack: When planting in Step 4, I like to toss the seed bombs from about 1 foot up to break them slightly before they hit the ground. This helps the clay shell crack open faster, releasing the seeds and compost more quickly. For urban planting, I've even used them to fill cracks in pavement—just toss them in and water lightly!
Pro Tips for Modern Sprout Seed Bomb
- Here's what I learned after making dozens of these—tricks that guarantee better germination and easier handling.
- Mixing Tip: In Step 1, if your clay feels too powdery, add a pinch of 1 tablespoon of water at a time while mixing. T...
- Seed Placement Secret: When embedding seeds in Step 3, press them just below the surface—about ¼ inch deep. This ensu...
Frequently asked questions
about modern sprout seed bombs—here’s what you need to know before diving in!What’s the best time of year to plant seed bombs for fastest sprouts?
Seed bombs thrive in spring or early fall when temperatures are mild (50–75°F). Avoid extreme heat or frost—these can dry out clay or kill seeds. If you’re in a warm climate, early morning or late afternoon planting minimizes stress on seeds. Pro tip: Test soil moisture first—damp (not soggy) is ideal!
Why aren’t my seed bombs sprouting after 7 days?
Germination delays often stem from dry conditions, poor soil contact, or seed dormancy. Check for:
- Moisture: Keep bombs consistently damp (like a wrung-out sponge).
- Sunlight: Most seeds need 4–6 hours of indirect light daily.
- Seed viability: Some varieties (like clover) sprout slower—try radish or microgreens for speed.
Can I make seed bombs without clay? What’s a good substitute?
Yes! Skip clay if you’re short on time or resources. Try these equally effective binders:
- Coconut coir (eco-friendly, retains moisture).
- Compost + water (mix 2:1 ratio, let sit 24 hours).
- Baking soda + water (1 tbsp soda to 1 cup water—dries harder but works in a pinch).
Are seed bombs safe for pets or wildlife?
Most seed bombs are non-toxic if made with organic materials, but avoid:
- Seeds treated with pesticides/fungicides.
- Moldy or fermenting mixtures (can attract pests).
How can I repurpose failed seed bombs?
Don’t toss them! Failed bombs (no sprouts after 3 weeks) can still boost soil health:
- Compost them—add to your pile for nutrient-rich breakdown.
- Use as mulch around existing plants to retain moisture.
- Feed worms (if mold-free)—red wigglers love decomposed seed matter.
Wrapping up and next steps
Creating your own modern sprout seed bombs is a game-changer for fast, eco-friendly greening!
With just a few simple ingredients—like clay, compost, and your favorite seeds—you can transform bare soil into lush sprouts in just 7 days. 🌱 Whether you're a gardening newbie or a seasoned green thumb, these seed bombs make urban gardening effortless and rewarding.
Ready to take the next step? Start small—try a few seed bombs in your backyard, balcony, or even a community garden. Watch them sprout, grow, and inspire others to join the green revolution! 🌍✨