
Lawn
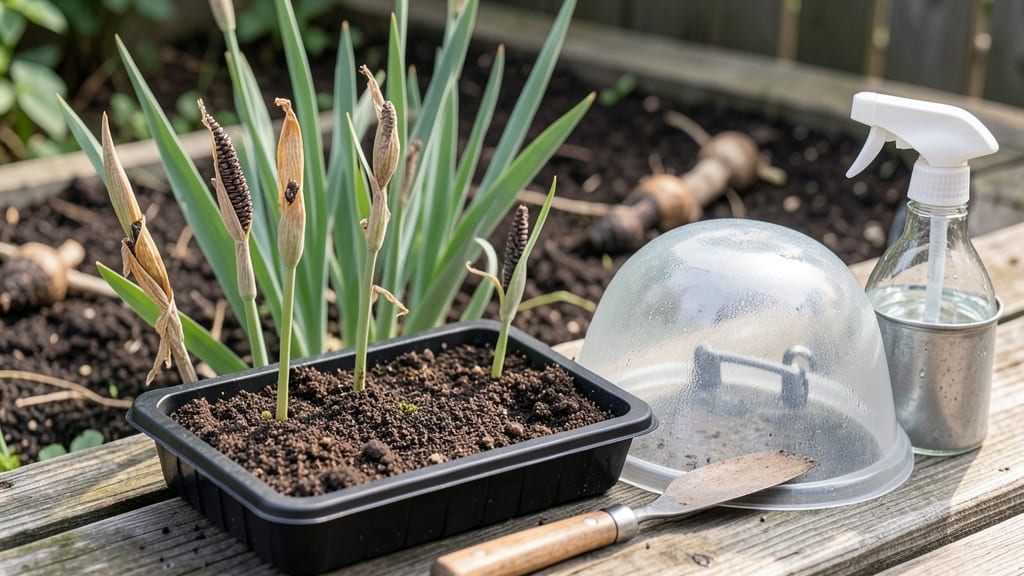
Those papery iris seed pods are nature’s way of promising next spring’s blooms—if you plant them right. 🌱 I’ve turned my garden’s leftover seed pods into a zero-waste treasure trove, and the secret is simple: timing, soil, and patience.
Most people toss them, but these dried pods hold the potential for vibrant purple, blue, or yellow irises in just a few seasons.
The best time to plant is late summer or early fall, when soil is still warm but cooling—ideal for germination. Dig a shallow trench about 1 inch deep and scatter the seeds (no need to clean them out of the pods).
Lightweight soil with good drainage is key; irises hate soggy roots. A sprinkle of compost mixed in gives them the nutrients they’ll need to push through next spring.
Water lightly after planting, then let nature take over—no need to fuss. Germination can take 6-12 months, so don’t panic if you don’t see sprouts right away. The real magic happens when those first thin, grass-like leaves appear, signaling roots are establishing deep.
By year two, you’ll start seeing the familiar sword-shaped foliage that means irises are on their way.
Here’s the game-changer: label your planting spot (trust me, you’ll forget). Irises grow slowly but live for decades, so patience pays off. If you’re in a cooler climate, wait until spring to plant—just adjust your watering to avoid winter sog.
With these steps, you’ll have a self-sustaining iris patch that multiplies every year.
📚 In This Guide
- What you need
- Instructions
- Tips and common mistakes
- Wrapping up and next steps
What you need
- ● Mature iris seed pods: Collect 3–5 fully dried pods (brown, papery texture) from healthy plants after blooming.
- ○ Gloves (optional but recommended): Thin gardening gloves to protect hands from tiny, sharp seed pod edges.
- ● Scissors or pruners: Sharp, clean pair to snip pods from stems without damaging the plant.
- ● Paper towels or newspaper: For drying and storing seeds in a cool, dry place.
- ● Small paper bags or envelopes: 1–2 breathable bags to store seeds until planting.
- ● Seed-starting mix or well-draining potting soil: 1–2 small pots (4–6 inches wide) or a seed tray.
- ○ Planting containers (optional): Biodegradable pots or small cells for transplanting seedlings.
- ● Watering can or spray bottle: With a fine mist setting to avoid disturbing seeds.
- ● Plastic wrap or humidity dome: To create a mini greenhouse for germination.
- ● Grow lights or sunny windowsill: A south-facing spot or LED grow lights (12+ hours/day) for seedlings.
- ● Patience: Iris seeds can take 30–90 days to germinate—plan ahead!
- ● Consistent moisture: Keep soil lightly damp (not soggy) during germination.
- ● Warmth: Ideal germination temp: 65–75°F (18–24°C).
- ● Sunlight: Seedlings need full sun (6+ hours/day) once sprouted.
- ● Space: Thin seedlings to 3–4 inches apart when transplanting outdoors.
- ● 🌡️ Test seed viability: Crush a pod—if seeds inside are plump and dark, they’re ready to plant!
- ● ✨ No soil? Use coffee grounds or coconut coir as a temporary seed-starting medium.
- ● 🔄 Reuse containers: Old egg cartons or biodegradable pots cut down on waste.
- ● 📅 Plant timing: Start indoors 8–10 weeks before your last frost date.
Step-by-Step guide to planting iris seed pods
Here’s how to turn those dried iris pods into next season’s vibrant blooms—no waste, just future flowers.
🌱 Step 1: Harvest and Dry the Seed Pods
Wait until the seed pods turn tan and papery—this means they’re fully mature and ready to collect. Use clean, sharp scissors to snip them from the stalk, leaving a short stem. I like to lay them out on a paper towel-lined tray in a dry, shaded spot for 1-2 weeks to ensure they’re completely dry before opening.
If you open them too soon, the seeds won’t be viable. You’ll know they’re ready when the pods split open on their own or crack easily when gently squeezed. Store them in a paper envelope in a cool, dark place until planting—this keeps them fresh for up to 6 months.
🪴 Step 2: Prepare the Planting Site
Iris seeds need well-draining soil and full sun to thrive. Choose a spot with at least 6 hours of direct sunlight daily. Loosen the soil to a depth of 6 inches, mixing in sand or perlite if your soil is heavy clay. This prevents rot, which is the #1 killer of young iris seedlings.
Sow the seeds ¼ inch deep in early fall—this mimics their natural dormancy period. Space them 1 inch apart in rows 12 inches apart to give them room to grow. A light sprinkle of compost over the seeds adds nutrients without smothering them.
☀️ Step 3: Water and Protect Until Germination
Keep the soil evenly moist but not soggy—think of it like a damp sponge. Water lightly every 2-3 days until the seeds sprout, which can take 4-8 weeks. Overwatering here will drown the tiny seeds before they even get started.
Once sprouts appear, reduce watering to once a week unless the soil feels dry to the touch. Thin seedlings to 4 inches apart when they reach 2 inches tall—this prevents overcrowding and gives each plant room to develop strong roots.
⏰ Step 4: Care for Seedlings Through First Year
Young iris seedlings need consistent sunlight and minimal disturbance. Avoid fertilizing until they’ve developed 3-4 true leaves—this usually happens by late spring. A light layer of mulch (like straw) helps retain moisture and suppress weeds without smothering the plants.
Watch for yellowing leaves—this often signals overwatering. Iris roots rot easily, so let the soil dry out between waterings. By fall of the first year, your seedlings should be 6-8 inches tall and ready to overwinter for their first blooms the following spring.
✂️ Step 5: Divide and Transplant Mature Clumps
When your irises reach 3-4 years old, they’ll form dense clumps. In early fall, dig up the entire plant and separate the rhizomes—each section should have 1-2 fans of leaves. Replant them 6 inches apart in the prepared soil, making sure the tops of the rhizomes are just above the soil line. This prevents rot and encourages strong growth.
Water deeply after transplanting, then taper off as winter approaches. With patience, your homegrown iris seedlings will reward you with bold, colorful blooms in just a few seasons—all from those forgotten seed pods!
Tips & tricks for perfect iris seed pod planting
Here's what I've learned from years of experimenting with iris seed pods—these little tricks make all the difference between success and disappointment.
Harvesting Timing: The 1-2 week drying period in Step 1 is crucial—don't rush it! I've learned the hard way that opening pods too soon results in seeds that won't germinate. Place them in a spot with good airflow (like a mesh bag) to speed up drying without direct sunlight, which can cause them to overheat.
Soil Preparation Secret: When amending your soil with sand or perlite in Step 2, mix it thoroughly to a depth of 6 inches. I like to use a garden fork to create a loose, crumbly texture—this mimics the natural well-draining conditions irises love. The key is to make sure water drains quickly but doesn't wash away nutrients.
Watering Wisdom: That "evenly moist but not soggy" description in Step 3 is everything! I've found that sticking my finger 1 inch into the soil is the best way to check moisture. If it feels like a damp sponge, you're golden. If it's dry, water lightly; if it's wet, wait a day. Overwatering is the #1 reason iris seeds fail to sprout.
Thinning Technique: When thinning seedlings in Step 3, use sharp scissors to cut at soil level rather than pulling. This prevents disturbing the roots of neighboring plants. I mark my spacing with toothpicks before thinning—it creates perfect 4-inch spacing without guesswork, and the toothpicks biodegrade over time.
Pro Tips for Planting Iris Seed Pods
- Here's what I've learned from years of experimenting with iris seed pods—these little tricks make all the difference ...
- Harvesting Timing: The 1-2 week drying period in Step 1 is crucial—don't rush it! I've learned the hard way that open...
- Soil Preparation Secret: When amending your soil with sand or perlite in Step 2, mix it thoroughly to a depth of 6 in...
Frequently asked questions
Got questions about harvesting and planting iris seed pods? You’re not alone—this process can feel tricky at first! Here are some of the most common queries (and answers) to help you navigate your zero-waste iris adventure like a pro.
When is the best time to collect iris seed pods?
Harvest iris seed pods when they turn tan or brown and begin to split open naturally—usually late summer to early fall (August–October, depending on your climate). Wait too long, and the seeds may scatter or dry out. If pods are still green, give them a few more weeks to mature.
How long does it take for iris seeds to germinate?
Patience is key! Iris seeds can take 6 months to 2 years to germinate—some may even sprout in spring after a cold stratification period. Keep the soil moist but well-draining, and avoid disturbing the area. Pro tip: Label your planting spots to track progress!
Can I plant iris seeds directly in the ground, or do they need to be started indoors?
For most gardeners, direct sowing outdoors is easiest—just scatter seeds on top of soil (no need to bury them) in a sunny, well-drained spot. If you’re in a colder zone, start seeds indoors 8–10 weeks before your last frost date for a head start. Bonus: Mixing seeds with sand makes scattering them easier!
What should I do if squirrels or birds eat my seed pods before I can collect them?
Don’t panic—this happens more often than you’d think! Cover pods with mesh netting as soon as they form to deter critters. Alternatively, harvest pods as soon as they’re half-dry (but not fully open) and store them in a paper bag until ready to plant. Quick fix: Place a wire cage over clusters for a few days to buy time!
Do iris seeds need sunlight to germinate?
Yes! Iris seeds thrive in full sun (6+ hours daily), but they’ll tolerate partial shade—just expect slower growth. If planting in shady spots, ensure the soil stays consistently moist until germination. Warning: Avoid low-lying areas where water pools, as soggy soil can rot seeds.
What’s the success rate for growing irises from seed vs. dividing rhizomes?
While dividing mature rhizomes guarantees 90%+ success, seeds offer 50–70% germination (with variation by iris type). Seeds produce unique color variations and are great for experimenting, but division is faster for established plants. Hybrid tip: Save seeds from rare irises for future heirloom blooms!
Wrapping up and next steps
Planting iris seed pods is a rewarding way to cultivate stunning blooms while embracing a zero-waste approach!
By collecting and sowing these pods, you’re not only nurturing next year’s garden but also reducing waste and connecting with nature’s cycles. 🌱 Whether you’re a seasoned gardener or just starting out, every small step—like saving those pods—contributes to a thriving, sustainable landscape.
Ready to take the next step? Mark your calendar to harvest pods in late summer or early fall, then get planting! Soon, you’ll be enjoying vibrant irises that you’ve grown from seed—all while doing your part for the planet. Happy gardening! 🌸