
Lawn
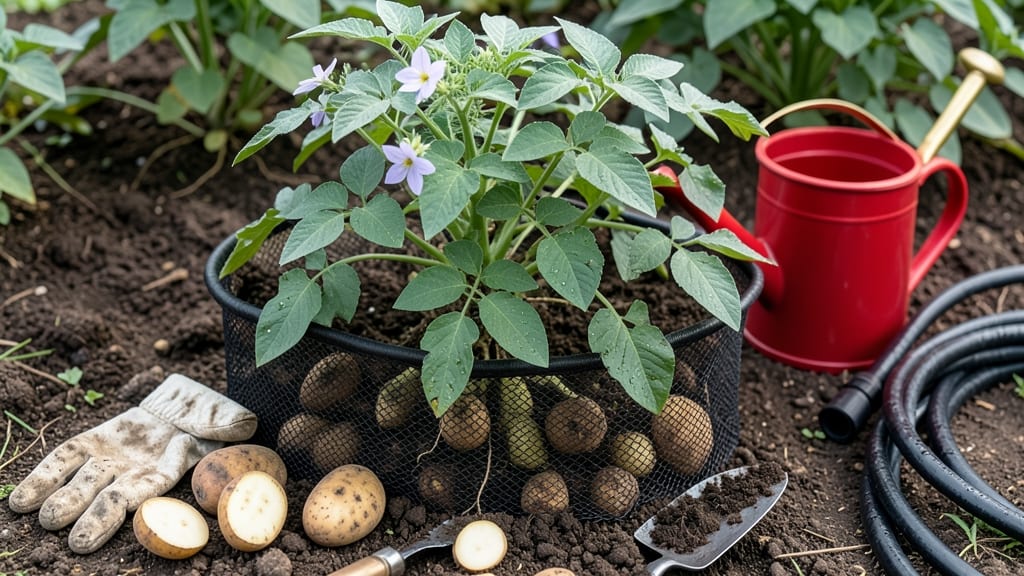
Planting seed potatoes in a bag turns a tiny corner into a high-yielding harvest—no yard required. 🌱 I’ve grown enough potatoes in a 5-gallon bucket to feed my family for weeks, and the secret is simple: chit your seed potatoes, use the right soil mix, and keep them happy with consistent moisture.
No digging, no fuss, just 90 days of growth from a small space.
The beauty of this method is how it eliminates common mistakes. Too much water? The bag’s drainage holes prevent rot. Not enough space? The vertical growth of potato plants makes bags perfect for patios or balconies.
You’ll need 3-4 seed potatoes per bag, a bag with drainage, potting soil, and a sunny spot—no fancy equipment needed. Even beginners get reliable results with just a few key steps.
By harvest time, you’ll be pulling golden, earthy potatoes straight from the bag—no weeding, no bending over, just fresh spuds ready for roasting or mashing. The first time I saw those tubers forming, I couldn’t believe how much food came from such a small setup.
It’s the kind of gardening that proves big harvests don’t need big spaces.
Works in any climate with a few tweaks—just adjust watering for rainier seasons and protect bags from late frosts. Whether you’re a city dweller or a small-space gardener, this method delivers effortless abundance. Let’s get those potatoes growing!
📚 In This Guide
- What you need
- Instructions
- Tips and common mistakes
- Wrapping up and next steps
What you need
- ● Pro tip: 💡 If using fabric bags, pre-wet them before filling to prevent soil from sticking to the sides!
Step-by-Step instructions for planting seed potatoes in a bag
Here's how to grow a full harvest of potatoes in just a few square feet of space—no garden needed.
🪴 Step 1: Choose and Prepare Your Growing Bag
Use a sturdy, breathable 5-gallon fabric grow bag (like those made from burlap or heavy-duty mesh) with drainage holes. These bags let roots spread freely while saving space. Fill the bag ⅔ full with a mix of 50% potting soil and 50% compost—this gives roots room to grow without compacting. I like to add a handful of slow-release fertilizer (like 10-10-10) mixed into the soil to feed the plants over time.
Moisten the mix until it feels like a damp sponge—you shouldn’t see water pooling at the bottom, but it should hold together when squeezed. Leave the bag open for a few hours to let the soil settle slightly. This prevents the mix from shifting when you add potatoes later.
🌱 Step 2: Cut and Chit Your Seed Potatoes
Choose firm, disease-free seed potatoes (not grocery store potatoes—they’re treated to prevent sprouting). Cut each potato into 3-4 inch chunks, ensuring each piece has at least 2-3 "eyes" (the little dimples where sprouts emerge). Let the cut pieces dry in a dark, cool place for 24 hours—this prevents rot when planted. While they dry, place whole seed potatoes in a sunny windowsill to pre-sprout (or "chit") for 2-3 weeks. You’ll see tiny green shoots form—they’ll grow faster once planted.
Real talk: If you skip chitting, your potatoes will still grow, but they’ll take longer to produce tubers. The sprouts act like a head start, giving roots a jump on the growing season. Once chitted, gently place 2-3 potato pieces in the bag, eyes-up, spaced evenly around the edges. Cover lightly with about 1 inch of soil—just enough to hold them in place.
💧 Step 3: Water and Maintain Through Early Growth
Water the bag lightly but thoroughly until water drains from the bottom holes. You want the soil to be moist but not soggy—think of a wrung-out sponge. Place the bag in a spot that gets full sun (6+ hours daily) and keep the soil consistently damp (not waterlogged) for the first 4-6 weeks. You’ll see green shoots emerge within 2-3 weeks—that’s your cue everything’s working.
Here’s the thing—once the sprouts reach 6 inches tall, add 2-3 more inches of soil around the stems, burying them up to the leaves. This encourages more tuber formation below ground. Repeat this earthing-up process every 2 weeks until the bag is full. It’s like giving your potatoes a cozy blanket to grow into!
☀️ Step 4: Monitor and Harvest at Peak Maturity
After 8-10 weeks, the potato plants will flower—this signals tubers are forming. Reduce watering slightly to prevent greening (which makes potatoes bitter). When the flowers fade and the foliage starts yellowing (around 90 days), it’s time to harvest. Empty the bag carefully, sifting through the soil to find small, new potatoes mixed with larger ones. Let them cure in a dark, dry place for 1-2 weeks before storing.
Don’t skip curing! It thickens the skins and improves storage life. If you leave potatoes in damp conditions, they’ll rot within days. For a second harvest, leave a few plants in the bag—some varieties produce late-season tubers that mature even after the tops die back.
Tips & tricks for perfect potato bag harvests
These simple strategies will help you avoid common pitfalls and maximize your potato yield in minimal space.
Soil Mix Matters: The 50% potting soil and 50% compost ratio is key for drainage and nutrients. I've found that adding a handful of perlite (about 1 cup) to the mix improves aeration even more. This prevents soggy roots while keeping moisture levels perfect for tuber development. The slow-release fertilizer in Step 1 ensures you won't need to fertilize again until harvest time.
Chitting Pays Off: Don't skip the 2-3 week chitting process! I've grown potatoes without chitting, but the plants always took 2-3 weeks longer to produce tubers. Place your seed potatoes on a sunny windowsill where they'll get indirect light. You'll know they're ready when you see ½-inch green sprouts. These little shoots give your potatoes a head start that makes all the difference in that 90-day timeline.
Watering Wisdom: Those first 4-6 weeks of consistent moisture are critical. I use a spray bottle to check moisture levels—if the top inch feels dry when squeezed, it's time to water. Overwatering causes greening (which makes potatoes bitter), while underwatering stresses the plants. Aim for that wrung-out sponge consistency mentioned in Step 3, and you'll avoid both problems. A moisture meter can be a helpful investment for perfecting this.
Harvesting Hack: When it's time to harvest at 90 days, gently invert the bag and shake out the potatoes onto a tarp. The soil will naturally sift away, making it easy to spot even small tubers. For a second harvest, leave a few plants in the bag—they'll often produce additional tubers even after the tops die back. I've gotten 20-30% more potatoes this way by not harvesting everything at once.
Pro Tips for Planting Seed Potatoes In A Bag
- These simple strategies will help you avoid common pitfalls and maximize your potato yield in minimal space.
- Soil Mix Matters: The 50% potting soil and 50% compost ratio is key for drainage and nutrients. I've found that addin...
- Chitting Pays Off: Don't skip the 2-3 week chitting process! I've grown potatoes without chitting, but the plants alw...
Frequently asked questions
Got questions about growing seed potatoes in bags? You’re not alone—this method is full of handy shortcuts but also a few quirks. Below, we’ve rounded up the most common queries to help you grow like a pro!
How deep should I plant seed potatoes in a bag?
Plant your seed potatoes about 4–6 inches deep in the bag, with the "eyes" (sprouts) facing upward. This depth ensures stability while allowing room for tubers to develop. If your bag is shallow, use a second bag inside or add a layer of compost for extra depth!
When is the best time to plant seed potatoes in a bag?
Start planting 2–4 weeks before your last frost date (typically early spring). Seed potatoes thrive in 40–85°F soil temps, so aim for warm but not scorching conditions. If you’re in a cooler climate, use a grow light or move the bag indoors until sprouts appear!
Can I reuse the same bag for multiple potato harvests?
Yes! After harvesting, sterilize the bag by soaking it in a 1:10 bleach-water solution (or 10% vinegar) for 10 minutes, then rinse well. This prevents disease buildup. Avoid reusing bags with visible mold or foul odors—start fresh instead!
What do I do if my seed potatoes sprout but don’t produce tubers?
If sprouts appear but no potatoes form, check these fixes:
- Light: Move the bag to a sunny spot (6+ hours of light daily).
- Water: Keep soil consistently moist (not soggy).
- Nutrients: Add a balanced fertilizer (like 10-10-10) when flowers appear.
- Space: Thin crowded sprouts to 3–4 inches apart.
Are there alternatives to growing potatoes in bags?
Try these space-saving methods:
- Grow bags or fabric pots: Use 5–10 gallon containers with drainage.
- Straw bales: Soak a bale, plant potatoes, and cover with straw.
- Vertical towers: Stack buckets or pallets for a tower garden.
- Hanging pots: Use breathable fabric pots with a trellis for vining varieties.
Wrapping up and next steps
Growing seed potatoes in a bag is a game-changer for small spaces—no yard required! 🌱 With just a few supplies and minimal effort, you’ll enjoy fresh, homegrown potatoes in just three months. Whether you’re a beginner or a seasoned gardener, this method proves that big harvests start small.
Ready to dig in? Start your next batch today—and don’t forget to save a few potatoes to replant next season! 🌟