
Lawn
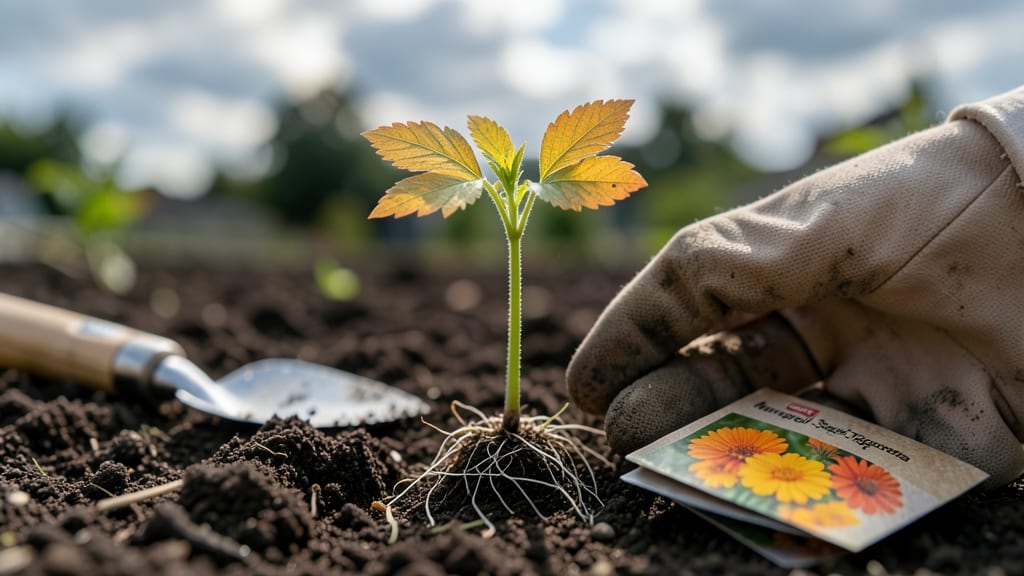
Planting seeds directly in the ground feels like magic—one day nothing, the next a forest of tiny green promises. 🌱 I’ve watched my own garden transform from bare soil to thriving plants by following a few simple rules about timing, prep, and patience.
The key? Matching your seeds to your zone’s last frost date and giving them the perfect start. Soil prep is where most beginners stumble.
Loosen the top 6 inches with a fork or tiller, remove rocks, and mix in compost until the earth looks dark and crumbly—not compacted like a sidewalk.
Different seeds need different depths: tiny seeds like lettuce go just ¼ inch down, while big beans or peas need 1-2 inches of cover. Water gently after planting so the soil settles around them without washing them away.
Within days, you’ll see the first green shoots—this is the moment that makes it all worth it. Keep the soil consistently moist (not soggy) and watch as those fragile sprouts grow into sturdy plants. The right spacing now means fewer fights for sunlight later, and proper watering keeps roots happy.
This method works for vegetables, flowers, and even herbs—just adjust timing for your zone. Let’s get those seeds in the ground for a garden that actually grows.
📚 In This Guide
- What you need
- Instructions
- Tips and common mistakes
- Wrapping up and next steps
What you need
- ● Seeds: Choose blank">zone-appropriate varieties (e.g., cool-season grasses like Kentucky Bluegrass for Zones 3-9 or warm-season Bermuda for Zones 7-10). Pro tip: Buy fresh seeds (within the last year) for higher germination rates! 🌱
- ● Soil: Topsoil (2–3 cubic yards for a 1,000 sq. ft. lawn)
- ● Compost (5–10 lbs. per 100 sq. ft. to improve drainage and nutrients)
- ○ Sand (optional, for sandy soils—mix 1 part sand to 3 parts soil for better aeration)
- ● Fertilizer: Slow-release granular fertilizer (e.g., 10-10-10 or 16-4-8) at 1 lb. per 100 sq. ft. (follow package instructions for zone-specific timing).
- ● Watering Tools: Garden hose with adjustable nozzle (or a soaker hose for deep, even watering)
- ● Watering can (for small patches or seedlings)
- ● Lawn Rake: A bow rake (for leveling soil) and a garden rake (for seedbed prep).
- ● Broadcast Spreader: For even seed distribution (manual or drop spreader for precision).
- ● Hand Trowel or Transplanter: For marking rows or planting individual seeds.
- ● Garden Gloves: Heavy-duty, water-resistant gloves to protect your hands.
- ● Knee Pads: Because gardening is hard work! 💪
- ● Zone Check: Know your blank">USDA Zone (e.g., Zone 5–9 for cool-season grasses, Zone 7–10 for warm-season). Pro tip: Use a frost-free date calculator to time your planting! ❄️🌡️
- ● Soil Test: Test your soil’s pH (ideal: 6.0–7.0 for most grasses). Adjust with lime (to raise pH) or sulfur (to lower it) if needed.
- ● Weather Forecast: Aim for 5–7 days of dry weather after planting to prevent seed washout.
- ● Sunlight Assessment: Ensure your lawn area gets 6+ hours of sunlight daily (adjust seed choices for shady spots).
- ● Seedling trays (for starting seeds indoors 4–6 weeks before last frost).
- ● Mulch (straw or peat moss to retain moisture and suppress weeds).
- ● Lawn thermometer (to monitor soil temperature—ideal germination range: 60–75°F).
- ● Organic weed barrier fabric (for new lawns to block weeds until grass establishes).
Instructions for planting seeds directly in the ground
Here's how to get seeds in the soil the right way—so they sprout reliably every time.
🌱 Step 1: Prepare the Soil for Perfect Germination
Loosen the top 6 inches of soil with a garden fork or tiller, breaking up any clumps. This creates air pockets that roots need to grow strong. Work the soil until it feels light and crumbly—like cake batter, not packed dirt. If your soil is heavy clay, mix in 2 inches of compost to improve drainage and fertility.
For seeds that need warmth, like tomatoes or peppers, consider using a clear plastic dome or row cover to trap heat. I like to plant these in late spring when soil temperatures reach 60°F—check with a soil thermometer to be sure. Cool-season crops like lettuce and peas, on the other hand, prefer soil temps between 40-70°F.
🌿 Step 2: Plant Seeds at the Right Depth and Spacing
Most seeds germinate best when planted at a depth of twice their diameter. Tiny seeds like lettuce or carrots only need to be pressed ¼ inch deep, while larger seeds like beans or peas go 1 inch down. I tap the seed packet gently to release one seed at a time—planting too many in one hole leads to weak, crowded seedlings.
Follow the spacing guidelines on the seed packet, but don't be afraid to adjust for your climate. In hot, dry regions, give plants a little more room to reduce competition for water. Space seeds 1-2 inches apart in rows that are 12-24 inches apart, depending on the mature plant size. Mark rows with sticks or a garden hose to keep things straight.
💧 Step 3: Water Gently and Keep Soil Moist
Water the soil before planting to help seeds settle at the right depth. After planting, use a fine mist or watering can with a gentle spray to avoid disturbing the seeds. You'll know moisture is right when the soil surface looks slightly damp but not glistening—like a wrung-out sponge. Overwatering now can wash seeds away or create a crust that prevents sprouting.
Keep the soil consistently moist until seeds germinate, which usually takes 7-14 days depending on the plant. I like to use a mulch layer of straw or shredded leaves to lock in moisture and keep the soil temperature stable. Avoid letting the soil dry out completely, especially in the first week—this is when most seeds either sprout or give up.
☀️ Step 4: Provide the Right Light and Protection
Most vegetable seeds need full sun (6+ hours daily) to germinate well, but some, like lettuce, prefer partial shade. If you're planting in early spring or fall, seedlings may need protection from wind or pests. I use row covers or cloches to create a microclimate that speeds up germination and shields tender sprouts.
Watch for the first true leaves—these are the second set of leaves that appear after the initial seed leaves (cotyledons). Once you see them, you can gradually remove any protective covers to harden off the seedlings. If your area has late frosts, wait until nighttime temperatures stay above 50°F before leaving seedlings uncovered permanently.
⏰ Step 5: Monitor and Thin as Needed
Check your seeds daily for signs of germination. Once seedlings are 1-2 inches tall, thin them to the recommended spacing to give each plant room to grow. Use scissors to snip unwanted seedlings at soil level—this is gentler than pulling and less likely to disturb roots of the remaining plants.
Thinning might seem cruel, but it prevents overcrowding, which leads to weak stems and increased disease risk. I always save the thinned seedlings for cooking or composting—nothing goes to waste in my garden. After thinning, water deeply to help the remaining plants establish strong roots in their new space.
Tips & tricks for perfect seed germination in the ground
These simple tricks will help your seeds sprout reliably every time—no matter what zone you're in.
Soil Prep Secret: After loosening the top 6 inches of soil, run your fingers through it to check for any remaining clumps. If you feel resistance, add a handful of sand to break up compacted areas—this improves root penetration dramatically. For clay-heavy soil, mix in that 2 inches of compost in a grid pattern rather than all at once to avoid creating pockets of uneven fertility.
Depth and Spacing Hack: Use a pencil to mark planting depth on your seed packet before opening it—this prevents over-planting. For tiny seeds like lettuce, press them into the ¼-inch mark with your thumb rather than dropping them in, which can bury them too deep. Larger seeds like beans? Make a small hole with your finger, drop in one seed, then cover with soil—no need for extra tools!
Temperature Troubleshooting: If your soil thermometer reads below 60°F for warm crops, try planting in a black plastic-lined trench to absorb heat. For cool-season crops, avoid planting when soil temps exceed 70°F—this can trigger bolting (premature flowering). I keep a small thermometer buried in my garden beds so I can adjust planting times without guessing.
Watering Wisdom: The "wrung-out sponge" test for moisture is spot-on, but here's the pro move: water in the early morning so the soil has all day to dry slightly before evening. This prevents fungal diseases that thrive in damp, cool conditions. For sandy soils, water more frequently but lightly—heavy watering can wash seeds away before they sprout.
Pro Tips for Seed In The Ground
- These simple tricks will help your seeds sprout reliably every time—no matter what zone you're in.
- Soil Prep Secret: After loosening the top 6 inches of soil, run your fingers through it to check for any remaining clumps.
- Depth and Spacing Hack: Use a pencil to mark planting depth on your seed packet before opening it—this prevents over-planting.
Frequently asked questions
Got questions about planting seeds for a reliable lawn? You’re not alone! Here are answers to the most common queries—so you can grow with confidence.
What’s the best time to plant seeds in my zone?
The ideal time depends on your USDA Hardiness Zone and grass type. Cool-season grasses (like Kentucky bluegrass) thrive in early fall or spring, while warm-season grasses (like Bermuda) need late spring to early summer. Check your zone on the USDA Plant Hardiness Map for precision!
How long does it take for seeds to germinate?
Germination time varies by grass type:
- Cool-season grasses: 7–21 days
- Warm-season grasses: 10–30 days
What if my seeds aren’t sprouting after 3 weeks?
Don’t panic! First, check soil moisture—seeds need consistent dampness (like a wrung-out sponge). If the soil is too hot/cold, try adjusting your planting time. Poor seed-to-soil contact or old seeds could also be culprits. Test a few seeds in a damp paper towel to see if they’re viable.
Can I plant seeds in summer? What about winter?
Summer planting is risky—heat and drought stress seeds. Winter planting? Only in Zone 7+ with frost protection. For most zones, spring or fall are safest. If you must plant in summer, water deeply twice daily and use shade cloth to protect tender sprouts.
What’s a good alternative if seeds fail to grow?
Try sod (instant grass) or plugs for faster coverage. If reseeding, mix in a starter fertilizer (low nitrogen, high phosphorus) to boost root growth. For bare spots, consider hydroseeding
Wrapping up and next steps
The "seed in the ground" journey is all about patience, preparation, and trusting the process—just like nature intended! 🌱 Whether you’re a seasoned gardener or a curious beginner, the right timing and zone-tailored approach can transform your lawn into a lush, thriving reality.
Now that you’re armed with the perfect planting calendar, take the next step: grab those seeds, mark your calendar, and let your green dreams grow!
Pro tip: Start small if you’re unsure—even a single healthy patch of grass is a victory worth celebrating! 🎉