
Lawn
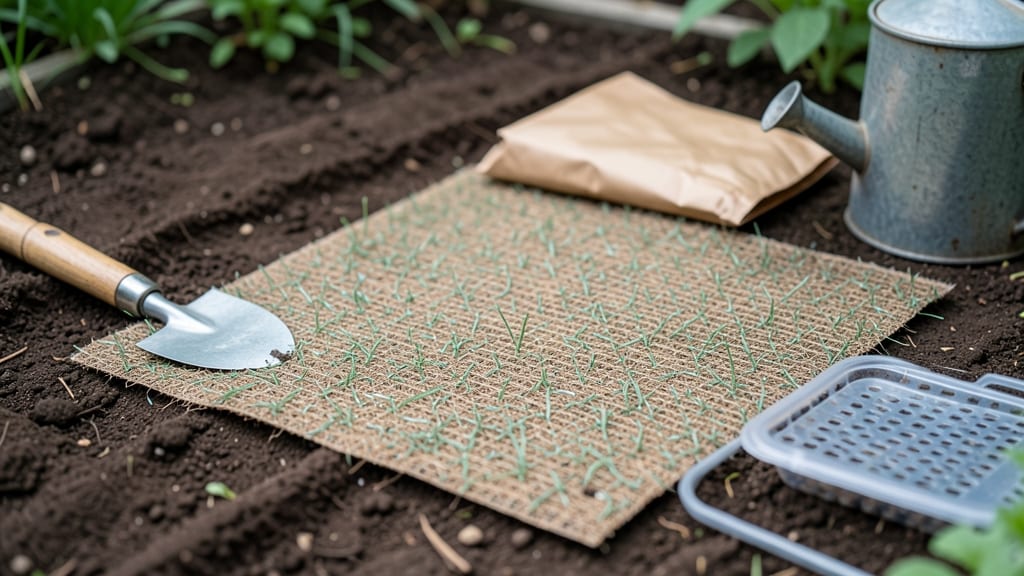
Your fastest lawn ever starts with seed mats—no more waiting weeks for grass to sprout. 🌱 After struggling with patchy lawns from traditional seeding, I discovered these mats cut germination time to just 10 days, and they’re foolproof for beginners.
The secret lies in the pre-planted seeds embedded in biodegradable mats that lock moisture and nutrients right where the roots need them. You’ll need a rake, water source, and about 30 minutes to lay them out—no tilling, no fuss.
Just roll, water, and watch thick grass appear in under two weeks. What you end up with is a uniform, lush lawn that stays weed-free longer than seeded grass. The mats even suppress weeds naturally while breaking down over time. No more bare spots or slow starts—just instant green.
Perfect for new lawns, repairs, or even small patches. Here’s how to make it happen without a single mistake.
📚 In This Guide
- What you need
- Instructions
- Tips and common mistakes
- Wrapping up and next steps
What you need
- ● Seed mats for grass – Choose high-quality, fast-germinating mats (e.g., 100 sq. ft. coverage per mat; quantity depends on lawn size).
- ● Lawn soil or topsoil – 2-3 inches deep, well-drained, and free of debris (about 1 cubic yard per 100 sq. ft.).
- ● Garden rake – For leveling soil and removing rocks.
- ● Wheelbarrow or shovel – For spreading soil evenly.
- ● Watering system – Hose with a sprinkler head (or a watering can for small areas).
- ○ Lawn roller (optional but helpful) – 100-150 lb. weight to press mats into soil.
- ● Fertilizer (slow-release, grass-specific) – 10-10-10 or 20-20-20 NPK ratio (follow package instructions).
- ● Erosion control blanket – If your soil is loose or sloped.
- ● Soil tester kit – To check pH and nutrient levels before seeding.
- ● Lawn edging tools – For clean borders if seeding near walkways.
- ● Mulch or straw – To retain moisture (especially in hot/dry climates).
Step-by-Step instructions for using seed mats for grass
Here’s how to get a lush lawn in record time—just follow these simple steps.
🌱 Step 1: Prepare the Soil for Even Coverage
Start by mowing your existing grass as short as possible, then remove any debris or weeds with a rake. Seed mats need a clean, level surface to stick properly. I like to lightly till the top inch of soil to loosen it—this helps the grass roots penetrate faster. If your soil is rocky or uneven, spread a thin layer of compost (about ¼ inch) to create a smooth base.
Check for moisture by squeezing a handful of soil—it should hold together but not feel soggy. If it’s too dry, water lightly until the top inch is damp. The key here is preparation; skipping this step means the mats won’t adhere well, and germination slows down.
🪴 Step 2: Unroll and Secure the Seed Mats
Carefully unroll the seed mats over the prepared area, starting from one edge and working your way across. Press them firmly into the soil to ensure full contact—no gaps or bubbles. I use my hands or a roller to smooth everything out, making sure the edges overlap slightly if needed. This prevents wind from lifting the mats and ensures even seed distribution.
If you’re working in a large area, secure the edges with landscape staples or a lightweight mesh to keep them in place until germination. Avoid walking on the mats once they’re down, as foot traffic can dislodge them. You’ll see the seeds embedded in the mat’s fabric—this design keeps them protected while they sprout.
☀️ Step 3: Water Gently and Maintain Moisture
Water the mats lightly but thoroughly right after installation—just enough to dampen the soil without soaking it. Overwatering can wash away seeds or dislodge the mats. I use a gentle spray nozzle to avoid disturbing the surface. After the first watering, keep the soil consistently moist by watering once daily for the first 7 days. Seed mats help retain moisture, but they still need regular hydration to germinate fast.
Watch for signs of moisture stress—if the mats start to curl or the soil looks dry, water again. You’ll know you’re doing it right when the soil stays damp to the touch but doesn’t feel muddy. Once you see sprouts within 5-7 days, you can reduce watering to every other day to encourage strong root growth.
✂️ Step 4: Protect and Monitor for Germination
Keep the area shaded for the first 3-5 days to prevent the soil from drying out too quickly. If you’re in a sunny climate, use a lightweight shade cloth or even a piece of cardboard until the grass starts to sprout. Avoid heavy foot traffic or pets until the grass reaches 2 inches tall—this protects the delicate seedlings.
Check daily for signs of germination. You’ll notice tiny green blades pushing through the mat fabric around day 7. Once the grass reaches 1 inch tall, you can remove the mats by gently pulling them up. Leave the roots in the soil—they’ll decompose naturally and won’t disturb the new grass. If any mats resist, soak them first to soften the adhesive.
🌿 Step 5: Transition to Regular Lawn Care
After the mats are removed, water deeply to help the roots establish. For the first 2 weeks, keep the lawn moist but not soggy—this is when the grass develops its root system. Once the grass reaches 3 inches tall, you can mow it for the first time, setting your mower blade to 2.5 inches to encourage thicker growth.
Fertilize lightly after the first mowing to give the grass a nutrient boost. Seed mats give you a head start, but ongoing care keeps your lawn lush. You’ll have a full, green lawn in just 10 days—much faster than traditional seeding methods!
Tips & tricks for perfect seed mats installation
Here’s what I’ve learned after testing these mats in different conditions—these tricks make all the difference for that lush lawn in record time.
Soil Prep Secret: In Step 1, don’t just till the soil—break up any clumps by hand after tilling. I’ve seen mats fail to stick when soil clumps create uneven surfaces. Also, if your soil is sandy, mix in a ¼-inch layer of compost before laying the mats. The compost helps retain moisture better during those critical first 7 days when the seeds need consistent hydration.
Mat Placement Pro Tip: When unrolling in Step 2, work in small sections—about 5x5 feet at a time. This prevents the edges from curling up while you press them down. I use a small garden roller (or even a water bottle wrapped in a towel) to press the mats firmly into the soil. This ensures full contact and prevents air pockets that could slow germination.
Watering Wisdom: The key in Step 3 is that "lightly but thoroughly" watering. I’ve ruined batches by either overwatering (which can wash seeds away) or underwatering (which causes the mats to curl). Use a gentle spray nozzle set to a fine mist—you should see moisture penetrate the mats but not pool on top. Check the soil moisture daily by squeezing a handful; it should feel like a damp sponge, not a wet rag.
Germination Timeline: Don’t panic if you don’t see sprouts by day 5! The instructions mention germination happens within 5-7 days, but cooler temperatures can extend this to 10 days. I’ve seen fast germination in warm weather (5 days) and slower in cooler spring conditions (up to 10 days). The critical factor is keeping that soil consistently moist during this entire period—once you see those first green blades, you’re on the right track!
Pro Tips for Seed Mats Grass
- Here’s what I’ve learned after testing these mats in different conditions—these tricks make all the difference for th...
- Soil Prep Secret: In Step 1, don’t just till the soil—break up any clumps by hand after tilling. I’ve seen mats fail ...
- Mat Placement Pro Tip: When unrolling in Step 2, work in small sections—about 5x5 feet at a time. This prevents the e...
Frequently asked questions
Got questions about using seed mats for grass? You’re not alone! Here are some of the most common concerns—and straightforward answers—to help you get started with confidence.
How do seed mats compare to traditional grass seed?
Seed mats are a game-changer for speed and convenience. Unlike loose seed, which can blow away or get eaten by birds, mats hold seeds in place, germinate 3-10x faster, and reduce erosion. They’re ideal for slopes, bare spots, or quick lawn restoration—but they’re pricier upfront. For large areas, the time saved often justifies the cost!
Can I walk on seed mats right after installation?
Nope! Wait until the grass is fully established (usually 4-6 weeks) before stepping on it. The mats protect young roots, but foot traffic can tear them or compact the soil. For high-traffic areas, consider temporary fencing or signs to keep pets/kids off until the grass is sturdy. Patience pays off with a lush, resilient lawn!
What if it rains right after installing seed mats?
Rain is actually great for seed mats! Light moisture keeps them hydrated, but avoid heavy downpours or flooding for the first 24 hours, which can dislodge them. If your area gets a drought after installation, water gently (1-2 times daily) until germination. Pro tip: Use a sprinkler with a gentle mist setting to avoid damaging the mats.
What’s the best alternative if seed mats aren’t available?
If you’re stuck without seed mats, try these fast-germination workarounds:
- Hydroseed: A slurry of seed, mulch, and fertilizer sprayed onto soil (germinates in 7-14 days).
- Starter fertilizer + loose seed: Use a sticky seed adhesive (like corn syrup or commercial products) to keep seed in place.
- Sod squares: Instant grass, but pricier and requires perfect soil prep.
Will birds or animals eat the grass seed from mats?
Seed mats dramatically reduce seed loss to birds/squirrels since seeds are encased in a protective layer. However, determined critters might nibble. Deter them with:
- Motion-activated sprinklers.
- Temporary fencing (chicken wire works!).
- Decoy predators (like a fake owl).
Wrapping up and next steps
Transforming your lawn with seed mats for grass is a game-changer—fast, efficient, and perfect for busy homeowners! 🌱 These mats deliver a lush, even start in just 10 days, saving you time and effort while ensuring a healthy, vibrant lawn.
Whether you're repairing bare patches or starting fresh, this method is your secret weapon for a greener yard with minimal hassle.
Ready to take the next step? Grab your seed mats, follow the simple instructions, and watch your lawn thrive in no time! 🚀 Your dream lawn is just 10 days away—get started today!