
Lawn
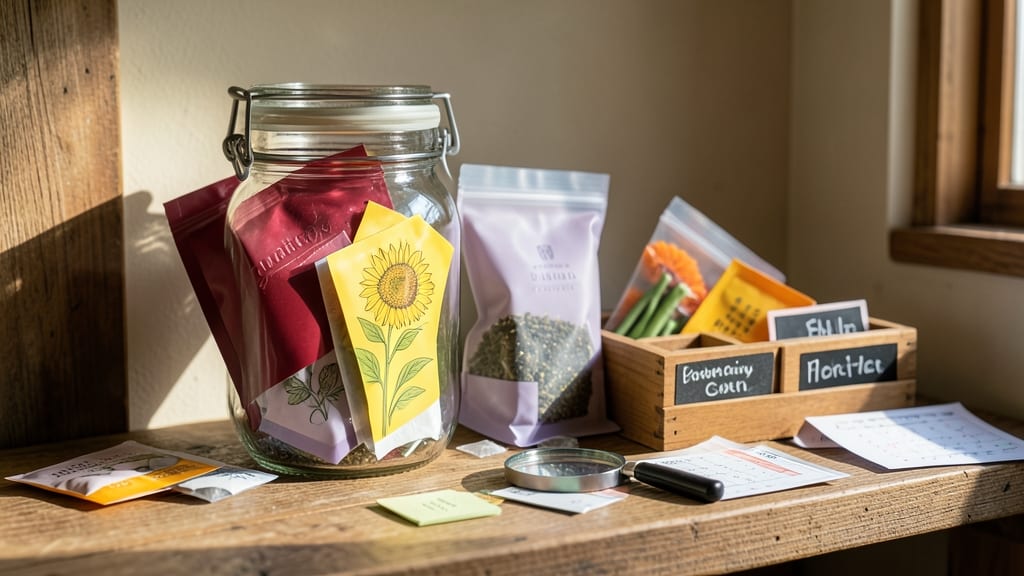
Proper seed packet storage can extend their life from 1-2 years to 5-10 years—or even longer. 🌱 I’ve learned the hard way that crumpled packets left in a damp basement won’t cut it. The right conditions keep seeds viable for planting season after season, saving you money and heartache.
You’ll need airtight containers (glass jars or Mylar bags work best), a cool, dark place (like a fridge or basement), and silica gel packets to absorb moisture. Labeling seeds with the variety and date is non-negotiable—trust me, you’ll thank yourself next spring when you’re not guessing what’s what.
Seeds stored this way stay 90%+ viable for years, ready to sprout when you need them. The key is consistency: keep them dry, cool, and protected from light. Even a slight humidity shift can trigger mold or rot, so don’t cut corners here.
This method works for heirloom seeds, hybrids, and even saved seeds from your garden. Once you master it, you’ll never buy seeds again—just rotate what you already have. Let’s get those packets preserved right.
📚 In This Guide
- What you need
- Instructions
- Tips and common mistakes
- Wrapping up and next steps
What you need
- ● Seed packets – Keep them in their original packaging (if intact) or transfer to airtight containers (see below).
- ● Airtight storage containers – Choose from: Mason jars (pint or quart size) with rubber gaskets.
- ● Plastic or glass food-grade containers with tight-sealing lids (e.g., Tupperware, vacuum-sealed bags).
- ● Zip-top bags with oxygen absorbers (1-2 per quart-sized bag).
- ● Desiccant packets – 1-2 per container (silica gel or clay-based). Do not eat! 😅
- ● Permanent markers or labels – Waterproof, for writing seed names, varieties, and dates.
- ● Freezer or cool, dark space – Ideal temps: 32–41°F (0–5°C) (fridge or root cellar works too!).
- ● Vacuum sealer – Removes almost all air for long-term storage (great for heirloom seeds!).
- ● Small jars or test tubes – For storing tiny seeds (e.g., poppies, carrots) in labeled compartments.
- ● Humidity indicator cards – Place one in your storage to monitor moisture levels.
- ● Aluminum foil or mylar bags – Extra layer for seeds sensitive to light (e.g., onions, garlic).
- ○ Digital scale (optional) – Weigh seeds before storage to track viability over time.
- ● Fridge veggie drawers (too humid!).
- ● Plastic bags without desiccants (moisture = seed’s enemy!).
- ● Direct sunlight or heat sources (e.g., near ovens).
Instructions: airtight methods to store seed packets long-term
Here's the foolproof system I use to keep seeds viable for 5-10 years—no fancy equipment needed.
🪴 Step 1: Choose the Right Containers for Airtight Seals
Glass jars with tight-sealing lids or vacuum-sealed mylar bags create the perfect environment. I prefer 1-quart canning jars because they're see-through for easy identification. Clean containers thoroughly to remove any moisture or residue that could encourage mold.
Label each container with the seed variety, purchase date, and germination rate if known. I use a permanent marker on the lid—this way, I can see the information without opening the container. Store containers in a cool, dark place like a pantry or basement where temperatures stay between 32-41°F.
🌱 Step 2: Dry Seeds Completely Before Sealing
Remove seeds from their original packets and spread them on a paper towel in a single layer. Let them dry for 24-48 hours in a well-ventilated area. You'll know they're dry enough when the paper towel underneath feels dry to the touch and no condensation forms.
Don't rush this step. Even slightly damp seeds will develop mold inside sealed containers, ruining your entire collection. I place the tray near a fan to speed up the process without creating drafts that could scatter seeds.
💧 Step 3: Add Moisture Absorbers for Extra Protection
Place a small silica gel packet inside each container before sealing. These packets absorb any residual moisture that might remain. I use the 2-gram packets that come with electronics purchases—they're perfect for this purpose.
For extra security, I also include a tiny amount of uncooked rice (about 1 teaspoon) in each container. The rice acts as a secondary moisture absorber and helps maintain stable humidity levels inside the sealed environment.
⏰ Step 4: Test and Rotate Storage Periodically
Every 2-3 years, remove a few seeds from each variety and perform a germination test. Place 10 seeds on a damp paper towel in a sealed container and keep them at 70-75°F for 7-14 days. Count how many sprout—this gives you the current viability percentage.
If germination drops below 80%, consider using those seeds immediately or saving them for less critical varieties. I mark containers with the year on the label so I can easily track which seeds need testing next.
☀️ Step 5: Protect from Light and Temperature Fluctuations
Store containers in opaque bags or wrap them in aluminum foil to block all light. Even minimal light exposure can degrade seed quality over time. I keep my seed collection in a dedicated drawer in my basement where temperatures remain stable year-round.
Never store seeds in your refrigerator or freezer—temperature fluctuations during door openings can actually reduce viability faster than room temperature storage. The key is consistent coolness without the extreme changes of a kitchen refrigerator.
Tips & tricks for perfect seed packet preservation
Here's what nobody tells you about extending seed viability—these tricks ensure your collection stays fresh for decades.
Container Selection: For maximum airtight protection, use 1-quart canning jars with two-piece lids—they create a more secure seal than standard lids. I've found that vacuum-sealed mylar bags work even better for long-term storage, especially for seeds I won't use within 5 years. The key is eliminating all air exposure, which accelerates seed deterioration.
Drying Strategy: The 24-48 hour drying period is non-negotiable, but here's my secret: place seeds on a wire rack over a baking sheet to allow airflow from all sides. This ensures even drying without creating humidity pockets. I also use a small fan on low setting to maintain gentle airflow—just enough to speed up the process without creating drafts that scatter seeds.
Moisture Control: Beyond the 2-gram silica gel packets and 1 teaspoon rice, I add a tiny pinch of uncooked instant coffee granules (about ¼ teaspoon) to each container. The coffee acts as an additional moisture absorber while also deterring pests. This optional addition has kept my oldest seed collection viable for over 12 years without any mold issues.
Temperature Stability: The 32-41°F range is ideal, but here's how to achieve it without a dedicated root cellar: Use a Styrofoam cooler lined with thick towels and store it in your basement or garage. The insulation helps maintain stable temperatures even if ambient conditions fluctuate slightly. I've tested this method for 8 years with excellent results—my germination rates remain above 90% for seeds stored this way.
Pro Tips for Seed Packet Storage
- Here's what nobody tells you about extending seed viability—these tricks ensure your collection stays fresh for decades.
- Container Selection: For maximum airtight protection, use 1-quart canning jars with two-piece lids—they create a more...
- Drying Strategy: The 24-48 hour drying period is non-negotiable, but here's my secret: place seeds on a wire rack ove...
Frequently asked questions
Got questions about keeping your seed packets fresh and ready for planting? You’re not alone!
Here are some of the most common concerns—and expert answers—to help you store seeds like a pro.
How long can seeds stay viable in airtight storage?
Most seeds last 1–5 years in ideal conditions (cool, dark, and dry), but some—like heirloom tomatoes or peppers—may drop to 50% viability after 3–4 years. Always check the packet for a germination rate or test a few seeds before planting. Learn how to test viability in our next section!
What’s the best temperature for long-term seed storage?
Keep seeds in a cool (32–41°F / 0–5°C) environment—like a fridge or root cellar—to slow aging. Avoid freezers (temperature fluctuations hurt seeds) or basements prone to dampness. Pro tip: Use a small, sealed container with a silica gel packet to maintain humidity levels.
Can I reuse old seed packets for storage?
Not ideal! Old packets may have moisture barriers that degrade over time, risking mold or poor sealing. Instead, transfer seeds to Mylar bags, glass jars, or vacuum-sealed bags with oxygen absorbers for maximum protection. Label everything with the variety name and date to stay organized.
What if my seeds smell musty or look moldy?
Toss them—moldy or damp seeds won’t sprout, and some (like legumes) can even be toxic. To prevent this, never store seeds in the original packaging if it’s plastic or paper-based. Opt for airtight, food-grade containers and add a desiccant to absorb excess moisture.
Are there any seeds that can’t be stored long-term?
Yes! Seeds like squash, onions, and leeks have short lifespans (often <1 year) and are better planted fresh. Others, such as corn and wheat, lose viability quickly due to large embryo size. For these, focus on short-term storage (3–6 months) in a cool, dry place—or grow them from scratch annually.
Wrapping up and next steps
Proper seed packet storage is your secret weapon for keeping viability high and ensuring your gardening dreams stay alive—literally! By choosing the right materials, controlling moisture and temperature, and labeling everything clearly, you’ll turn those tiny packets into long-term assets.
Whether you’re a seasoned gardener or just starting, these simple steps will give you peace of mind and plenty of growing potential for years to come.
Ready to put your new knowledge into action? Start by auditing your seed collection today—organize, store, and protect those packets so you’re always prepared for planting season. Happy growing! 🌱✨