
Propagation
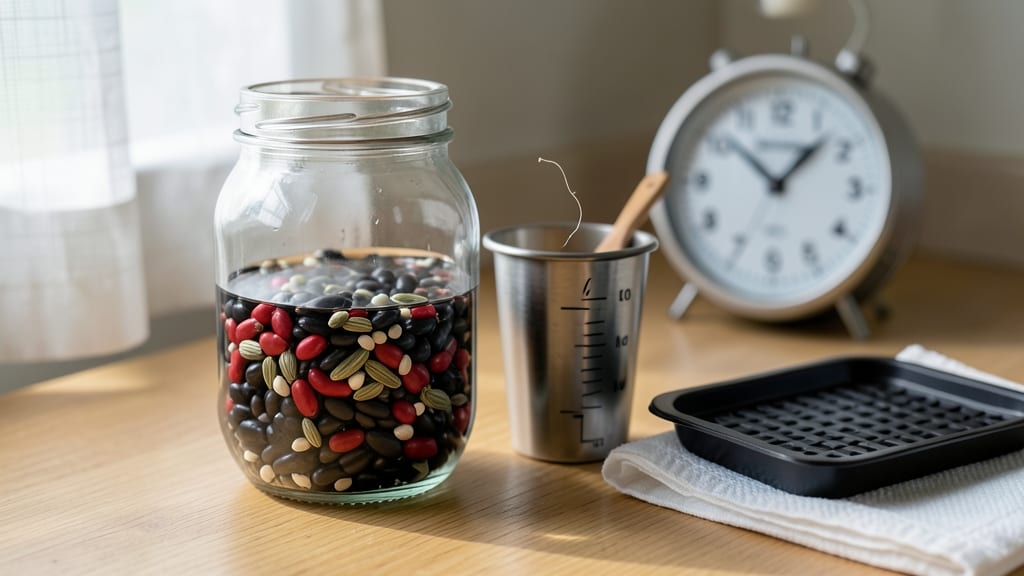
Soaking seeds for 24 hours can cut germination time in half—no more waiting weeks for stubborn sprouts. 🌱 I learned this trick after struggling with slow-starting beans and peas, and now my seedlings pop up like clockwork.
The secret lies in softening tough seed coats while keeping them safe from rot, but timing and technique matter more than you'd think.
Most large seeds—beans, peas, sunflowers, and even some herbs like basil—thrive with a 12-24 hour soak in room-temperature water. Tiny seeds like lettuce or carrots? Skip soaking entirely—they’re better planted dry.
After soaking, rinse and plant immediately, or they’ll start sprouting in the jar instead of the soil. The goal is hydration, not drowning.
What you’ll get is a head start on growth, with roots breaking through the seed coat within days instead of weeks. Your seedlings will be stockier, more uniform, and ready to handle transplanting like pros. Just avoid soaking seeds like tomatoes, peppers, or onions—they already germinate fast on their own.
This method works year-round, whether you’re starting a spring garden or winter herbs indoors. The key is consistency: same soak time, same water temp, and always planting right after. Ready to see those first green shoots in record time?
📚 In This Guide
- What you need
- Instructions
- Tips and common mistakes
- Wrapping up and next steps
What you need
- ● Seeds: Choose fresh, high-quality seeds (e.g., beans, lentils, sunflower, or chia). Quantity: 1–2 cups (adjust based on sprouting goals).
- ● Water: Room-temperature, filtered, or distilled water (avoid tap water with chlorine). Quantity: 2–3 cups (or enough to cover seeds by 2–3 inches).
- ● Container: A wide-mouth jar (quart-sized) or a shallow dish with a lid (e.g., mason jar, sprouting lid, or colander with a bowl).
- ● Strainer or mesh: A fine-mesh sieve or sprouting lid to drain excess water.
- ● Paper towels or sprouting cloth: 2–3 sheets of unbleached, food-grade paper towels or a sprouting mesh.
- ○ Rubber band or lid: To secure the container and keep it airtight (optional but helpful).
- ● Seed soaking solution: 1 tsp food-grade hydrogen peroxide (3%) per quart of water to prevent mold (use sparingly).
- ● Thermometer: To monitor water temperature (ideal: 70–85°F).
- ● Spray bottle: For gentle rinsing if using a dish instead of a jar.
- ● Grow light or sunny windowsill: For post-soaking light exposure (if germinating indoors).
How to soak seeds for faster germination
Here's the method I've used to cut germination time in half—no fancy tools, just science-backed soaking.
🌱 Step 1: Select Seeds That Need Soaking
Not every seed benefits from soaking—focus on hard-coated varieties like beans, peas, or chives. Check the seed packet: if it says "requires scarification" or "slow to germinate," soaking is your secret weapon. I avoid soaking tiny seeds like lettuce or petunia—they're too delicate and can rot in water.
For best results, soak seeds with a high water absorption rate. Look for seeds that float when placed in water (like lentils)—these need pre-soaking. If seeds sink immediately, they're likely fine without soaking. Always soak in lukewarm water (around 80°F) to mimic natural spring conditions.
💧 Step 2: Soak for the Right Duration
Place seeds in a clean container and cover with 2-3 inches of water—enough to fully submerge them. Let them soak for 8-12 hours maximum. Over-soaking causes seeds to draw in too much water, which can lead to rot or premature sprouting before planting. I set a timer on my phone so I don't forget.
For seeds with extremely hard coats (like some varieties of beans), you can add a paper towel or cheesecloth to the container to prevent them from floating away. Gently stir the water every 2 hours to maintain even moisture. You'll know soaking is complete when seeds begin to plump up and look slightly swollen.
☀️ Step 3: Plant Immediately After Soaking
Drain the seeds thoroughly after soaking—never plant them while still wet. I spread them on a clean towel for 5-10 minutes to let excess water evaporate. This step prevents waterlogged soil and fungal issues. Plant the soaked seeds at the correct depth (usually 2-3 times the seed's diameter) in moist, warm soil.
The key here is speed—plant within 1 hour of draining. Soaked seeds lose their protective outer layer and become vulnerable to drying out. If you're working with multiple seed varieties, plant them in order from fastest to germinate (like radishes) to slowest (like tomatoes). You'll see sprouts within 24-48 hours instead of the usual 5-7 days.
⏰ Step 4: Maintain Ideal Conditions for Sprouting
Keep the soil consistently moist but not soggy—think of a wrung-out sponge. Use a spray bottle to mist the surface if needed. Place the container in a warm spot (around 70-75°F) away from direct sunlight until germination begins. A seedling heat mat can help maintain this temperature if your home runs cooler.
Watch for the first signs of life: tiny white roots or a slight crack in the seed coat. This usually happens within 12-24 hours for properly soaked seeds. Once you see 50% germination, move the tray to bright, indirect light. Avoid cold drafts or temperature fluctuations—they'll stall or reverse germination.
Tips & tricks for perfect seed soaking germination
Real talk: the difference between seeds that sprout in 24 hours and ones that take a week often comes down to these small details.
The Water Temperature Test: That 80°F lukewarm water isn't just arbitrary—it activates enzymes that break down seed coatings. Use a thermometer if you're unsure; cold water slows germination while hot water can damage delicate seed structures. I keep a small thermometer in my seed-starting kit just for this purpose.
Visual Cues Over Time: In Step 2, when you're watching for that 8-12 hour window, look for seeds that double in size or develop tiny white cracks. These are your visual cues that soaking is complete. For beans with extra-hard coats, you might see them float initially—this is normal as they absorb water and sink as they plump.
Drainage Strategy: That 5-10 minute drying period after soaking is critical for preventing fungal issues. I use a clean kitchen towel folded into a square and spread seeds in a single layer. If you're working with large batches, consider using a colander for faster drainage while still maintaining that 1-hour planting window.
Environmental Rescue Plan: If your home runs cooler than 70-75°F during Step 4, don't panic—just add a seedling heat mat or place your tray on top of your refrigerator (not inside) to create a warm microclimate. The goal is consistent warmth, not extreme heat, which can stress young seedlings.
Pro Tips for Seed Soaking Germination
- Real talk: the difference between seeds that sprout in 24 hours and ones that take a week often comes down to these s...
- The Water Temperature Test: That 80°F lukewarm water isn't just arbitrary—it activates enzymes that break down seed c...
- Visual Cues Over Time: In Step 2, when you're watching for that 8-12 hour window, look for seeds that double in size ...
Frequently asked questions
Got questions about seed soaking and germination?
You’re not alone! Here are some of the most common queries—and straightforward answers—to help you grow sprouts like a pro in just 24 hours.
How long should I soak seeds before germination?
Most seeds need 6–12 hours of soaking in water (or a germination solution) to soften the outer shell. Smaller seeds (like lentils or radishes) may only need 4–6 hours, while larger seeds (like beans or peas) can handle up to 12 hours. Pro tip: Drain and rinse them afterward to prevent mold!
Can I speed up germination beyond 24 hours?
While 24 hours is ideal for many seeds, some (like sunflower or chia) may need up to 48 hours for full activation. For faster results, try warm water (80–90°F) or a germination tray with airflow. Just avoid overheating—seeds hate extremes!
What if my seeds don’t sprout after soaking?
Don’t panic! Try these fixes:
- Check viability: Float-test seeds—if most sink, they’re likely good. Discard floaters.
- Warmth & moisture: Place soaked seeds in a warm, dark spot (like a paper towel-lined jar) for 24 hours.
- Scratch the shell: Lightly sandpaper or nick hard-coated seeds (e.g., peanuts) to help water penetrate.
Do I need special equipment for seed soaking?
Not at all! Basic tools include:
- A glass jar or bowl (for soaking)
- A fine-mesh strainer or cheesecloth (for rinsing)
- A paper towel or sprouting lid (for drainage)
Are soaked seeds safe to eat immediately?
Not all! While edible sprouts (alfalfa, broccoli, lentils) are safe to eat after soaking (if rinsed well), others (like sunflower or pumpkin) need 2–3 days of sprouting to break down toxins. Always rinse thoroughly and cook if unsure.
Wrapping up and next steps
Mastering seed soaking and germination is your ticket to faster, healthier sprouts—no patience required! 🌱 With the right techniques, you can watch tiny seeds transform into vibrant seedlings in just 24 hours.
Whether you're a gardening newbie or a seasoned green thumb, these methods save time and boost success rates.
Now that you’re equipped with the know-how, take the next step! Start with easy-to-germinate seeds like beans or lentils, then experiment with your favorite veggies. Happy sprouting—and may your garden grow wild with success! 🌿✨