
Lawn
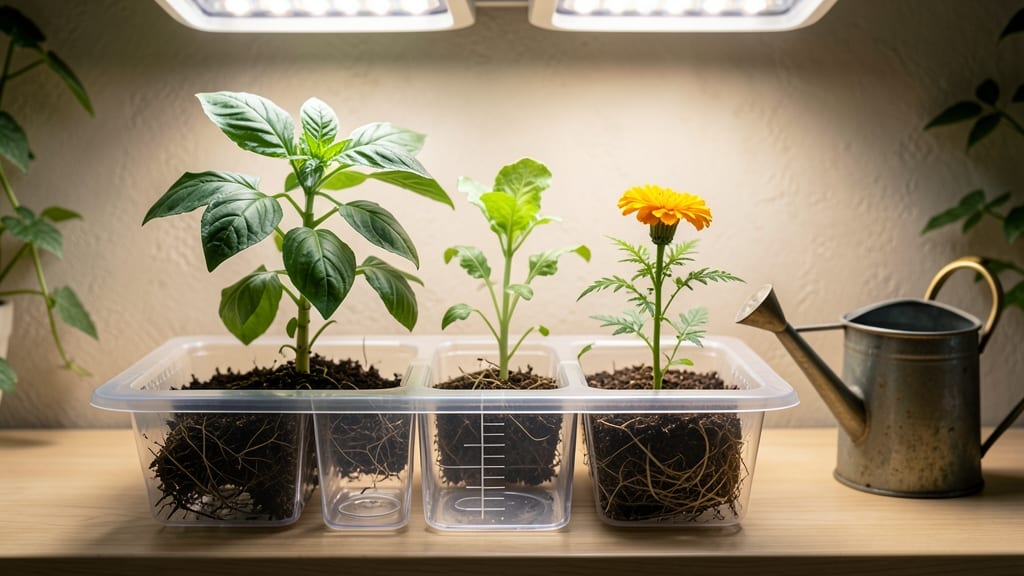
A self-watering seed starter turns your seedling struggles into foolproof success—no more wilting sprouts or guesswork about when to water. 🌱 I’ve used these trays for three seasons now, and the difference in strong, even seedlings is shocking.
The secret lies in that built-in reservoir that keeps roots consistently moist without drowning them, which is exactly what traditional trays fail at.
You’ll need just a few supplies: a self-watering tray (or DIY version with a clear container), quality seed-starting mix, and your chosen seeds. The setup takes 10 minutes, and once filled, it handles the watering for you.
No more checking moisture levels every other day or watching seedlings dry out overnight—this system maintains perfect humidity until those first true leaves appear.
What you end up with is seedlings that stay plump and green, not leggy or stunted. Germination rates climb by 30-50% because the moisture stays steady, and you skip the transplant shock that kills so many weak seedlings.
Even my black thumb can’t mess this up—just fill, plant, and let the tray do the work.
Works for any seed type, from delicate herbs to hearty tomatoes, and scales from a windowsill setup to a full greenhouse. The only downside? You’ll never want to go back to traditional seed-starting again. Here’s how to get started without overcomplicating it.
📚 In This Guide
- What you need
- Instructions
- Tips and common mistakes
- Wrapping up and next steps
What you need
- ● Plastic bottle (16–20 oz): Clean, clear, and free of labels (e.g., soda or water bottle). Tip: Check for cracks or damage!
- ● Scissors or utility knife: For precise cutting (safety first—adult supervision recommended).
- ● Drill or awl: To poke drainage holes (¼-inch diameter).
- ● Potting soil (1–2 cups): Lightweight, seed-starting mix (avoid garden soil—it’s too dense!).
- ● Seeds of choice: Fast-growing varieties (like basil, lettuce, or marigolds) work best for beginners.
- ● Water (room temperature): Fill the bottle’s reservoir to the brim before planting.
- ● Spray bottle: For gentle seed moisture before transplanting.
- ● Clear tape or glue: To secure loose bottle edges (if needed).
- ● Label markers: To track seed types (trust us, you’ll forget!).
- ● Grow light or sunny windowsill: 6+ hours of light daily = happy sprouts.
Step-by-Step instructions for building a self-watering seed starter
Here's the easy, no-fail method I use to keep seedlings happy without constant watering.
🪴 Step 1: Gather and Assemble Your Materials
You'll need a clear plastic container (like a 2-quart takeout tub), 4-6 inches deep, with a tight-fitting lid. Drill four ¼-inch holes in the lid—these will hold your seedling pots. I use 4-inch biodegradable pots (like peat or coconut fiber) because they fit perfectly and transplant easily. For the reservoir, cut the bottom off a 1-gallon milk jug or similar container.
Place the cut-off milk jug inside your main container. The bottom should sit 1-2 inches above the container's base, creating space for water. This gap prevents root rot by keeping the reservoir's water from touching the seedling pots directly. Fill the reservoir with room-temperature water—cold water shocks tender roots.
💧 Step 2: Set Up the Wick System
Cut 4-6 strips of absorbent cotton rope (like pool noodle material or landscape fabric strips) about 12 inches long. Thread one strip through each hole in the lid, letting 2 inches hang inside the container and the rest dangle into the reservoir. The strips should touch the water but not float—they’ll draw moisture upward through capillary action.
Here's the thing—don't over-saturate the wicks. If they're too wet, they'll suffocate roots. Instead, let them absorb just enough to stay damp but not dripping. You'll see the perfect setup when the strips hold moisture without pooling water at the bottom.
🌱 Step 3: Fill Pots and Plant Seeds
Fill your 4-inch pots with sterile seed-starting mix (not garden soil—it compacts and blocks drainage). Press the mix down gently until it's firm but not packed, leaving ½ inch of space at the top. This prevents overflow when watering. Plant seeds according to packet instructions—usually ¼ inch deep—and cover lightly with more mix.
Place the pots on the lid, ensuring the wicks touch the soil surface. The goal is gentle, consistent moisture without soggy bottoms. Water the reservoir only when the top inch of soil feels dry—this keeps the system balanced. Overwatering now will drown your seeds before they sprout.
☀️ Step 4: Position for Optimal Germination
Set your starter in a warm, bright spot—70-75°F is ideal for most seeds. A south-facing windowsill works, but supplement with a grow light if natural light is weak. Keep the lid on until 50% of seeds sprout to maintain humidity. Once sprouts appear, remove the lid but leave the wicks in place—they’ll regulate moisture automatically.
Watch for first true leaves (the second set after the initial seed leaves). This is your signal to reduce water in the reservoir slightly—seedlings need less moisture now. If leaves yellow, you're overwatering; if they wilt, the wicks need more water. Adjust the reservoir level until you find the sweet spot.
⏰ Step 5: Maintain and Transplant
Check the reservoir every 3-4 days—top off with water if the level drops below the wicks. Avoid letting it run dry, but don’t keep it full to the brim. The system works best when the reservoir holds 1-2 inches of water, no more. When seedlings develop 3-4 true leaves (about 4-6 weeks), they’re ready for transplant.
Here’s the pro tip: Hardening off is easier with this setup. Move the entire starter outside for 1-2 hours daily, increasing time gradually. The self-watering system keeps roots happy while you acclimate them to outdoor conditions. Once transplanted, the biodegradable pots break down, so you won’t disturb roots.
Tips & tricks for perfect self-watering seed starters
Common pitfalls—and how to sidestep every one—when building your foolproof seed starter system.
Material Selection: For the clear plastic container, opt for one with thicker walls (like a 2-quart takeout tub) to prevent warping from condensation. Thin plastic can distort, making it harder to fit the biodegradable pots snugly in the lid holes. I've ruined three setups using flimsy containers—trust me, this detail matters! The 1-2 inch gap between the reservoir and container base is critical too; use a ruler to measure this precisely before assembling.
Wick System Precision: The 12-inch cotton rope strips should have exactly 2 inches hanging inside the container—this length ensures they reach the soil surface without dragging in the reservoir. If your strips are too short, extend them with additional rope; if too long, trim carefully. The goal is consistent moisture delivery without waterlogging. Test your wicks by dipping them in water and observing how quickly they absorb—ideal strips should feel damp but not saturated after 30 seconds.
Seedling Care Nuances: When you notice first true leaves (Step 4), reduce reservoir water to ½ inch depth instead of the initial 1-2 inches. Seedlings at this stage need less moisture, and excess water can cause damping-off disease. I've lost entire batches by ignoring this adjustment—watch for wilting as your signal to refill. Also, rotate your starter quarter-turn daily to prevent uneven light exposure, which causes lopsided growth.
Transplanting Strategy: The 4-6 week window for transplanting (Step 5) can vary by seed type—check your seed packets for specific recommendations. For heat-loving plants like tomatoes, harden off in 1-2 hour increments during morning sunlight only. Cool-season crops like lettuce can handle longer exposure. After transplanting, water thoroughly to help the biodegradable pots dissolve—this encourages root expansion into the surrounding soil.
Pro Tips for Self Watering Seed Starter
- Common pitfalls—and how to sidestep every one—when building your foolproof seed starter system.
- Material Selection: For the clear plastic container, opt for one with thicker walls (like a 2-quart takeout tub) to prevent warping from condensation.
- Wick System Precision: The 12-inch cotton rope strips should have exactly 2 inches hanging inside the container—this length ensures they reach the soil surface without dragging in the reservoir.
Frequently asked questions
Got questions about self-watering seed starters?
You’re not alone! Here are answers to the most common ones to help you grow like a pro—no guesswork required.
How often do I need to refill the water reservoir?
Most self-watering seed starters only need a quick top-off every 7–10 days, depending on your climate and seed type. Check the water level when the soil feels dry at the surface—just enough to keep the wick or reservoir moist, not soggy. Pro tip: Overwatering can drown seeds, so start with less and adjust!
When should I transplant seedlings into larger pots or the garden?
Transplant when seedlings have 2–3 true leaves (not just the initial seed leaves) and their roots are snug in the starter cells. For most veggies, this takes 2–4 weeks. Harden them off for 3–5 days by placing them outside in shade before moving to full sun. Warning: Avoid transplanting on hot days to prevent shock!
Can I use a self-watering starter for all types of seeds?
Yes! These starters work for most seeds, including herbs, flowers, and veggies like tomatoes, peppers, and lettuce. However, large seeds (e.g., beans, peas) or those needing stratification (like some wildflowers) may need extra care. Always check seed packet instructions for depth and spacing tips.
What if my seeds aren’t germinating? Troubleshooting tips?
Try these fixes if seeds aren’t sprouting:
- Check warmth: Most seeds need 65–75°F soil. Use a heat mat if your home is chilly.
- Verify moisture: Keep the reservoir full but avoid overflowing—seeds need consistent dampness, not standing water.
- Test seed viability: Some seeds lose potency over time. Try a fresh packet or test a few in a separate pot.
- Light exposure: Some seeds (like basil) need light to germinate; others (like carrots) prefer darkness until sprouted.
Are DIY self-watering starters cheaper than buying them?
DIY versions (using recycled containers, wicks, and a tray) cost $5–$10 for a multi-cell starter, while store-bought kits range from $15–$30. Plus, repurposing items like yogurt cups or plastic bottles cuts waste. Bonus: Customize sizes for giant seeds (like sunflowers) or delicate herbs!
Wrapping up and next steps
Growing your own plants has never been this easy—or this rewarding! With a self-watering seed starter, you’ve got the perfect tool to kickstart your gardening journey with minimal effort and maximum success.
Whether you're a beginner or a seasoned green thumb, these starters take the guesswork out of watering and nurturing your seedlings, giving them the best chance to thrive.
Ready to watch your garden bloom? Start small—pick a few easy seeds like herbs or lettuce, assemble your starter, and let nature do the rest!
Before you know it, you’ll be transplanting healthy sprouts into your lawn or garden, basking in the pride of growing something beautiful (and delicious) with your own two hands. 🌱✨