
Propagation
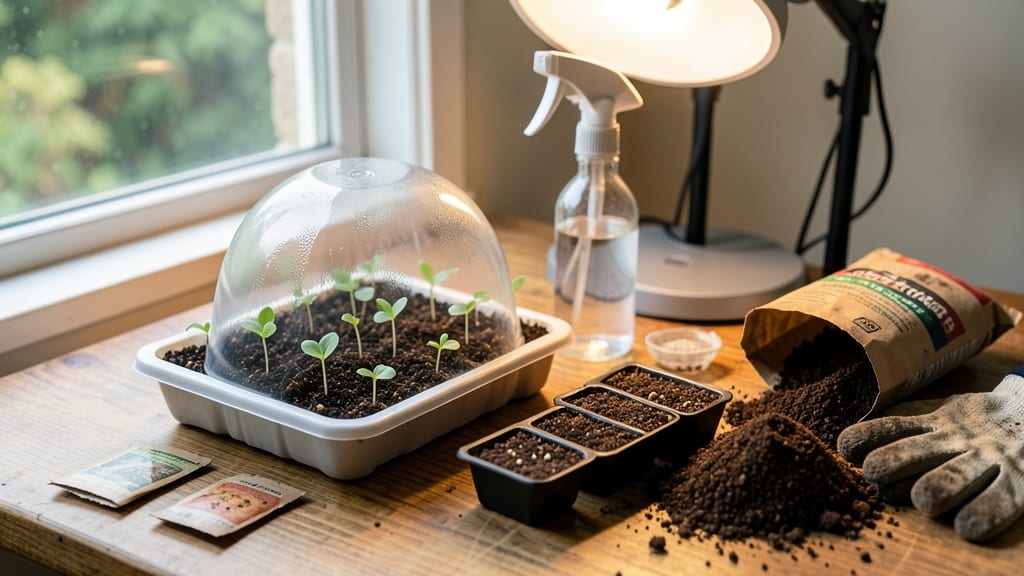
The perfect soil mix for seed starting is the difference between seedlings that pop up in days and ones that rot before they even sprout. 🌱 I learned this the hard way after watching my first batch of seedlings turn to mush from too-heavy soil—now I swear by a blend that’s fluffy, sterile, and just damp enough to encourage roots without smothering them.
You’ll need three key ingredients: peat moss or coconut coir for moisture retention, perlite or vermiculite for drainage and airflow, and a pinch of compost or worm castings for gentle nutrients.
The magic ratio is 50% peat moss, 40% perlite, and 10% compost, but adjust based on your seeds—succulents need more perlite, while veggies thrive with a touch more organic matter. Sterilizing the mix with a 10-minute bake at 200°F kills fungi and bacteria that cause damping-off.
What you’ll end up with is a mix that crumbles like fresh bread but holds moisture like a sponge—ideal for tiny roots to explore. Seedlings grow stronger and faster, with fewer leggy stems or moldy stems at the base.
The texture stays light enough to avoid compacting when watered, so you won’t accidentally suffocate your babies.
Store-bought mixes work in a pinch, but DIY gives you control over ingredients and cost. For example, swap peat moss for coconut coir if you’re eco-conscious, or add sand for extra grit if your climate is humid.
The key is consistency—once you nail this mix, you’ll never go back to the generic stuff from the garden center.
📚 In This Guide
- What you need
- Instructions
- Tips and common mistakes
- Wrapping up and next steps
What you need
- ● 50% sterile potting soil – Look for a seed-starting mix labeled "sterile" or "seedling mix" (avoid garden soil—it’s too dense and may contain pathogens).
- ● 30% perlite or vermiculite – Perlite improves drainage; vermiculite retains moisture. Use 1 part to the mix.
- ● 20% coco coir or peat moss – Adds lightweight, moisture-holding properties. Coco coir is sustainable and pH-neutral.
- ● Mixing container – A clean, shallow bin or bucket (5-gallon size works well).
- ● Measuring cups or scale – For precise ratios (a kitchen scale ensures accuracy).
- ○ Gloves & mask – Optional but recommended when handling perlite/vermiculite (they’re dusty!).
- ● Seed trays or pots – With drainage holes (4–6" deep for most seeds).
- ● Spray bottle – For gentle watering post-mixing.
- ● 🔥 Sterilize your mix: Microwave dampened soil for 90 seconds to kill fungi/bacteria.
- ● ✨ Adjust for seed types: Add 10% sand if starting cacti/succulents for extra grit.
How to create the perfect soil mix for seed starting
This blend gives seeds the ideal balance of moisture, aeration, and nutrients to germinate strong.
🌱 Step 1: Combine Base Ingredients for Lightweight Texture
Start with 50% peat moss or coco coir—this holds moisture without compacting. I sift it first to remove any large fibers that could block airflow. Add 30% perlite or vermiculite next; this creates those tiny air pockets seeds need to breathe. The perlite will look like tiny white pebbles, while vermiculite has a silvery, flaky appearance—both work, but perlite drains faster if you tend to overwater.
Mix these two components dry first. Use a clean bucket or large bowl, and stir with a garden trowel until evenly distributed. You'll see the peat moss or coco coir dark and fibrous, with the perlite/vermiculite scattered throughout like tiny white or silver specks. This dry blend prevents clumping when you add moisture later.
💧 Step 2: Add Organic Matter for Nutrient Boost
Now incorporate 20% compost or worm castings—this provides gentle, slow-release nutrients without overwhelming tender seedlings. I use a well-aged compost that's broken down into a dark, crumbly texture (no big chunks). Sift it through a quarter-inch mesh to remove any large particles that could harbor pests or diseases. The compost should smell earthy, not sour or ammonia-like.
Gently fold the compost into your dry mix until it's evenly distributed. You want to see dark flecks throughout the lighter base. Avoid overmixing—just enough to blend the compost in without breaking down the perlite's structure. This step ensures your seedlings get a nutrient head start without the risk of burning young roots.
✂️ Step 3: Moisten to Ideal Consistency
Gradually add warm water while mixing until the blend reaches the consistency of a damp sponge. It should hold together when gently squeezed but not drip water. I use a spray bottle for the final adjustment—mist the surface until it looks uniformly moist but not glistening. The mix should crumble easily between your fingers with just slight resistance.
Here's the thing—this mix dries out faster than garden soil, so you'll water more frequently. But that's the point: seeds need consistent moisture without sitting in soggy conditions. Test your mix by filling a small container, pressing down lightly, and checking the moisture level after 24 hours. If it's dry at the surface, you've achieved the right balance.
☀️ Step 4: Sterilize for Disease Prevention
Spread your mixed soil on a baking sheet and place it in a 250°F oven for 30 minutes. This step kills any dormant pathogens or weed seeds that could harm your seedlings. The mix will smell fresh and earthy afterward—no burnt odors. If you don't have an oven, microwave the soil in 1-minute increments until steaming hot, stirring between each interval.
Let the sterilized mix cool completely before use. I store any extras in a sealed container with a moisture barrier (like a plastic bag inside) to prevent mold. This precaution is especially important if you're starting heat-loving plants like peppers or tomatoes, which are prone to damping-off disease in contaminated soil.
🪴 Step 5: Test Before Planting
Fill a small container with your mix and press down lightly. The surface should look firm but not compacted—you should be able to push your finger in about half an inch without resistance. Water it thoroughly, then wait 10 minutes. The water should drain freely through the bottom, leaving the surface slightly damp but not wet.
This final test ensures your mix has the perfect balance of moisture retention and drainage. If water pools on top, add more perlite to improve airflow. If it drains too quickly, increase the peat moss or coco coir percentage slightly. Once you've passed this test, you're ready to sow seeds with confidence in a mix that promotes strong, healthy germination.
Tips & tricks for perfect seed starting soil mix
A few simple adjustments can transform your basic mix into a seedling superstar. Here's what I've learned after years of trial and error in my own greenhouse.
Sifting is Non-Negotiable: I can't stress this enough—sifting both the peat moss or coco coir AND the compost through a quarter-inch mesh screen makes all the difference. This removes those pesky large fibers that block airflow and create waterlogged pockets where seeds rot. I use a simple hardware cloth stretched over a frame for this step, and it's saved me from countless failed seed batches. The goal is to create a uniform texture where every seedling gets equal access to air and moisture.
Perlite vs. Vermiculite Decision: Here's what nobody tells you—perlite is better for plants that need excellent drainage (like succulents or cacti), while vermiculite holds more moisture and works better for water-loving seedlings (like lettuce or spinach). I keep both on hand and adjust the ratio based on what I'm growing. For most vegetables, I stick with the original 30% perlite recommendation, but for delicate herbs, I'll increase vermiculite to 20% and reduce perlite to 10% to maintain consistent moisture.
Warm Water Secret: That warm water in Step 3 isn't just about comfort—it activates beneficial microbes in your compost while preventing temperature shock to your seeds. I heat my water to about 100°F (just below boiling) and let it sit for 5 minutes before using. This extra step ensures your mix is ready to support germination immediately. Pro tip: Use a kitchen thermometer to check—water that's too hot can actually kill beneficial bacteria in your compost.
Sterilization Shortcut: If you don't have an oven, the microwave method works surprisingly well—just stir every 30 seconds during those 1-minute increments to distribute the heat evenly. I've also found that spreading the mix on a baking sheet in direct sunlight for 2-3 hours on a warm day (75°F+) achieves similar sterilization. The key is to make sure the entire mix reaches at least 160°F internally to kill pathogens effectively. This is especially important if you're using compost from outdoor sources that might contain weed seeds or fungal spores.
Pro Tips for Soil Mix For Seed Starting
- A few simple adjustments can transform your basic mix into a seedling superstar. Here's what I've learned after years...
- Sifting is Non-Negotiable: I can't stress this enough—sifting both the peat moss or coco coir AND the compost through...
- Perlite vs. Vermiculite Decision: Here's what nobody tells you—perlite is better for plants that need excellent drain...
Frequently asked questions
What’s the best ratio for a homemade seed-starting mix?
A balanced mix is 50% peat moss or coco coir (for moisture retention), 30% perlite or vermiculite (for aeration), and 20% compost or worm castings (for nutrients). Adjust perlite/vermiculite (50/50) if your climate is extra wet or dry. Pro tip: Sterilize components by baking them at 200°F for 30 minutes to kill pathogens!
How long can I reuse seed-starting soil?
Reuse it once or twice for fast-growing seeds (like lettuce or radishes), but discard after one season for slow starters (tomatoes, peppers). Old soil compacts, loses nutrients, and may harbor fungus. Signs to toss: foul smell, mold, or crusty texture.
Is it worth buying pre-mixed seed-starting soil?
Yes! Pre-mixes (like FoxFarm Seedling Mix or Black Gold) are sterile, lightweight, and formulated for germination. They save time but cost more per cubic foot. For budget-friendly bulk, blend your own—just ensure it’s sterile and has 30–50% pore space (the "squish test": gently press; it should hold shape but not feel soggy).
My seeds aren’t sprouting—could the soil be the problem?
Check these 3 culprits:
Too dense? Add perlite/vermiculite (1:1 ratio) to improve airflow.
Too wet? Let it dry slightly between waterings (stick your finger in—top inch should feel damp, not soaked).
No warmth? Seeds need 65–85°F to germinate. Use a heat mat if your home runs cool.
Also, test depth: Tiny seeds (like carrots) need only ¼-inch coverage, while large ones (beans) can go 1-inch deep.
Can I use garden soil or potting mix for seeds?
No! Garden soil is too dense, compacted, and may contain weeds/seeds. Potting mix is often too heavy and lacks sterile conditions. Seed-starting mixes are lightweight, sterile, and designed to wick moisture while preventing damping-off disease. Exception: If repurposing potting mix, amend it with 30% perlite and sterilize.
Wrapping up and next steps
Starting seeds successfully all comes down to giving them the right foundation—a lightweight, well-draining soil mix that mimics their natural environment. Whether you’re blending your own mix or choosing a pre-made option, prioritize airflow, moisture control, and nutrient balance to set tiny roots up for growth.
With the right soil, you’re not just planting seeds—you’re nurturing future plants with confidence!
Ready to take the next step? Grab your supplies, mix with care, and watch those seeds sprout into thriving seedlings! 🌱✨