
How To
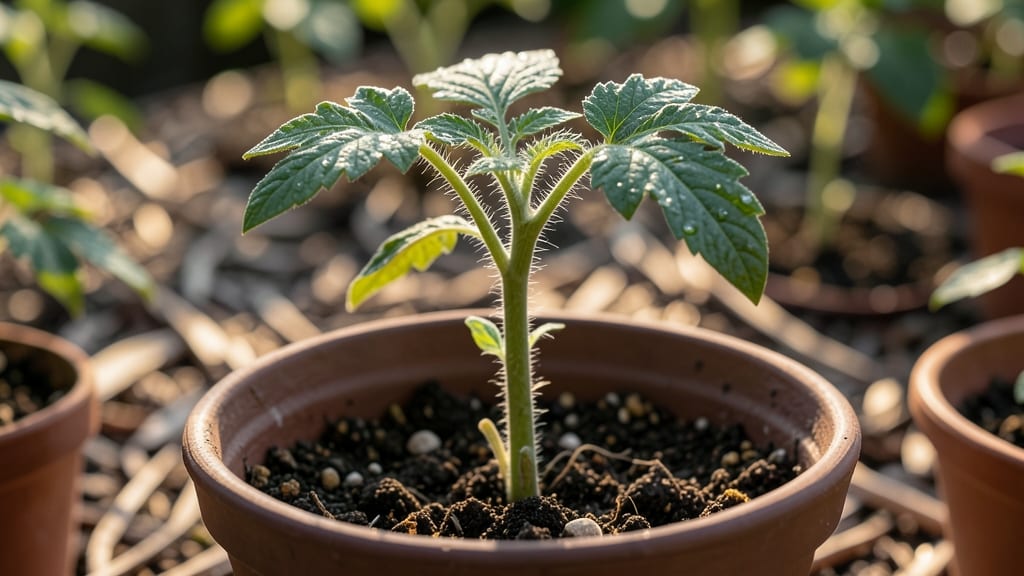
Those first tiny tomato seed leaves—called cotyledons—are your plant’s secret weapon for survival. 🌱 I’ve watched them transform from delicate sprouts into sturdy seedlings, and the key to success starts right here, with the right care during this critical stage.
The moment you spot those first two leaves, you’ll know you’re on the right track. But weak seedlings or damping off can turn this exciting phase into a heartbreaking loss.
That’s why I’ll show you exactly how to handle them: when to thin, how to water, and what to watch for to keep your seedlings strong and thriving.
📚 In This Guide
- What you need
- Instructions
- Tips and common mistakes
- Wrapping up and next steps
What you need
- ● Tomato plants – Healthy seedlings or young plants (1-3 months old) with visible seed leaves (the first pair of leaves that appear after germination).
- ● Sharp, clean pruning shears or scissors – Must be sterilized (use rubbing alcohol or a bleach solution) to prevent disease transfer. Avoid dull tools to minimize plant damage.
- ● Rubbing alcohol (70% or higher) or bleach – For sterilizing tools between cuts.
- ○ Gloves (optional but recommended) – Protects your hands from dirt, sap, and potential irritants.
- ● Compost or potting mix – For replanting or disposing of removed leaves (if composting).
- ● Water spray bottle or hose – To keep plants hydrated before and after pruning.
- ● Garden tweezers – For delicate plants or small seed leaves.
- ● Plant growth hormone (rooting powder) – If you plan to propagate the seed leaves.
- ● Label markers – To track plant varieties if working with multiple types.
- ● Disinfectant spray – For cleaning surfaces where you’ll work.
How to remove tomato seed leaves for stronger plants
Here's the simple method I use to boost tomato vigor by removing those early seed leaves.
🌱 Step 1: Identify Seed Leaves vs True Leaves
The first leaves that appear on your tomato seedlings are called cotyledons or seed leaves. These look different from the true leaves that follow—they're usually smaller, rounder, and have fewer veins. True leaves appear after the first set of seed leaves and look more like mature tomato foliage.
Wait until you see at least two true leaves before touching anything. This usually happens about 10-14 days after germination. The seed leaves serve their purpose by providing energy to the young plant, but once the true leaves emerge, they become unnecessary and can even compete for nutrients.
✂️ Step 2: Use Clean Tools and Proper Technique
Grab a pair of sharp, clean scissors or pruning shears. I like to use small, sharp scissors because they make precise cuts without damaging the stem. Sterilize your tools with rubbing alcohol to prevent spreading disease between plants.
Make your cut just above the point where the seed leaves attach to the stem. Don't leave any stubs—the cleaner the cut, the faster the plant recovers. You'll typically remove two seed leaves per seedling, but if you have extra leaves from multiple seeds germinating in one cell, remove those too. This prevents overcrowding and encourages stronger growth.
🌿 Step 3: Monitor Plant Health After Removal
After removing the seed leaves, give your seedlings a gentle watering to help them recover. You'll notice the plant might look a bit bare, but this is normal and actually beneficial. The true leaves will now have more access to sunlight and nutrients, leading to stronger, healthier growth.
Keep an eye on your seedlings over the next 3-5 days. You should see new growth emerging from the true leaves within this time. If the plant looks wilted or stressed, it might be reacting to the change. In this case, provide a bit more shade for a day or two until it recovers. This is especially important if you're growing in hot conditions.
☀️ Step 4: Provide Ideal Growing Conditions
Now that your seedlings have shed their seed leaves, they need plenty of light to support their new growth. Move them to a spot with 6-8 hours of sunlight daily or under grow lights if natural light is insufficient. I like to keep my seedlings about 2-3 inches away from the light source to prevent burning.
Water your seedlings gently at the base, keeping the soil consistently moist but not soggy. The top inch of soil should feel slightly damp to the touch. Avoid wetting the leaves, as this can lead to fungal diseases. A small watering can with a narrow spout works best for this delicate stage.
⏰ Step 5: Continue Pruning for Optimal Growth
As your tomato plants grow, you'll continue to prune throughout their lifecycle. After removing the seed leaves, focus on pinching off suckers—those small shoots that grow in the leaf axils. These compete with your main stem for energy, so removing them early helps the plant put its energy into producing stronger, more productive vines.
Here's the thing—removing seed leaves might seem counterintuitive at first, but it's one of the best ways to ensure your tomato plants grow strong and healthy. You'll see the difference in just a few weeks as your plants develop thicker stems and more robust foliage. Keep an eye out for any signs of stress and adjust your care routine as needed to keep your plants thriving.
Tips & tricks for healthier tomato seedlings
Removing seed leaves might seem counterintuitive, but these simple tricks will help your tomato plants thrive from day one.
Timing is Everything: Don't rush to remove those seed leaves! Wait until you see at least two true leaves—this usually happens around 10-14 days after germination. The seed leaves provide initial energy, and removing them too early can stress your seedlings. I've seen beginners pull them off at 7 days, and the plants struggled for weeks to recover. Patience here pays off with stronger stems later.
Tool Prep Matters: Sterilizing your tools with rubbing alcohol isn't just about disease prevention—it's about giving your seedlings the best possible start. I keep a small bottle of 70% isopropyl alcohol right by my gardening station. Clean tools mean cleaner cuts that heal faster, which is especially important when you're working with such delicate young plants. A quick wipe before and after each use makes all the difference in preventing infections.
Post-Cut Care: After removing the seed leaves, resist the urge to fuss over your seedlings. The key is to let them recover naturally over the next 3-5 days. I've learned the hard way that overwatering or moving them too soon can cause more harm than good. Just keep them in consistent light and watch for new growth emerging from the true leaves—this is your sign they're adapting well. The first few days are critical for their adjustment.
Light Positioning: When you move your seedlings to their new spot with 6-8 hours of sunlight, pay attention to the distance from your light source. I position mine about 2-3 inches away—close enough for strong growth but far enough to prevent leaf burn. Too close, and you'll get crispy edges; too far, and they'll stretch toward the light. This balance is what gives you those sturdy, healthy seedlings ready for transplanting.
Pro Tips for Tomato Seed Leaves
- Removing seed leaves might seem counterintuitive, but these simple tricks will help your tomato plants thrive from day one.
- Timing is Everything: Don't rush to remove those seed leaves!
- Tool Prep Matters: Sterilizing your tools with rubbing alcohol isn't just about disease prevention—it's about giving your seedlings the best possible start.
Frequently asked questions
Got questions about removing tomato seed leaves? You’re not alone! Here are some of the most common concerns—and their straightforward answers—to keep your plants thriving.
Why should I remove tomato seed leaves at all?
Removing seed leaves (also called cotyledons) helps redirect energy to your tomato plant’s true leaves (the ones that look like tiny, serrated tomato leaves). This promotes faster, stronger growth and better fruit production down the line. Think of it as giving your plant a head start!
When is the best time to remove seed leaves?
Remove them within 1–2 weeks after germination, once the true leaves (the second set) have sprouted and are about 1–2 inches tall. Wait too long, and the seed leaves may start competing with the new growth for nutrients. Pro tip: Do this on a dry, sunny day to minimize stress on the seedlings.
How do I safely remove seed leaves without hurting the plant?
Use clean, sharp scissors or your fingers to gently pinch or snip the seed leaves at their base. Avoid tearing—this can damage the stem. If you’re worried about overhandling, focus on removing only the seed leaves and leave the true leaves untouched. No need to go overboard!
What if I accidentally remove a true leaf instead?
Don’t panic! If you snip a true leaf by mistake, the plant can recover—just avoid over-pruning in the future. True leaves are tougher and will regrow if damaged slightly. For extra care, water lightly afterward and keep the seedlings in bright, indirect light until they bounce back.
Can I skip removing seed leaves if I’m short on time?
You can, but your tomatoes might grow a little slower at first. Seed leaves can steal nutrients and shade the true leaves, which could delay flowering and fruiting. If you’re in a rush, prioritize removing them as soon as possible—even just a few leaves makes a difference! For large batches, tackle them in small groups over a few days.
What’s an alternative if I don’t want to remove seed leaves manually?
Try the “topping” method for seedlings: Pinch off the entire seedling just above the seed leaves (about ¼ inch up). This encourages bushier growth and can reduce the need for individual leaf removal. Just be gentle—over-pruning can stress young plants.
Wrapping up and next steps
Removing tomato seed leaves is a simple yet powerful way to boost your plant’s growth and productivity! By following these steps—identifying, timing, and gently removing those extra leaves—you’ll help your tomatoes channel energy toward fruit production instead of unnecessary foliage. 🌱
Now that you’re armed with the know-how, give it a try! Start with one plant, observe the difference, and soon you’ll be a tomato-growing pro. Happy gardening—your future harvests will thank you! 🍅✨
Next step: Try companion planting (like basil or marigolds) to further protect your tomatoes from pests and diseases.