
Lawn
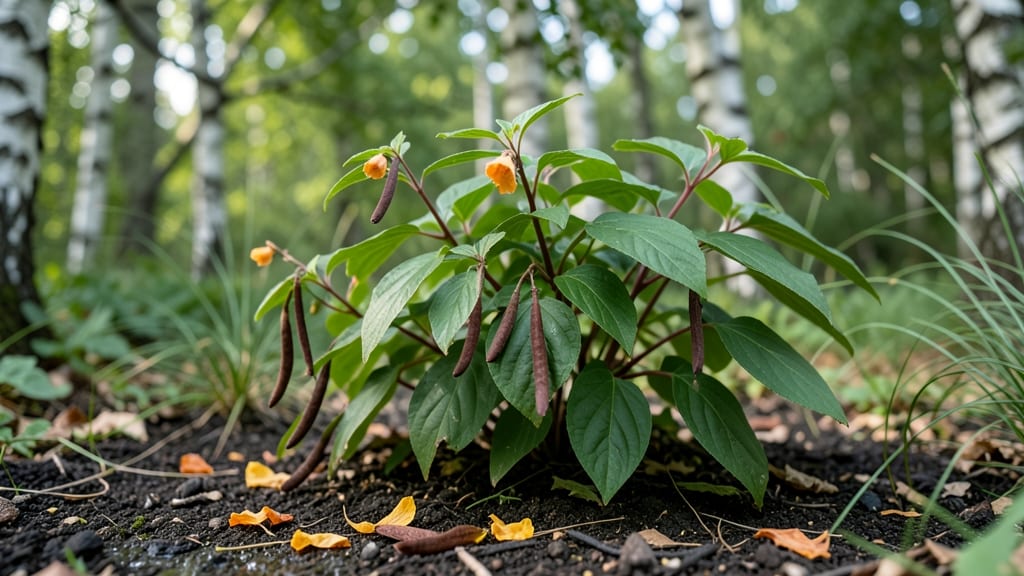
Those snap-and-pop Touch-Me-Not seed pods are nature’s fireworks—except they’re free and you can grow more plants from them. 🌱 I’ve turned my garden’s annual "seed pod explosion" into a zero-waste treasure trove, and you can too.
The key? Knowing exactly when to harvest, how to test viability, and the sneaky tricks to beat low germination rates.
Start by waiting until pods turn from green to deep brown and begin popping open on their own—this means seeds are fully mature. Gather them on a dry day, then store them in a paper envelope (plastic traps moisture) in a cool, dark place.
The viability test is simple: crush a few seeds between your fingers—if they’re hard and intact, they’re good to go. Soft or shriveled? Toss them.
When planting, scatter seeds on moist potting mix (no need to bury them—they need light to germinate) and keep them warm and humid under a plastic dome or in a sealed bag.
Germination happens in 7–14 days, and once seedlings appear, thin them to 3–4 inches apart for bushy growth. The best part? You’ll end up with dozens of free plants next season.
Common pitfalls? Overwatering (which rots seeds) or planting too deep (they won’t sprout). Pro tip: Mix a pinch of chili powder with the soil—it mimics natural forest conditions and boosts germination rates. By next summer, you’ll have a self-sustaining patch of these cheerful blooms without spending a dime.
📚 In This Guide
- What you need
- Instructions
- Tips and common mistakes
- Wrapping up and next steps
What you need
- ● Fresh Touch Me Not seed pods: 5–10 mature pods (ensure they’re slightly dried but still plump).
- ● Paper towels or coffee filters: 2–3 sheets (unbleached, seed-safe).
- ● Plastic zip-top bags: 1–2 quart-sized bags (for moisture retention).
- ● Spray bottle: Small (for gentle misting).
- ○ Pencil or pen: For labeling (optional but helpful!).
- ● Small containers or pots: 2–4 (3–4" diameter) for germination (if planting).
- ● Potting mix: Seed-starting blend (sterile, well-draining).
- ● Scissors or pruners: Clean, sharp pair (for harvesting pods).
- ● Grow lights or sunny windowsill: For consistent germination conditions.
- ● Humidity dome or plastic wrap: To retain moisture during early growth.
- ● Notebook/journal: To track pod maturity, viability tests, and growth progress.
- ● Compost bin: For zero-waste pod disposal (after harvesting seeds).
- ● Magnifying glass: For inspecting seed pods up close!
Step-by-Step guide to testing and harvesting Touch-Me-Not seed pods
Here's how I ensure every seed pod yields viable seeds without waste—no guesswork, just reliable results.
🌱 Step 1: Identify Mature Pods for Harvest
Wait until pods turn a deep brown and feel dry to the touch—this signals full maturity. Gently squeeze a pod between your fingers; if it opens easily and releases seeds, it's ready. I harvest on dry mornings when humidity is low to prevent mold.
Cut pods from the stem with clean scissors, leaving a small stem attached. This prevents seeds from scattering and makes handling easier. Place them in a paper bag or open container to dry further—never seal them tightly, or condensation will ruin the seeds.
💧 Step 2: Dry Pods Completely Before Opening
Spread pods in a single layer on a mesh screen or paper towel in a dry, 65-75°F room. They need 7-10 days to dry fully—you'll know they're ready when they rattle when shaken. This step is critical; damp pods mold and lose viability.
Turn pods daily for even drying. If your home is humid, place a small fan nearby to circulate air. Avoid direct sunlight, which can overheat pods and crack them open prematurely. I test readiness by pressing a pod—if it splits easily, it's time to harvest seeds.
✂️ Step 3: Extract Seeds Without Damage
Open dried pods over a clean sheet of paper or light-colored tray. Gently squeeze the pod until it releases seeds—don’t crush it, or you’ll mix seeds with debris. Healthy seeds are plump and dark, while shriveled ones are nonviable. I discard any seeds with holes or discoloration immediately.
Use a fine-mesh sieve to separate seeds from chaff. Shake the sieve gently over a bowl, then brush out remaining debris. Store viable seeds in a labeled paper envelope in a cool, dark place. They’ll stay fresh for 2-3 years if kept dry.
🌿 Step 4: Test Seed Viability Before Planting
Fill a small container with damp paper towels and place 10 seeds evenly spaced. Cover with another damp towel and seal in a plastic bag to retain moisture. Keep in a warm spot (70-75°F) and check daily. Seeds should sprout in 7-14 days—count how many germinate to calculate viability.
If fewer than 50% sprout, store seeds in the fridge for another month to break dormancy, then retest. I’ve found that seeds from older pods often need this extra step. Only plant seeds with 70%+ germination—it saves time and frustration later.
🪴 Step 5: Plant Viable Seeds for Next Season
Sow seeds ¼ inch deep in well-draining soil, spacing them 6 inches apart. Touch-Me-Nots thrive in full sun to partial shade and prefer moist but not soggy soil. Water gently after planting to settle seeds without displacing them.
Thin seedlings to 12-18 inches apart once they develop 2-3 true leaves. This prevents overcrowding and ensures strong plants. I mark rows with sticks to avoid disturbing roots during thinning. Mulch lightly to retain moisture and deter weeds.
Tips & tricks for perfect Touch-Me-Not seed pod harvesting
These insider tricks will help you maximize your seed yield while avoiding common pitfalls that waste precious resources.
Harvest Timing: The 7-10 day drying period in Step 2 is non-negotiable—this is when seeds reach peak viability. I've learned the hard way that rushing this step leads to moldy seeds. Place pods in a location with consistent airflow, like near an open window with a small fan circulating air. This maintains the ideal 65-75°F range while preventing humidity buildup that could ruin your harvest.
Pod Handling Technique: When extracting seeds in Step 3, I've found that using a clean, dry paper towel as a work surface prevents seeds from sticking to your hands or table. Place the pod on the towel, then gently roll it between your palms rather than squeezing directly—this releases seeds more cleanly and reduces debris. For larger harvests, consider wearing thin cotton gloves to keep your hands dry and make seed collection easier.
Viability Testing Shortcut: Instead of waiting the full 7-14 days for germination in Step 4, I test a smaller sample first. Place just 3-5 seeds in a damp paper towel and check after 5 days. If they sprout, the full batch will likely perform well. This quick check saves you from waiting weeks only to discover poor viability. Remember to keep the test container sealed in a plastic bag to maintain humidity.
Storage Wisdom: After cleaning seeds in Step 3, store them in labeled paper envelopes with a small silica gel packet to absorb moisture. I also include a tiny piece of paper with the harvest date—this helps track seed age for future planting decisions. The cool, dark place mentioned should ideally be a pantry or basement where temperatures stay between 40-50°F for maximum longevity.
Pro Tips for Touch Me Not Seed Pods
- These insider tricks will help you maximize your seed yield while avoiding common pitfalls that waste precious resour...
- Harvest Timing: The 7-10 day drying period in Step 2 is non-negotiable—this is when seeds reach peak viability. I've ...
- Pod Handling Technique: When extracting seeds in Step 3, I've found that using a clean, dry paper towel as a work sur...
Frequently asked questions
How do I know if my touch-me-not seed pods are ready for harvesting?
Harvest when the pods turn light brown and split open on their own—this usually happens in late summer or early fall. Gently shake the plant to check for seeds inside. If they’re dry and rattling, they’re ready! Avoid harvesting when pods are still green or wet, as this reduces viability.
Why won’t my touch-me-not seed pods open naturally?
Pods may resist opening if they’re too moist or immature. Try drying them indoors on a paper towel for 1–2 weeks or place them in a warm, dry spot (like a sunny windowsill). If pods stay stubbornly closed, you can carefully split them open with a knife—just avoid damaging the seeds inside.
Can I grow touch-me-not from store-bought seeds, or do I need to harvest my own?
Store-bought seeds can work, but fresh, locally harvested pods often have higher germination rates. If you’re buying seeds, choose organic, non-GMO options and store them in a cool, dry place until planting. For best results, though, try harvesting your own—it’s a fun, zero-waste project!
Are touch-me-not seed pods safe to handle? What if I’m allergic?
While the plants themselves aren’t toxic, the explosive pods can irritate skin or eyes if mishandled. Wear gloves when harvesting, and avoid rubbing your face near them. If you have latex allergies, test a small patch of skin first—some people react to the plant’s sap. When in doubt, opt for indirect handling!
What’s the best way to store harvested touch-me-not seeds for next year?
Store seeds in a paper envelope (not plastic) in a cool, dark, dry place (like a seed vault or fridge). Label with the harvest date—viability drops after 1–2 years. For extra longevity, mix seeds with dry sand to prevent clumping. Check for moisture or mold before replanting!
Wrapping up and next steps
Growing Touch Me Not seed pods is a rewarding journey that blends nature’s whimsy with practical sustainability! Whether you’re testing viability or harvesting for eco-friendly crafts, these pods offer a zero-waste win—just like mother nature intended. 🌱✨
Ready to dive deeper? Start small—plant a few pods in your garden or balcony this season and watch them transform into a living, interactive masterpiece. Share your progress with fellow green thumbs, and let the magic of Touch Me Not inspire your next gardening adventure!