
Propagation
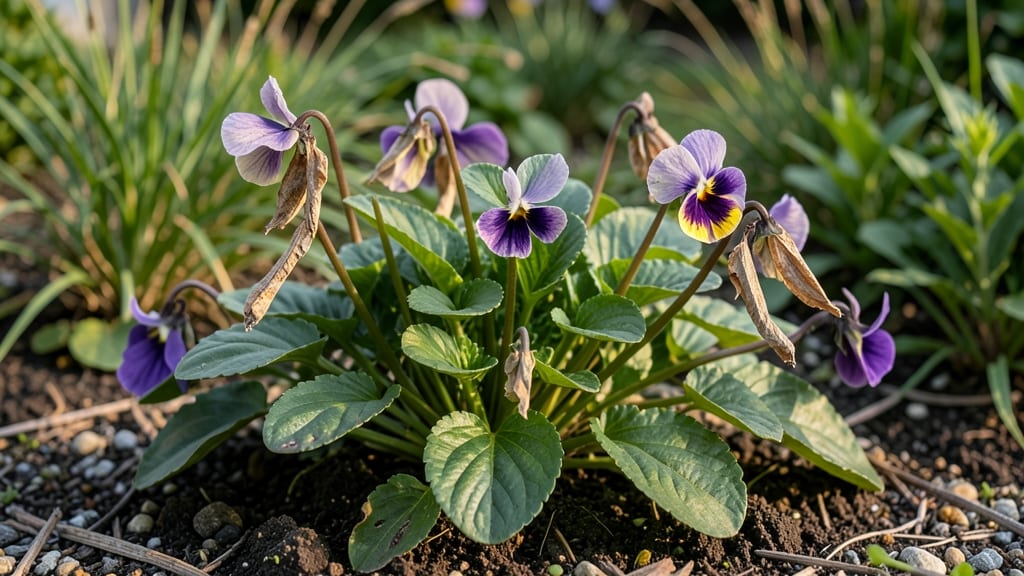
Viola seed pods hold the secret to next year’s cheerful blooms—if you know when and how to collect them. 🌿 I’ve saved seeds from my violas for three seasons now, and the key is patience: waiting for those pods to turn from green to brown before harvesting.
One wrong move, and you’ll end up with seeds that won’t germinate—or worse, a pile of empty husks.
You’ll need a pair of clean scissors, a paper bag for drying, and a cool, dark spot to store your seeds. The pods should feel dry and papery when you gently squeeze them; if they’re still firm, wait another week.
Once harvested, let them dry completely for 10-14 days before cracking them open—this ensures the highest viability for planting.
When it’s time to sow, scatter the tiny seeds on top of well-draining soil (they need light to germinate) and barely cover them with a fine layer of compost. Keep the soil moist but not soggy, and you’ll see delicate sprouts in 2-4 weeks.
The payoff? A carpet of violas blooming earlier and more abundantly than store-bought plants.
This method works for pansies too, and the seeds stay viable for 2-3 years if stored properly. No need for fancy equipment—just a little timing and care. Ready to turn this year’s blooms into next year’s garden staples?
📚 In This Guide
- What you need
- Instructions
- Tips and common mistakes
- Wrapping up and next steps
What you need
- ● Mature viola plants – Ensure they’re healthy and have fully developed seed pods (usually after flowering).
- ● Pruning shears or clean scissors – Sharp and sterilized to avoid damaging plants or spreading disease.
- ● Paper bags or breathable seed envelopes – 3–5 per plant (or one per pod if harvesting individually). Label each with the viola variety and date!
- ● Flat drying tray or screen – A mesh screen or baking sheet works well for airflow.
- ● Pencil or marker – For labeling your seed packets.
- ○ Air-tight storage containers – Small jars, envelopes, or resealable bags with silica gel packets (optional but helpful for long-term storage).
- ● Glove – Protects hands from prickly pods or dirt.
- ● Fine-mesh sieve – For separating seeds from chaff after drying.
- ● Humidity pack – Adds moisture control in storage containers.
- ● Seed catalog or notebook – To track varieties, germination rates, and notes on performance.
- ● Spray bottle with water – Helps dust off seeds before storage.
Step-by-Step guide for harvesting viola seed pods
Violas reward patience with next year's blooms—here's how to collect and store those seeds properly.
🌱 Step 1: Identify Mature Seed Pods
Wait until the viola flowers have fully bloomed and the petals begin to yellow and drop. This signals the seed pod is maturing inside. Look for pods that are swollen and turning brown—these are ready for harvesting. I like to check plants every 3-5 days in late summer to catch them at the perfect stage.
Gently squeeze a pod between your fingers. If it feels dry and papery with no give, it's ready. If it's still firm or green, wait another day or two. Harvesting too early means immature seeds that won't germinate, while waiting too long risks the pods splitting open naturally and scattering seeds everywhere.
✂️ Step 2: Harvest and Prepare the Pods
Use clean, sharp scissors or pruners to snip the seed pods from the stems, leaving about ½ inch of stem attached. This prevents the pods from drying out too quickly. Place them in a paper bag or envelope labeled with the viola variety and harvest date—this helps track germination rates later.
Let the pods dry completely in a warm, dry place away from direct sunlight for about 1-2 weeks. I spread mine out on a mesh screen or lay them flat in a single layer. You'll know they're fully dry when they rattle slightly when shaken and feel brittle to the touch.
🪴 Step 3: Extract and Store the Seeds
Once dry, gently crush the pods between your fingers or roll them with a pin to release the tiny, round seeds. Viola seeds are incredibly small—think 1/16 inch in diameter—so avoid inhaling them. I use a small funnel to channel them into a labeled envelope or small glass jar for storage.
Store the seeds in a cool, dry place, like a sealed envelope in your refrigerator or a jar in a dark cabinet. Viola seeds can remain viable for 2-3 years if kept dry and cool. Label everything clearly—viola varieties can look similar, and you'll want to know which color blooms you're saving for next season.
💧 Step 4: Stratify Seeds for Better Germination (Optional)
For best results, stratify viola seeds before planting. Place the seeds in a damp paper towel, fold it over, and seal it in a plastic bag. Refrigerate for 4-6 weeks to simulate winter conditions. This step mimics the natural cold period violas experience, breaking dormancy and encouraging stronger germination.
After stratification, plant the seeds in well-draining potting mix at a depth of ¼ inch. Keep the soil consistently moist but not soggy. Viola seeds germinate slowly—expect sprouts in 2-4 weeks—so be patient. Thin seedlings to 6 inches apart once they have their first true leaves to give them room to grow.
Tips & tricks for perfect viola seed pod harvesting
A few simple tricks will help you maximize your viola seed yield and ensure strong germination next season.
Timing Secret: Harvest on a dry morning after the dew has evaporated. This prevents moisture from causing mold during the drying process. I've found that collecting pods between 8-10 AM gives me the best results—early enough to catch fresh pods but late enough to avoid overnight moisture buildup.
Drying Strategy: For the 1-2 week drying period in Step 2, I recommend using a mesh screen over a cardboard box. The airflow prevents mold while the cardboard absorbs any excess moisture. Place your drying setup in a spot with indirect sunlight—direct sun can cause pods to dry too quickly and crack open prematurely.
Storage Wisdom: When storing seeds in Step 3, add a small packet of silica gel to your envelope or jar. This extra moisture absorber helps maintain seed viability for the full 2-3 years. I also date my storage containers—this helps me track how long seeds have been stored and when they might need refreshing.
Stratification Shortcut: If you're short on time for the 4-6 week stratification in Step 4, you can use a simple DIY cold frame. Place your seeds in a sealed plastic bag with a damp paper towel, then bury the bag in your garden soil where it stays naturally cold. This mimics the refrigerator method without requiring electricity.
Pro Tips for Viola Seed Pods
- A few simple tricks will help you maximize your viola seed yield and ensure strong germination next season.
- Timing Secret: Harvest on a dry morning after the dew has evaporated. This prevents moisture from causing mold during...
- Drying Strategy: For the 1-2 week drying period in Step 2, I recommend using a mesh screen over a cardboard box. The ...
Frequently asked questions
Got questions about viola seed pods? You’re not alone! Here are some of the most common queries gardeners have when saving and harvesting these delicate seeds for next season.
When is the best time to harvest viola seed pods?
Harvest viola seed pods when they turn from green to brown and begin splitting open—usually late spring to early summer. Wait until the pods are fully dry but haven’t released seeds yet to avoid waste. Morning harvests work best, as pods are less likely to burst open from overnight moisture.
How long does it take for viola seeds to mature inside the pods?
Viola seed pods typically take 4–6 weeks to mature after flowering. Keep an eye on them—once they turn brown and start cracking, act fast! If left too long, seeds may scatter, reducing your yield. A gentle shake test (listen for a rattling sound) confirms readiness.
Can I save seeds from store-bought violas?
Yes, but with a caveat: store-bought violas may be hybrids, meaning saved seeds might not produce identical flowers. For true-to-type blooms, choose heirloom or open-pollinated varieties. If you’re okay with surprises, go ahead—just label seeds clearly for future reference!
What should I do if my viola seed pods rot before opening?
Pod rot is often caused by excess moisture or fungal issues. To prevent it, ensure good airflow around plants and avoid overhead watering. If pods rot anyway, try harvesting seeds from partially damaged pods (sterilize tools with rubbing alcohol first) or focus on healthier plants next season.
How do I store viola seeds until planting?
Store seeds in a cool, dry place (like a sealed envelope in the fridge) for up to 2–3 years. For best germination, plant them as soon as possible—viola seeds are freshest when used within a year. Label everything with the variety and harvest date to stay organized!
Wrapping up and next steps
Harvesting and saving viola seed pods is a rewarding way to ensure next year’s vibrant blooms—whether you’re a seasoned gardener or just starting out! 🌱 With the right timing, tools, and storage techniques, you’ll have a fresh supply of seeds to grow cheerful violas for seasons to come. Now’s the perfect time to put your new knowledge into action—grab those dried pods, label your envelopes, and get ready to watch your garden flourish with homegrown beauty!
Next step: Try experimenting with different viola varieties or even cross-pollination to create unique color combos. Happy gardening! 🌸