
Propagation
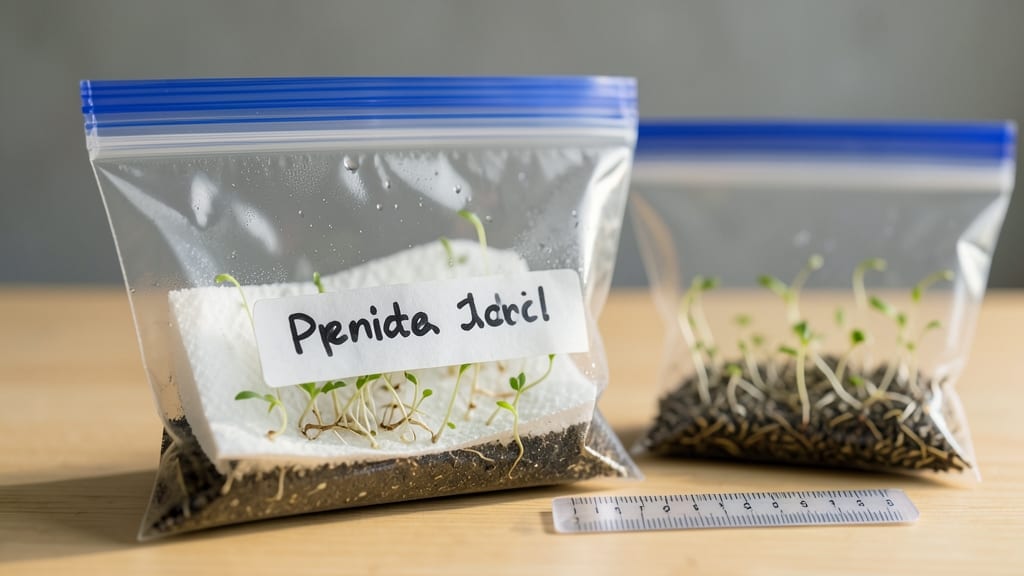
Germinating seeds in a Ziploc bag seed germination cuts weeks off your growing season while keeping your countertop clean. 🌱 I’ve used this method for years—it’s how I get my tomatoes and peppers sprouting in just 7 days, not the usual 2-3 weeks.
The secret lies in trapping moisture and warmth inside that plastic, creating the perfect cozy environment seeds crave.
The best part? You only need a few supplies: a Ziploc bag, paper towels, water, and your seeds. No fancy equipment, no messy trays—just a sealed bag that does all the work.
I’ve even tried it with finicky seeds like basil and okra, and they’ve all come through stronger than store-bought seedlings. This method also saves space, which is a game-changer if you’re working in a small apartment or just want to maximize your seed-starting setup.
By day 7, you’ll have tiny green sprouts ready to transplant, and they’ll be hardier than anything from a nursery. The key is monitoring moisture—too much and you risk mold, too little and your seeds dry out.
I’ll show you exactly how to strike that balance so your sprouts stay healthy and ready for their next adventure in soil.
Whether you’re a seasoned gardener or just starting out, this technique works for almost any seed. Just avoid tiny seeds like lettuce—they’ll get lost in the process. Let’s get those sprouts growing!
📚 In This Guide
- What you need
- Instructions
- Tips and common mistakes
- Wrapping up and next steps
What you need
- ● Seeds: Choose fast-sprouting varieties like radishes, beans, or lettuce (10–20 seeds per bag).
- ● Gallon-sized Ziploc bags: 1–2 bags (clear for visibility).
- ● Paper towels: 2–3 sheets (unbleached, seed-safe).
- ● Water: Distilled or room-temperature tap water (¼ cup per bag).
- ○ Spray bottle (optional but helpful): For gentle misting.
- ● Heat mat or warm spot: Maintains 70–85°F for faster germination.
- ● Grow lights: If sprouting in low-light areas.
- ● Label markers: To track seed types.
- ● Small tray or plate: For drainage if using multiple bags.
Step-by-Step instructions for germinating seeds in Ziploc bags
Here's the foolproof method I use to get seeds sprouting in just 7 days—no soil, no mess, and no fuss.
🌱 Step 1: Prep Seeds and Moisten Paper Towels
Lay out 2 paper towels on a flat surface and lightly mist them with warm water until damp but not dripping. I like to use a spray bottle for even moisture—too much water creates a swampy environment where seeds rot. Fold the towels into quarters so they fit neatly inside a quart-sized Ziploc bag.
Place 4-6 seeds (about ½ inch apart) along the center crease of the folded towels. The spacing ensures roots won’t tangle later. Gently unfold the towels just enough to cover the seeds lightly—no burying needed. This keeps them in contact with moisture while allowing airflow.
💧 Step 2: Seal and Position for Germination
Seal the bag 3/4 of the way, leaving a small gap at the top to prevent condensation buildup. I use a pencil to poke 2-3 tiny holes in the sealed portion—this keeps humidity high while allowing fresh air to circulate. The goal is to mimic a greenhouse environment without suffocating the seeds.
Place the bag in a warm, dark spot—I keep mine on top of my fridge, where the temperature stays steady at 70-75°F. Check daily for moisture; if the towels dry out, mist the outside of the bag lightly. You’ll see tiny white roots appear in 3-5 days, followed by sprouts breaking through the towels.
☀️ Step 3: Transition to Light and Prepare for Transplanting
Once ½ inch of sprout growth appears (usually 5-7 days), open the bag and move it to bright, indirect light. Avoid direct sun—young seedlings burn easily. I place mine under a grow light or near an east-facing window. The seedlings will stretch toward the light, so rotate the bag quarter-turn daily to prevent leaning.
When the first true leaves (not the initial seed leaves) appear, they’re ready to transplant. Unfold the towels gently, keeping the root ball intact. Plant directly into soil or a small pot—no rinsing needed. Water lightly to settle the roots, and keep the soil consistently moist for the first 2 weeks.
✂️ Step 4: Harden Off and Acclimate Seedlings
After 7 days in soil, start hardening off by placing seedlings outside in partial shade for 1 hour daily. Gradually increase exposure over 5-7 dayswilting or yellowing leaves—this means they’re not ready for full sun yet. I like to do this in the morning so they have time to recover indoors.
By day 14, your seedlings should be sturdy enough for their final planting spot. The Ziploc method gives you a 2-week head start over traditional soil germination, and the roots stay intact—no transplant shock. Just remember: the key to success is keeping those towels damp but never soggy.
Tips & tricks for perfect Ziploc bag seed germination
Here's what nobody tells you about getting every seed to sprout successfully.
Moisture is Everything: The key to success in Step 1 is getting those paper towels just right—damp but not dripping. I use a spray bottle because it gives me even coverage without oversaturating. Too much water creates a swampy environment where seeds rot, while too little means they won't activate. Think of it like a sponge: it should hold moisture but not leak when squeezed gently. If you're unsure, lay a paper towel on a plate and mist it—when water beads form but don't roll off, you're golden.
The 70-75°F Temperature Secret: While the instructions mention keeping your bag in a warm spot (like on top of your fridge), I've found that consistency is more important than exact temperature. If your kitchen runs cooler, place the bag near a warm spot like under a grow light or on a seedling heat mat. The critical factor is maintaining that steady warmth—fluctuations can shock the seeds and slow germination. Pro tip: If your home is particularly cold, try placing the bag inside a slightly larger plastic container with a lid (like a takeout container) for extra insulation.
Light Transition Timing: When moving your sprouts to light in Step 3, don't rush it! The ½-inch growth mark is your cue, but if your seeds are smaller or slower-growing, wait until you see clear signs of life breaking through the towels. I've seen some seeds take up to 8 days to reach this stage, especially if they're larger varieties like beans. The light exposure should be bright but indirect—think of it as a sunbath, not a tanning session. If you notice seedlings stretching toward the light (a condition called etiolation), rotate the bag daily to encourage even growth.
Harden Off Gradually: The 1-hour daily outdoor exposure in Step 4 might seem short, but it's the perfect starting point. I've learned the hard way that pushing seedlings too fast leads to shock. Begin with just 30 minutes if your climate is particularly harsh, and always do it in the morning. This gives plants time to recover if they wilt slightly. Watch for those true leaves to firm up—this is your sign they're ready for more time outside. Remember, the goal is to acclimate them to outdoor conditions, not to stress them out.
Pro Tips for Ziploc Bag Seed Germination
- Here's what nobody tells you about getting every seed to sprout successfully.
- Moisture is Everything: The key to success in Step 1 is getting those paper towels just right—damp but not dripping. ...
- The 70-75°F Temperature Secret: While the instructions mention keeping your bag in a warm spot (like on top of your f...
Frequently asked questions
Got questions about germinating seeds in Ziploc bags? You’re not alone! Here are some of the most common concerns—and their simple solutions—to help you grow confidently.
Why use a Ziploc bag instead of soil for germination?
A Ziploc bag creates a humid, warm microclimate that speeds up germination by keeping seeds consistently moist without overwatering. It also lets you monitor progress daily—no digging required! Plus, it’s mess-free and works great for delicate seeds like herbs or lettuce.
How long until seeds sprout in a Ziploc bag?
Most seeds sprout in 3–7 days with the right conditions (warmth, moisture, and darkness). Fast germinators like beans or radishes may pop up in just 2–3 days, while slower ones (like tomatoes) could take up to 2 weeks. Keep an eye on them!
Do I need to add anything to the bag besides seeds and paper towels?
Nope! Just seeds, damp paper towels, and a little warmth are all you need. But for extra help, some gardeners add a sprinkle of cinnamon (natural antifungal) or a few drops of hydrogen peroxide (to prevent mold). Avoid soil—it can get soggy and attract pests.
What if mold grows in my Ziploc bag?
Mold is a sign of too much moisture or poor airflow. If you see fuzzy spots, open the bag for 10–15 minutes daily to dry it out. Discard any seeds with mold and try again with slightly less water. A fan on low can also improve circulation!
Can I reuse the same Ziploc bag for multiple seed batches?
Not recommended! Bags can harbor bacteria or mold spores after use. For safety, grab a new bag each time. If you’re eco-conscious, opt for reusable silicone germination pods instead—they’re washable and long-lasting!
Wrapping up and next steps
Germinating seeds in a Ziploc bag is a game-changer—it’s fast, mess-free, and foolproof! 🌱 With just a few supplies and a little patience, you’ll see sprouts in as little as 7 days, giving your plants a head start.
Whether you’re a green thumb or a beginner, this method makes propagation effortless.
Now that you’re armed with the know-how, give it a try! Start with easy seeds like beans or herbs, and soon, you’ll be expanding your garden with confidence. Happy growing! 🌿