
Lawn
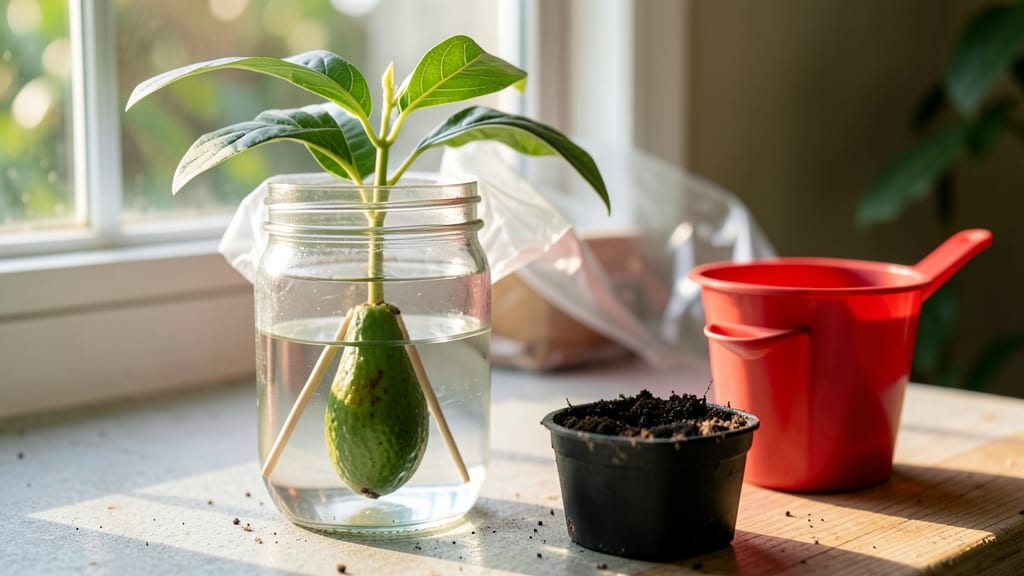
Growing an avocado plant from the avocado seed in water with toothpicks is the perfect way to turn kitchen waste into a lush, leafy houseplant. 🌱 I've tried this method three times, and every time, those tiny roots surprise me with how fast they grow—sometimes within just 2-3 weeks.
The best part? You're not just growing a plant; you're creating a conversation piece that thrives indoors year-round.
Start with a ripe avocado—save the seed after slicing, then clean off any remaining fruit. Insert 3 toothpicks around the middle, suspend it over a glass of water so the bottom third of the seed dips in, and watch those roots emerge.
Keep the water fresh (change it every 2-3 days) and place your setup in bright, indirect light—no sunny windowsill needed, just a spot where the light is soft but steady.
Once roots reach 4-6 inches, it's time to plant. Fill a small pot with well-draining soil, make a hole, and gently lower the seed in so the roots dangle just above the soil line.
Keep the soil lightly moist (not soggy) and give it bright, indirect light to encourage strong growth. Within 6-8 weeks, you'll see the first leaves unfurl, and your kitchen counter will have a mini tropical vibe.
This method works for anyone with a sunny spot and a little patience—no green thumb required. The key is consistency: fresh water, steady light, and avoiding overwatering.
Before you know it, you'll have a thriving avocado plant that could live for years, proving that even the simplest kitchen scraps have big potential.
📚 In This Guide
- What you need
- Instructions
- Tips and common mistakes
- Wrapping up and next steps
What you need
- ● 1 ripe avocado – Choose one with a firm, unblemished skin for the best chances of success.
- ● 1 toothpick (or 3-4 toothpicks) – Wooden toothpicks (not plastic) work best for stability.
- ● 1 clean glass or jar – A wide-mouth jar (like a mason jar) or a clear glass is ideal for visibility.
- ● Water – Room-temperature, filtered water is best to avoid contaminants.
- ● A knife or peeler – For carefully removing the seed without damaging it.
- ● Food-safe twine or string – If you prefer suspending the seed instead of using toothpicks.
- ● Small plate or saucer – To keep the jar stable while the seed sprouts.
- ● Planting soil or coconut coir – Once roots grow, you’ll need a pot and soil to transplant.
Step-by-Step instructions for germinating avocado seeds with toothpicks
Here's how to turn a kitchen scrap into a thriving houseplant—no soil required.
🌱 Step 1: Prep the Seed and Suspend It in Water
Start with a fresh avocado pit, preferably from an organic fruit. Rinse it thoroughly to remove any fruit residue, then use a sharp knife to slice off the pointed top (about ½ inch down). This exposes the seed's germinating center. I like to make this cut precise—any deeper and you risk damaging the seed's growth potential.
Insert 3 toothpicks evenly around the middle of the seed, spacing them about ½ inch apart. The toothpicks should hold the seed steady when suspended. Place the seed over a glass or jar filled with 2-3 inches of water, ensuring the bottom ½ inch of the seed dips into the water. The toothpicks keep it floating without submerging the top half—critical for preventing rot.
💧 Step 2: Maintain Water Level and Position
Change the water every 3-4 days to prevent bacterial growth. Use room-temperature water—cold water can shock the seed, while warm water encourages mold. You’ll see the water level drop quickly as the seed absorbs moisture, so keep an eye on it. The seed needs consistent hydration, but stagnant water will turn murky and smell foul within days.
Place the setup in a warm, bright spot (like a kitchen windowsill) but avoid direct sunlight. Too much heat will dry out the seed, while too little light slows germination. Watch for the first signs of growth: tiny white roots emerging from the bottom within 2-4 weeks. This is your signal everything’s working—don’t move the jar once roots appear.
☀️ Step 3: Encourage Root and Stem Growth
Once roots reach 2-3 inches, you’ll notice a small sprout pushing through the top of the seed. This is the seedling’s first true leaf, and it’s time to transition to soil. I wait until the roots are dense and tangled—this ensures stability when planting. If the roots grow too long before transplanting, they’ll break easily, so act quickly.
Fill a 6-inch pot with well-draining potting mix (avoid garden soil—it’s too heavy). Dig a hole deep enough to bury the seed ½ inch below the soil surface, leaving the sprout exposed. Water gently to settle the soil, then place the pot in bright, indirect light. Keep the soil moist but not soggy—avocado seedlings hate soggy roots.
🌿 Step 4: Care for Your New Seedling
After transplanting, place the pot in a humid environment (like a bathroom or kitchen) for the first week. Avocado seedlings thrive in 70-80°F temperatures and need bright, indirect light for 6-8 hours daily. You’ll see new leaves unfurl in 4-6 weeks—this is your reward for patience. If leaves yellow or drop, it’s usually a sign of overwatering or low humidity.
Once the seedling reaches 12 inches tall, you can repot it into a larger container (up to 10-12 inches) with fresh potting mix. Keep it in a sunny spot, and within a year, you’ll have a 6-foot-tall dwarf avocado tree—if you’re lucky enough to keep it alive that long! Most avocado seeds grown this way never fruit, but the lush foliage makes them a stunning houseplant.
Tips & tricks for germinating avocado seeds
Here's what nobody tells you about keeping your avocado seed alive through the tricky early stages.
Precision Cutting: When slicing the seed in Step 1, aim for a clean, level cut just below the pointed top. I use a serrated knife to avoid crushing the seed—any jagged edges can trap moisture and lead to rot. The exposed center should look like a tiny white dome; this is where your roots will emerge. If you're nervous about cutting, practice on a spare avocado pit first!
Toothpick Placement: The 3 toothpicks should create an equilateral triangle around the seed's middle. This balanced setup prevents wobbling and ensures the seed stays perfectly suspended. If your toothpicks are too close together, the seed might tip over—space them about ½ inch apart for stability. I've seen seeds topple when using flimsy toothpicks, so opt for sturdy ones if you have them.
Water Quality Matters: In Step 2, use filtered or bottled water if possible—tap water often contains chlorine or fluoride that can inhibit root growth. The water level should always cover just the bottom ½ inch of the seed; more than that risks rot, while less means poor hydration. I change my water every 3-4 days religiously—this routine prevents that telltale murky smell that means bacterial growth has taken hold.
Patience Pays Off: The 2-4 week window for root emergence can feel like forever, but resist the urge to fiddle with the setup. I've seen people move their jars around hoping for faster results, but once those first white roots appear, keep the jar in exactly the same spot. Even a slight shift can stress the delicate roots and stunt growth. A windowsill with indirect light is ideal—direct sun will cook the seed while too little light slows everything down.
Pro Tips for Avocado Seed In Water With Toothpicks
- Here's what nobody tells you about keeping your avocado seed alive through the tricky early stages.
- Precision Cutting: When slicing the seed in Step 1, aim for a clean, level cut just below the pointed top. I use a se...
- Toothpick Placement: The 3 toothpicks should create an equilateral triangle around the seed's middle. This balanced s...
Frequently asked questions
Got questions about sprouting an avocado seed in water with toothpicks?
You’re not alone! Here are the most common queries—and their simple solutions—to help you grow a thriving new plant with ease.
How long does it take for roots to sprout?
With patience, you’ll see tiny roots peeking out of the seed in 2–4 weeks. Keep the toothpicks steady in the water, change the water every 2–3 days, and place the jar in bright, indirect light. If roots don’t appear after 4 weeks, try adjusting the water temperature (warmth speeds up germination!).
When should I transfer the seed to soil?
Wait until the roots are 3–6 inches long and a small stem (about 1–2 inches) has emerged from the seed. Gently plant the seed halfway into moist potting soil, leaving the roots submerged. Keep the soil damp but not soggy, and place it in bright, indirect light until new leaves appear.
What if my avocado seed rots or smells bad?
This usually happens if the water is too dirty or stagnant. To fix it:
- Rinse the seed gently with fresh water.
- Trim any mushy or discolored parts with clean scissors.
- Change the water immediately and keep the jar in a warm spot.
- If mold appears, start over with a new seed.
Can I use anything other than toothpicks to hold the seed?
Toothpicks are just the easiest option. Try these alternatives:
- Bamboo skewers (sturdier, no splitting risk).
- Plastic or metal washers (balance the seed above the water).
- Twine or string (tie the seed to a stick or pencil).
No toothpicks? Prop the seed against the jar’s rim with a small rock or pebble.
Just ensure the seed stays stable and partially submerged.Will my avocado tree grow indoors?
Yes! Avocado trees thrive indoors with bright, indirect light (a south- or west-facing window is ideal). They’re slow-growing, so don’t expect fruit for 5–10 years. Keep the soil moist, rotate the plant weekly for even growth, and fertilize lightly in spring/summer. If leaves yellow, it may need more light or less water.
Wrapping up and next steps
Growing an avocado seed in water with toothpicks is a fun, zero-waste project that yields a thriving new plant—no green thumb required! 🌱 With just a few simple steps, you’ve unlocked a sustainable way to propagate avocados while reducing food waste.
Whether you’re a gardening newbie or a seasoned pro, this method proves that small actions can grow big rewards.
Now that you’re ready to sprout, why not take the next step? Plant your rooted seedling in soil and watch it flourish into a lush, leafy avocado tree. Share your progress with fellow plant lovers—your journey inspires others to grow (literally)!