
Lawn
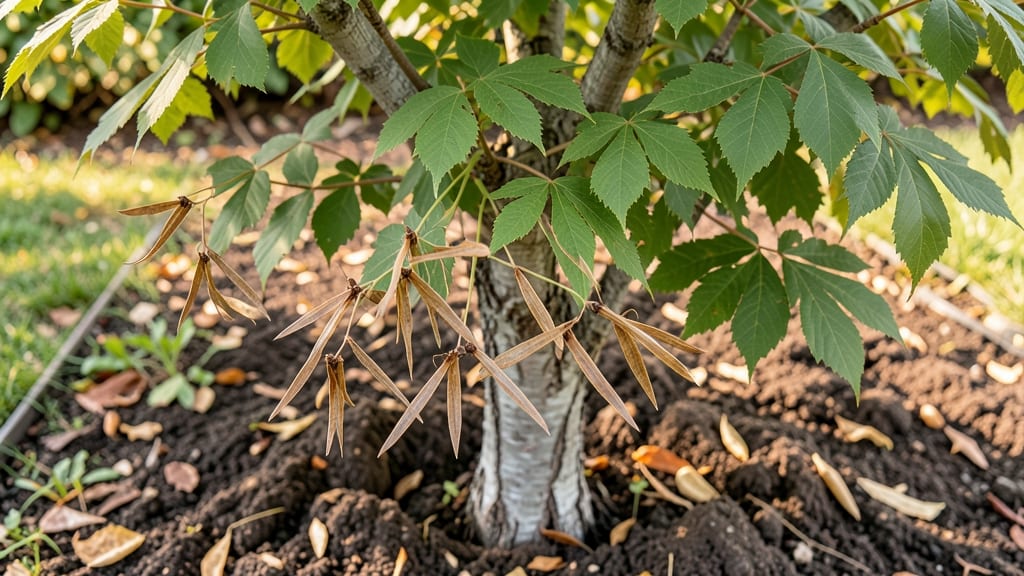
Cold-stratifying box elder seed pods guarantees fast, reliable sprouts—no more waiting months for germination. 🌱 I’ve struggled with these finicky seeds before, but this method turns them into sturdy seedlings in weeks, not years. The key is mimicking winter’s natural chilling process, which breaks their dormancy and triggers growth.
You’ll need just three things: a plastic bag, a damp paper towel, and your fridge. No fancy equipment—just patience and a little science. The process takes about 6-8 weeks, with sprouts appearing within 2-4 weeks of stratification.
It’s how I went from zero luck to a thriving box elder sapling in my backyard. Once sprouted, these seedlings grow 2-3 feet tall in their first season, with glossy green leaves that outshine most nursery plants. They’re hardy, drought-tolerant, and perfect for erosion control or fast shade.
The best part? You’re working with nature, not against it. If you’re dealing with fallen pods cluttering your yard, this method turns them into assets instead of nuisances. Just avoid planting near sidewalks—they spread aggressively. Here’s how to do it right the first time.
📚 In This Guide
- What you need
- Instructions
- Tips and common mistakes
- Wrapping up and next steps
What you need
- ● Fresh box elder seed pods: Collect 50–100 mature pods (greenish-brown, 1–2 inches long) from healthy trees in late summer or early fall. Pro tip: 💡 Harvest when pods are fully formed but before they split open!
- ● Cold-stratification container: A resealable plastic bag (quart-sized) or a small, breathable mesh bag (e.g., onion bag).
- ○ Moisture-absorbent material: 2–3 paper towels, a dampened coffee filter, or a handful of sphagnum moss (optional but ideal for humidity).
- ● Refrigerator or cold frame: A standard fridge set to 34–40°F (1–4°C) or a shaded outdoor cold frame (if temperatures stay below 45°F/7°C).
- ● Planting pots: Small 2–3 inch nursery pots (biodegradable or plastic) or a seed-starting tray with drainage holes. Use well-draining potting mix (e.g., 50% peat moss, 30% perlite, 20% vermiculite).
- ● Spray bottle: For gentle watering to avoid disturbing seeds.
- ○ Heat mat (optional): A seedling heat mat (70–75°F/21–24°C) to speed up germination after stratification.
- ● A seedling heating pad or grow light for indoor setups.
- ● Humidity dome or plastic wrap to retain moisture during early growth.
- ● Fertilizer: A balanced 5-5-5 or 10-10-10 diluted to half-strength for post-germination care.
- ● Label markers to track stratification dates and germination progress.
How to cold-stratify box elder seed pods for reliable germination
Here's my foolproof method to break dormancy and get those stubborn seeds sprouting within weeks.
🌱 Step 1: Harvest and Prepare the Seed Pods
Collect mature box elder seed pods when they turn brown and begin splitting open—usually in late summer or early fall. Place them in a paper bag and let them dry completely in a shaded, well-ventilated area for about 2 weeks. You'll know they're ready when the pods crumble easily between your fingers.
Remove the seeds from the pods by gently rubbing them between your hands or tapping the pods against a hard surface. Discard any damaged or shriveled seeds—they won't germinate. Store the viable seeds in a sealed container in a cool, dry place until you're ready to stratify them.
❄️ Step 2: Cold-Stratify the Seeds for Dormancy Break
Fill a sealed plastic bag with 2-3 inches of moistened peat moss or coconut coir—just damp enough to feel slightly damp but not dripping. Add the box elder seeds and seal the bag tightly. Place it in your refrigerator's crispier drawer (around 35-40°F) for 8-12 weeks. Check the moisture level every 2 weeks—if it feels dry, lightly mist the mix.
This cold treatment mimics winter conditions, tricking the seeds into thinking spring has arrived. You'll see nothing happen at first—that's normal. The key is patience. If the seeds start to sprout before the 8-week mark, remove them immediately and move to germination.
🌱 Step 3: Germinate the Stratified Seeds
After stratification, fill small pots with sterile seed-starting mix and plant the seeds ¼ inch deep. Water gently until the soil is moist but not soggy. Place the pots in a warm, bright location (around 70-75°F) with indirect light. Cover the pots with a clear plastic dome or plastic wrap to retain humidity, but remove it daily for 10 minutes to prevent mold.
Germination typically occurs within 7-14 days. You'll notice tiny green sprouts pushing through the soil first—this is the seedling's first true leaves. Keep the soil consistently moist but never waterlogged. If condensation forms inside the dome, lift it slightly to allow airflow.
☀️ Step 4: Transplant Seedlings for Strong Growth
Once seedlings develop 2-3 sets of true leaves (not the initial seed leaves), they're ready for transplanting. Choose a location with partial shade—box elders tolerate shade but grow best with filtered sunlight. Dig a hole twice as wide as the seedling's root ball and gently place it in, covering the roots with soil.
Water deeply after transplanting to settle the soil and encourage root growth. Space seedlings 6-8 inches apart if planting multiple trees. Avoid fertilizing for the first 4-6 weeks—let the roots establish before introducing nutrients. You'll see new growth within 2-3 weeks if conditions are right.
⏰ Step 5: Maintain Moisture and Monitor Growth
Keep the soil consistently moist but not waterlogged for the first month after transplanting. Box elder seedlings are sensitive to drought, so water when the top inch of soil feels dry. Mulch around the base with 2-3 inches of organic mulch to retain moisture and suppress weeds.
Watch for signs of stress like yellowing leaves or stunted growth—these often indicate overwatering or poor drainage. If you notice pests like aphids, treat them immediately with a soapy water spray (1 tablespoon mild dish soap per gallon of water). With proper care, your seedlings will grow into strong, healthy box elder trees.
Tips & tricks for perfect box elder seed germination
These simple strategies will help you maximize your success rate with box elder seeds—no more wasted effort!
Timing Secret: In Step 1, don't rush the drying process. Those 2 weeks in a shaded area are critical for breaking down the seed pods' natural defenses. I've learned the hard way that skipping this step leads to lower germination rates. Place your pods in a location where they get airflow but no direct sunlight—like a mesh bag hanging in a garage or covered porch.
Moisture Management: During the 8-12 week cold stratification in Step 2, the peat moss or coconut coir should stay consistently damp—not wet. I use the "squeeze test": if water drips out when you gently press the mix, it's too wet. Too-dry mix means the seeds won't absorb moisture properly. Checking every 2 weeks keeps everything balanced. A spray bottle makes this easy without over-saturating.
Germination Environment: For Step 3, I've found that placing pots under a grow light (instead of relying solely on window light) speeds up germination from 14 days to as little as 7 days. The key is maintaining that 70-75°F warmth while keeping light indirect. If you don't have a grow light, position pots near a south-facing window where they get bright but filtered light for at least 6 hours daily.
Transplanting Tip: When your seedlings develop their 2-3 sets of true leaves in Step 4, harden them off before transplanting. Place pots outside in a sheltered spot for 1 hour on day 1, gradually increasing to full sun exposure by day 3. This prevents shock when you move them to their permanent location. I've seen seedlings wither dramatically when transplanted directly from indoor warmth to outdoor conditions.
Pro Tips for Box Elder Seed Pods
- These simple strategies will help you maximize your success rate with box elder seeds—no more wasted effort!
- Timing Secret: In Step 1, don't rush the drying process.
- Moisture Management: During the 8-12 week cold stratification in Step 2, the peat moss or coconut coir should stay consistently damp—not wet.
Frequently asked questions
Got questions about box elder seed pods?
You’re not alone! Here are some of the most common queries—plus quick answers to save you time and hassle.
When is the best time to harvest box elder seed pods?
Harvest pods when they’re fully brown and dry (usually late summer to fall). Wait until they’ve split open naturally—this ensures maximum viability. Avoid green pods, as they won’t germinate well. Store them in a cool, dry place until stratification.
How long does cold stratification take for box elder seeds?
Box elder seeds typically need 60–90 days of cold stratification (34–40°F). Place them in a sealed bag with moist peat moss or sand, then refrigerate. Check for mold weekly—discard any seeds that spoil. Patience pays off for faster, more reliable sprouts!
What if my box elder seeds won’t germinate?
Try these fixes:
- Check stratification: Ensure seeds stayed moist but not soggy.
- Test viability: Soak a few seeds in water—if they sink, they’re likely viable.
- Try scarification: Lightly nick the seed coat with sandpaper to break dormancy.
- Alternative method: Plant directly outdoors in fall (nature handles stratification!).
Can I plant box elder seeds without cold stratification?
Yes, but germination rates drop dramatically. For best results, always stratify—it mimics winter conditions and breaks seed dormancy. If you’re in a hurry, try soaking seeds in warm water for 24 hours before planting, though success isn’t guaranteed.
Are box elder trees invasive or hard to control?
Box elders (Acer negundo) can spread aggressively via seeds and suckers. If controlling growth is a concern:
- Plant in contained spaces (e.g., large pots or designated areas).
- Remove seed pods before they split to limit spread.
- Monitor for suckers and trim them back promptly.
Wrapping up and next steps
Box elder seed pods may seem tricky, but with cold stratification, you can unlock their full potential for fast, reliable sprouts! 🌱 Whether you're reviving a neglected lawn or expanding your native plant collection, this method simplifies the process—just gather your supplies, follow the steps, and let nature do the rest.
Ready to take the next step? Experiment with different stratification times or pair these seeds with other native species for a thriving, low-maintenance landscape. Happy gardening! 🌿