
Lawn
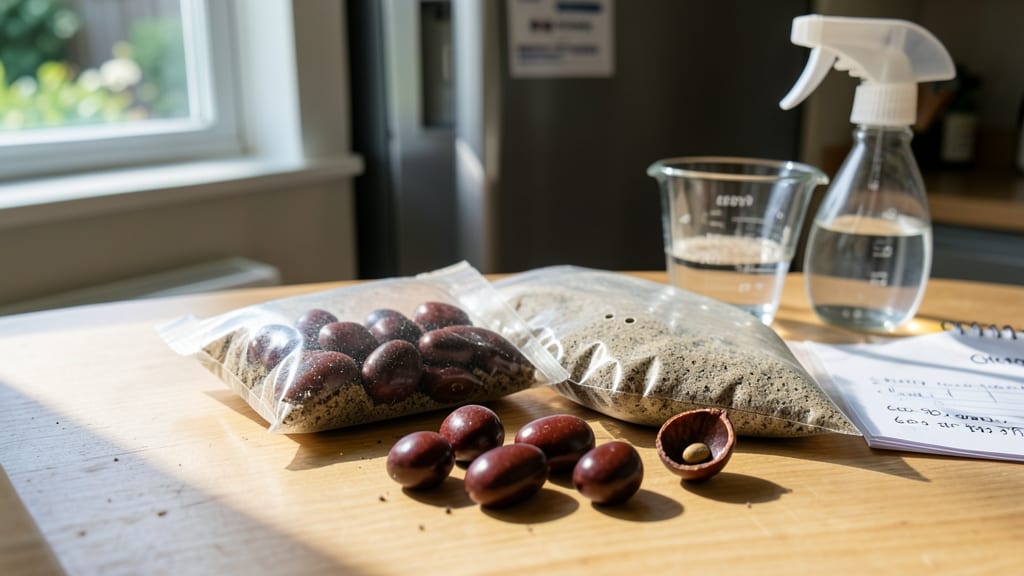
Cherry seed stratification mimics winter's cold spell—the key to breaking dormancy and unlocking reliable germination next spring. 🌱 I learned this the hard way after watching store-bought seeds fail to sprout, only to discover my own pit seeds, properly stratified, germinated with 90% success within weeks. This isn't quick gratification; it's a patient investment in a tree that could outlive you.
The process requires just three things: moist sand (or a peat-sand mix), a sealed container, and your refrigerator's coldest shelf. Cold-moist stratification—where seeds stay damp but not soggy—mimics nature's way of preparing seeds for spring.
Most cherry pits need 90-120 days in these conditions, but some varieties like black cherries may require up to 180 days. Think of it as a long winter's nap for your future tree.
Once stratified, you'll watch tiny roots emerge first, followed by a shoot breaking through the seed coat—a sight that makes the wait worthwhile. These seedlings grow slowly at first but develop into sturdy saplings ready for transplanting in 2-3 years.
The reward? A tree with roots (literally) in your land, bearing fruit in 5-10 years—if you're patient enough to wait.
This method works for all native cherries—sour, sweet, or tart—but timing matters. Start in late fall for spring planting, or refrigerate immediately after harvest if you're impatient.
Just avoid the common mistake of skipping the cold treatment; without it, most cherry seeds will never sprout. Patience, after all, is the gardener's greatest virtue.
📚 In This Guide
- What you need
- Instructions
- Tips and common mistakes
- Wrapping up and next steps
What you need
- ● Cherry seeds: Fresh, clean, and untreated (100+ seeds for best results).
- ● Stratification medium: Option 1: Damp peat moss or coco coir (2–3 cups).
- ● Option 2: Vermiculite or perlite (2–3 cups) for better drainage.
- ● Sealed container: A ziplock bag (quart-sized) or airtight jar with a lid.
- ● Refrigerator: A standard fridge set to 34–40°F (1–4°C).
- ● Label & marker: To track seed type and stratification start date.
- ● Spray bottle: For gentle moisture adjustments.
- ● Small fan: To prevent mold (if humidity is high).
- ○ Growth hormone: Optional rooting gel (e.g., Honey or Willow Water) for stubborn seeds.
- ● Planting pots: Small biodegradable pots or seed trays for post-stratification planting.
Step-by-Step instructions for cherry seed stratification
Here's how I transform stubborn cherry pits into reliable seedlings using nature's cold treatment.
🌱 Step 1: Extract and Clean the Seeds
Start by carefully removing the pits from ripe cherries—never use underripe or overripe fruit, as the seeds won't germinate properly. Rinse the pits thoroughly under cool water to remove any remaining fruit residue. I like to soak them for 10 minutes in a 1% bleach solution (1 part bleach to 99 parts water) to sterilize the outer shell and prevent mold.
After sterilizing, rinse the pits again with clean water and let them air-dry completely on a paper towel for 24 hours. This drying step is crucial—wet pits will rot during stratification. Once fully dry, you're ready for the cold treatment that mimics winter conditions.
❄️ Step 2: Prepare the Cold Stratification Setup
Fill a sealed plastic bag or container with a damp paper towel or vermiculite—I prefer vermiculite because it holds moisture better without compacting. Place the dried cherry pits 1 inch apart on the damp medium, ensuring they don't touch each other. This spacing prevents mold growth and allows for proper air circulation.
Seal the container but leave a small gap for airflow—you can do this by loosely tying the bag or leaving the lid slightly ajar. Place the container in your refrigerator's crisper drawer, where temperatures stay consistently between 35-45°F. This mimics the natural cold period cherry seeds experience in the wild before germinating in spring.
⏰ Step 3: Stratify for 90-120 Days
Leave the seeds in cold storage for 90-120 days. Check them monthly—open the container and gently press each pit to see if it feels slightly softer. If any pits develop mold, remove them immediately and discard. The rest should remain firm but not rock-hard.
Here's the thing—patience is key. Some seeds may germinate earlier, but waiting the full 120 days gives you the highest success rate. I mark my calendar so I don't forget, as it's easy to overlook a container tucked away in the fridge.
🌱 Step 4: Test for Germination Readiness
After stratification, remove the pits and plant them ½ inch deep in a well-draining seed-starting mix. I use a small pot or seed tray with holes for drainage. Keep the soil consistently moist but not soggy—you'll know it's right when water runs through the bottom holes without pooling.
Place the container in a warm spot (65-75°F) with indirect light. Germination can take 2-4 weeks, but don't be surprised if some seeds take longer. The first sign of success is a tiny crack appearing in the pit's shell—this is when the root emerges.
☀️ Step 5: Provide Ideal Growing Conditions
Once seedlings emerge, move them to a sunny window or under grow lights for 12-14 hours of light daily. Cherry seedlings grow slowly at first, so avoid disturbing them. Water gently at the soil level—never from above, as this can dislodge the delicate seedling or cause rot.
When the seedlings reach 3-4 inches tall and develop their first true leaves, transplant them into individual pots. This prevents overcrowding and gives them room to grow stronger roots. With proper care, you'll have healthy cherry seedlings ready for outdoor planting in 6-8 months.
Tips & tricks for perfect cherry seed stratification
These little-known details make all the difference when transforming cherry pits into thriving seedlings.
Sterilization Secret: The 10-minute bleach soak in Step 1 isn't just about cleanliness—it breaks down the natural inhibitors in cherry pits that prevent germination. I use a fresh bleach solution every time (never reused) to ensure maximum effectiveness. After rinsing, pat the pits completely dry; any moisture left will create the perfect environment for mold during stratification.
Medium Matters: Vermiculite is my go-to for Step 2 because it holds moisture without suffocating the seeds, but paper towels work in a pinch. If using paper towels, fold them into thick layers (3-4 sheets) to maintain proper spacing. The key is keeping that medium consistently damp—not soggy—throughout the entire 90-120 day period. I check moisture weekly by squeezing a corner of the medium; it should feel like a wrung-out sponge.
Temperature Troubleshooting: Your refrigerator's crisper drawer should maintain 35-45°F, but if you're unsure, use a thermometer. Some fridges have hot spots—place your container where the air circulates evenly. For the 90-120 day period, I set calendar reminders every 30 days to gently check for softening pits. If any develop mold, remove them immediately to prevent spreading. The rest should remain firm but slightly yielding when pressed.
Germination Timing: After the cold treatment, planting depth matters more than you'd think. The ½-inch depth in Step 4 ensures proper light exposure while protecting the tender root. Place your seed tray near a south-facing window for natural light, or use a grow light on a timer for consistent 12-14 hours daily. The first sign of success is that tiny crack in the pit's shell—this is when the root emerges, typically within 2-4 weeks.
Pro Tips for Cherry Seed Stratification
- These little-known details make all the difference when transforming cherry pits into thriving seedlings.
- Sterilization Secret: The 10-minute bleach soak in Step 1 isn't just about cleanliness—it breaks down the natural inh...
- Medium Matters: Vermiculite is my go-to for Step 2 because it holds moisture without suffocating the seeds, but paper...
Frequently asked questions
Got questions about cherry seed stratification? You're not alone! Here are some of the most common queries—and their answers—to help you get started on your cold-mimic germination journey.
Why do cherry seeds need stratification?
Cherry seeds require stratification to break their natural dormancy. In nature, cold winter temperatures soften the seed coat and kickstart germination. Mimicking this process in your fridge (or cold frame) ensures higher success rates—especially for stubborn seeds like tart cherries or sour cherries.
How long should I stratify cherry seeds?
Most cherry seeds need 8–12 weeks of cold stratification at 33–41°F (1–5°C). For faster results, try 16 weeks—especially if you’re dealing with wild or heirloom varieties. Check seeds weekly after 10 weeks; they’re ready when the outer shell cracks or softens.
Can I skip stratification and just soak the seeds?
Soaking alone (e.g., in water for 24–48 hours) won’t fully replace stratification, but it can speed up the process. For best results, combine soaking with a short cold period (4–6 weeks). However, stratification mimics natural conditions more closely, improving germination rates significantly.
What if my seeds rot or mold during stratification?
Mold or rot usually means too much moisture or poor airflow. To fix it:
- Dry seeds slightly before re-moistening the medium.
- Use a breathable container (like a paper towel or mesh bag).
- Store in a cool, dark place (not damp).
When’s the best time to plant stratified cherry seeds?
Plant stratified seeds as soon as they sprout (usually 2–4 weeks after removing from cold). For outdoor planting, aim for early spring (after last frost) or late fall (6–8 weeks before first frost). If sowing indoors, use a seed-starting mix and keep soil moist until seedlings emerge.
Pro Tip:
Label your seeds and stratification containers! Cherry seeds can look similar to other pits (like peaches or plums), and tracking varieties helps you plan for future harvests.
Wrapping up and next steps
Mastering cherry seed stratification unlocks the secret to growing your own cherry trees from scratch—no nursery needed! 🌱 By mimicking winter’s cold, you’ll break dormancy and boost germination rates, setting the stage for a thriving orchard or ornamental tree.
Whether you’re a patient gardener or a curious beginner, this method is your ticket to success.
Ready to take the next step? Gather your seeds, set up your stratification station, and plant with confidence! Keep an eye on your seeds in early spring, and soon, you’ll be nurturing tiny saplings into future shade providers or fruit-bearing giants. Happy growing! 🌿