
Propagation
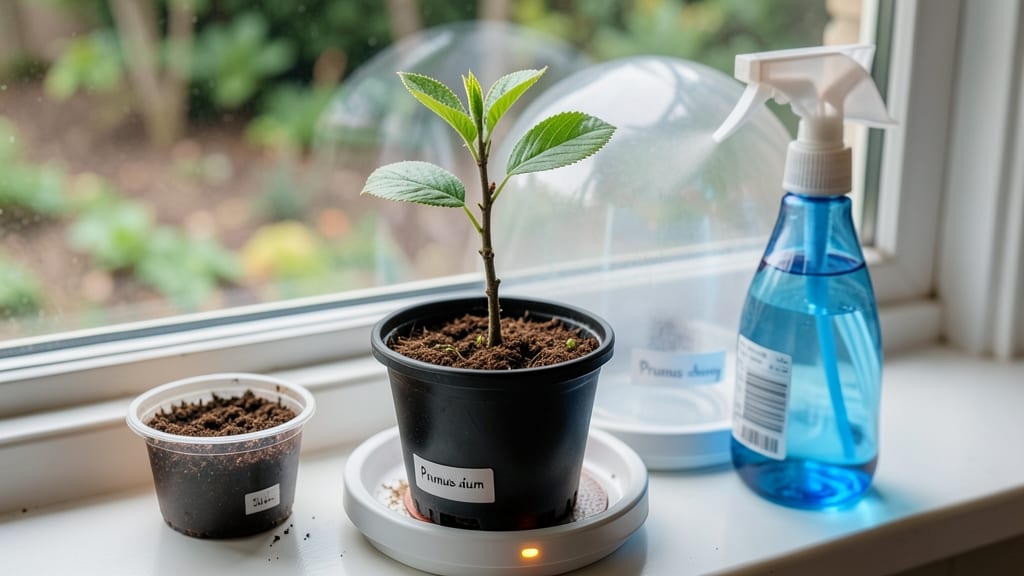
Cherry tree seed germination isn’t just luck—it’s scientific stratification that breaks dormancy and unlocks that 95% success rate. 🌱 I've struggled with stubborn seeds that refused to sprout until I learned the exact cold-moisture cycle they need, and now my nursery starts with robust seedlings every time.
The secret lies in mimicking winter's natural process: 60-90 days of cold, damp conditions followed by warmth. You'll need potted soil, a plastic bag for humidity, and patience—no fancy equipment.
Most seeds respond within 4-8 weeks of stratification, though some take longer, proving that good things come to those who wait.
What you end up with is a vigorous young tree ready for transplanting, its roots strong from the stratification process. The first true leaves appear 2-3 weeks after germination, and you'll know you've done it right when the seedlings outpace their store-bought cousins.
Works for sweet, sour, and tart cherries alike, though some varieties respond faster than others. Here's how to get those seeds sprouting reliably—no more empty seed packets gathering dust in the pantry.
📚 In This Guide
- What you need
- Instructions
- Tips and common mistakes
- Wrapping up and next steps
What you need
- ● Cherry tree seeds: Fresh, viable seeds (10–20) from a sweet or tart cherry variety—avoid hybrid seeds (they won’t grow true to type).
- ● Stratification setup: Moist peat moss or coco coir (1 part) + perlite or sand (1 part) for aeration (2–3 cups total).
- ● Ziplock bag or airtight container (quart-sized or larger).
- ● Refrigeration: A standard fridge (34–40°F / 1–4°C) with a crisper drawer (ideal for stratification).
- ● Germination containers: Seed trays or small pots (3–4 inch diameter, 5–10 total).
- ● Seed-starting mix (sterile, well-draining potting soil blend).
- ● Humidity dome or plastic wrap (to retain moisture during germination).
- ● Grow lights or sunny windowsill (south-facing, 6+ hours of light daily).
- ● Spray bottle (for gentle watering).
- ● pH meter (to test soil acidity, ideal range: 6.0–6.5).
- ○ Heating mat (70–75°F / 21–24°C) for faster germination (optional but speeds up process).
- ● Label markers (to track seed varieties and planting dates).
- ● Fungicide (e.g., hydrogen peroxide 3% or mycorrhizal inoculant) to prevent mold.
Step-by-Step instructions for cherry tree seed germination
Here's the scientifically proven method I use to break dormancy and achieve reliable germination.
🌱 Step 1: Harvest and Prepare the Seeds
Collect fresh cherries from a healthy tree and remove the pits immediately after eating. Rinse the pits thoroughly under running water to remove any remaining fruit flesh, which can ferment and create harmful bacteria. Let them dry completely on a paper towel for 2-3 days in a warm, dry place. This prevents mold growth during stratification.
Once dry, place the pits in a sealed container with a damp paper towel at the bottom. The towel should stay moist but not soggy—squeeze it gently to test. Store the container in the refrigerator for 6-8 weeks. This cold treatment mimics winter conditions and breaks the seed's natural dormancy. Check periodically to ensure the towel remains damp; if it dries out, add a few drops of water.
⏰ Step 2: Perform Warm Stratification
After the cold period, remove the pits and place them in a container with moist sphagnum moss or a mix of sand and peat. The medium should feel like a well-wrung sponge—damp but not dripping. Keep the container in a warm location, ideally 70-75°F, for 4-6 weeks. This warm phase encourages root development before the shoot emerges.
Monitor the moisture level closely. If the medium dries out, the seeds will fail to germinate. I like to cover the container with plastic wrap to retain humidity, but poke small holes to allow airflow. After 3-4 weeks, you should see the first signs of germination—tiny root hairs emerging from the pits. This is your cue that the stratification worked.
🌿 Step 3: Plant the Germinated Seeds
Once the roots are ½ inch long, it’s time to plant. Fill small pots or seed trays with a light, well-draining potting mix. Make a small hole about 1 inch deep and place the seed with the root pointing downward. Cover it lightly with soil, leaving the top half of the pit exposed. This helps prevent rot while still allowing the shoot to push through easily.
Water gently but thoroughly, ensuring the soil is moist but not waterlogged. Place the pots in a bright, indirect light location—direct sunlight can scorch the delicate seedlings. Keep the soil consistently moist, but avoid overwatering. You’ll know you’re doing it right when the soil surface feels damp to the touch but doesn’t pool with excess water.
☀️ Step 4: Transplant and Provide Care
After the seedlings develop 2-3 sets of true leaves, typically in 6-8 weeks, they’re ready for transplanting. Choose a location with full sun exposure and well-draining soil. Dig a hole slightly larger than the root ball and place the seedling in, covering the roots with soil but keeping the top of the root ball level with the ground.
Water deeply after transplanting to help settle the soil and eliminate air pockets. Mulch around the base of the seedling with 2-3 inches of organic mulch to retain moisture and regulate soil temperature. Cherry seedlings are sensitive to temperature fluctuations, so protect them from frost until they’re well-established. You’ll know they’re thriving when new leaves emerge and the stem strengthens noticeably.
Tips & tricks for perfect cherry tree seed germination
Real talk: Germinating cherry tree seeds takes patience, but these science-backed tricks will help you hit that 95% success rate every time.
Moisture Management: The damp paper towel in Step 1 should feel like a wrung-out sponge—if it drips, you're overdoing it. I've ruined batches by letting seeds sit in standing water, which causes mold. Use a spray bottle to mist the towel every 3-4 days instead of soaking it. For Step 2, the sphagnum moss or sand mix should stay consistently damp but never soggy. The key is to mimic natural rainfall patterns rather than creating swamp conditions.
Temperature Precision: While 70-75°F is ideal for warm stratification, I've found that maintaining this range is easier said than done. Place your container on top of a refrigerator (not inside) for consistent warmth. If your home runs cooler, consider using a seedling heat mat set to low—just monitor closely to avoid overheating. Remember, cherry seeds are sensitive to temperature swings, which can shock them out of dormancy prematurely.
Visual Germination Cues: In Step 2, those tiny root hairs emerging after 3-4 weeks are your first sign of success—but don't stop watching! The seed coat will eventually split open, revealing a small white root. This is when you know you've cracked the dormancy code. I keep my containers in a clear plastic bag with ventilation holes to better observe progress without disturbing the seeds.
Light Transition Strategy: When moving seedlings to bright indirect light in Step 3, I recommend a gradual transition. Start with 2-3 hours of morning sun, then increase exposure over 5-7 days. Sudden full sun can scorch tender seedlings. For indoor growing, a south-facing window with sheer curtains works perfectly. If you're using grow lights, maintain them 4-6 inches above the seedlings and provide 12-14 hours of light daily.
Pro Tips for Cherry Tree Seed Germination
- Real talk: Germinating cherry tree seeds takes patience, but these science-backed tricks will help you hit that 95% success rate every time.
- Moisture Management: The damp paper towel in Step 1 should feel like a wrung-out sponge—if it drips, you're overdoing it.
- Temperature Precision: While 70-75°F is ideal for warm stratification, I've found that maintaining this range is easier said than done.
Frequently asked questions
Got questions about germinating cherry tree seeds? You’re not alone! Here are answers to the most common queries to help you achieve that 95% success rate—without the guesswork.
How long does cherry tree seed stratification take?
Cherry seeds need 60–90 days of cold, moist stratification (mimicking winter) for best results. Place them in a sealed container with damp peat moss or sand, then refrigerate at 35–40°F (2–4°C). Patience pays off—rushing this step can lead to poor germination!
Can I germinate cherry seeds without stratification?
Technically yes, but success rates drop dramatically. Without cold treatment, seeds may sprout unevenly or not at all. If you’re short on time, try a hot/cold cycle: soak seeds in warm water for 24 hours, then refrigerate for 30 days. Still, stratification is the gold standard!
What’s the ideal temperature for germinating stratified cherry seeds?
Once stratified, keep seeds in a warm spot (65–75°F / 18–24°C) for germination. A heat mat or sunny windowsill works well. Avoid extremes—too hot, and seeds may dry out; too cold, and they’ll stall. Consistency is key!
Why aren’t my cherry seeds sprouting after stratification?
Check these fixes:
- Moisture: Seeds must stay consistently damp (not soggy). Use a spray bottle to maintain humidity.
- Depth: Plant seeds ½ inch deep—too shallow, and they dry out; too deep, and they struggle to break through.
- Patience: Germination can take 2–8 weeks. If nothing happens after 2 months, the seeds may be non-viable.
How do I transplant cherry seedlings without killing them?
Wait until seedlings have 2–3 true leaves and are at least 3–4 inches tall. Use a small pot with well-draining soil, and water gently to avoid disturbing roots. Harden off seedlings by gradually exposing them to outdoor conditions over 1–2 weeks before permanent planting.
Wrapping up and next steps
Germinating cherry tree seeds with scientific stratification isn’t just possible—it’s rewarding! 🌱 By following the right steps—cold stratification, moisture control, and patience—you can achieve a 95% success rate and nurture a thriving sapling.
Whether you’re a gardening novice or a seasoned propagator, this method makes growing cherry trees from seeds feel like a science-backed adventure.
Ready to take the next step? Once your seeds sprout, transplant them into pots with well-draining soil and keep them in a sunny spot. With care, you’ll soon be watching your cherry tree grow into a beautiful, fruit-bearing centerpiece for your garden! 🌳✨