
Pruning
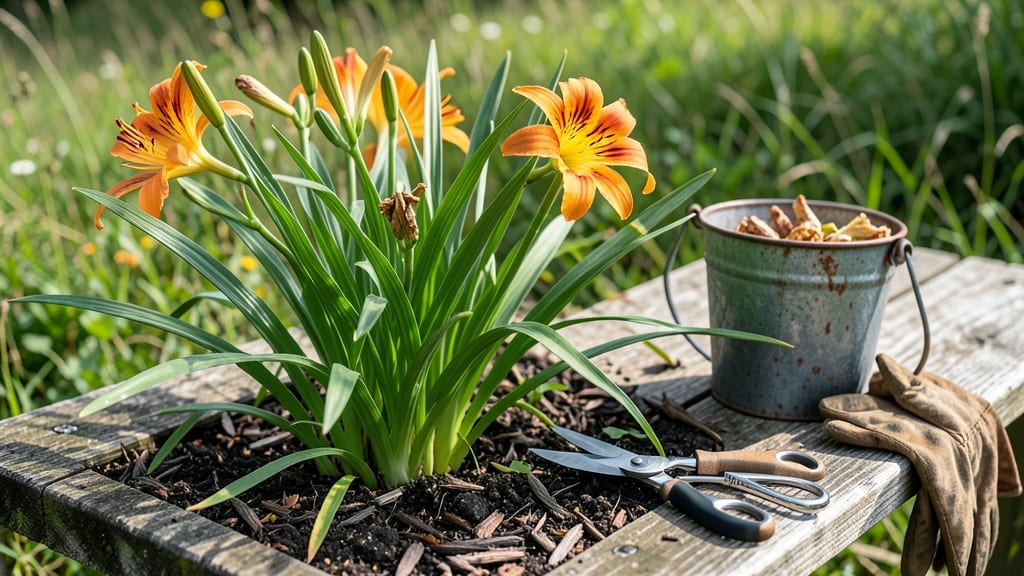
Deadheading daylilies and seed pods is the game-changer that turns your garden into a nonstop bloom machine—all it takes is a quick snip and a little consistency. The best time to deadhead is right after blooms fade, but don’t rush—wait until the petals start drooping. Grab your pruners (or clean scissors) and snip just above the first set of healthy leaves below the flower. This redirects energy from seed production back into new blooms, giving you weeks more color before winter. You’ll notice a difference fast: plants stay bushier, blooms come thicker, and those pesky seed pods (which drain energy) stay at bay. For varieties you want to propagate, leave a few pods—just not on your showiest plants. The trade-off? Fewer blooms on those stems, but you’ll have new daylilies to share next year. Works for all daylily types, from classic ‘Stella de Oro’ to heirloom varieties. The key is consistency—10 minutes every few days keeps your plants thriving all season. Let’s get those blooms back!
📚 In This Guide
- What you need
- Instructions
- Tips and common mistakes
- Wrapping up and next steps
What you need
- ○ Pruning shears or sharp bypass pruners – Choose sterilized, sharp tools (4-6 inch blades) to avoid spreading disease. Optional: Small handheld or long-reach pruners for hard-to-access blooms.
- ● Garden gloves – A pair of durable, breathable gloves (e.g., nitrile-coated or leather) to protect your hands from thorns and dirt.
- ● Disposable garden bags or bucket – A 5-gallon bucket or heavy-duty trash bags (20+ gallon) for collecting spent blooms and seed pods.
- ○ Garden disinfectant (optional but recommended) – A 70% isopropyl alcohol or bleach solution (1 part bleach to 9 parts water) to sterilize tools between cuts.
- ● Compost bin or pile – For repurposing healthy plant debris (if not diseased).
- ● Knee pads – For comfort during extended pruning sessions.
- ● Hose with nozzle – To rinse tools and refresh plants post-pruning.
- ● Plant food or compost tea – A balanced fertilizer (10-10-10) or homemade compost tea to nourish daylilies after deadheading.
- ● Label markers (if dividing plants later) – To tag new divisions for future reference.
Instructions for deadheading daylilies and seed pods
Here’s how to keep your daylilies thriving year after year with precise timing and technique.
Identify When and Which Blooms to Deadhead
Deadhead daylilies only after the flower fully fades and the petals begin to droop—never cut open blooms or you’ll damage the plant’s energy reserves. I look for brown or wilted petals as my cue, typically 2-3 weeks after blooming, depending on your climate. This ensures the plant has absorbed all the nutrients from the flower.
Leave the central flower stalk (the scape) intact if you want seed pods for propagation. If you’re not saving seeds, cut the entire spent bloom off at the base with clean, sharp pruners. This prevents the plant from wasting energy on seed production and redirects it toward next year’s blooms.
Remove Seed Pods Strategically
If you’re not propagating from seed, remove seed pods as soon as they form—usually 4-6 weeks after flowering. These pods drain energy from the plant, weakening future blooms. I pinch them off with my fingers or snip them with pruners just above the leaf node to avoid damaging the foliage.
For seed-saving purposes, leave 2-3 pods per plant and harvest them once they turn brown and papery. Collect seeds when pods are fully dry to ensure viability. Store them in a cool, dry place until spring planting.
Clean Up Foliage for Winter Hardiness
In late fall, after the first frost, cut back yellowed or damaged leaves to 2-3 inches above ground level. This prevents pests and diseases from overwintering in dead foliage. I use sterilized pruners and make clean cuts to avoid tearing the stems, which can invite rot.
Leave healthy green leaves if your climate is mild—this helps the plant store energy for spring regrowth. In colder zones, you can remove all foliage, but I prefer leaving some to protect the crown from harsh winter winds.
Fertilize and Mulch for Revival
After deadheading and cleaning up, apply a balanced, slow-release fertilizer (10-10-10) in early spring to replenish nutrients. I scatter it around the base of the plant and water it in deeply. This jumpstarts new growth and ensures vibrant blooms the following season.
Top with 2-3 inches of organic mulch, like shredded bark or straw, to retain moisture and regulate soil temperature. Keep mulch 6 inches away from the crown to prevent rot. This step is critical for reviving daylilies after their dormant phase.
Tips & tricks for perfect daylily maintenance
A few key strategies will transform your daylilies from seasonal blooms to year-round powerhouses. These insights come from years of trial and error—trust me, your plants will thank you.
Timing Secret: In Step 1, resist the urge to rush—those 2-3 weeks after blooming are critical. Daylilies need time to absorb nutrients from the flower before deadheading. I’ve seen plants with weak stems when cut too early, so mark your calendar or set a reminder based on your local bloom cycle. In hotter climates, this window might shrink to 1-2 weeks, but never cut before petals wilt completely.
Seed Pod Strategy: When removing seed pods in Step 2, focus on precision. Use your fingers to pinch pods just above the leaf node—this avoids damaging the plant’s energy pathways. For seed-saving, I’ve found that leaving exactly 2-3 pods per plant gives me enough seeds without compromising next year’s blooms. The key is consistency: always harvest when pods turn brown and papery, never before—they won’t be viable yet.
Foliage Care: In Step 3, don’t overcut in fall. I’ve learned the hard way that removing all foliage in colder zones can expose the crown to winter winds. Instead, leave 2-3 inches of healthy green leaves as natural insulation. For sterilized pruners, I soak mine in rubbing alcohol between cuts—this prevents cross-contamination that could spread diseases between plants.
Seasonal Revival: The early spring fertilization in Step 4 is non-negotiable, but timing matters. Apply fertilizer when you see new shoots emerging, not before. I’ve noticed that daylilies fertilized too early can develop weak stems. And for mulch, I always use shredded bark—it breaks down slowly and improves soil structure over time, unlike straw which can mat down and suffocate roots.
Pro Tips for Deadheading Daylilies And Seed Pods
- A few key strategies will transform your daylilies from seasonal blooms to year-round powerhouses.
- Timing Secret: In Step 1, resist the urge to rush—those 2-3 weeks after blooming are critical.
- Seed Pod Strategy: When removing seed pods in Step 2, focus on precision.
Frequently asked questions
Got questions about keeping your daylilies looking their best? Here are some common ones—and their answers—to help you master deadheading and seed pod care like a pro!
When is the best time to deadhead daylilies?
Deadhead spent blooms as soon as they fade to encourage more flowers. For daylilies, this usually means late spring through early fall (or whenever blooms appear). Skip deadheading in late summer/fall—let some seed pods form for next year’s blooms!
Should I remove all seed pods from daylilies?
Nope! Only remove excessive seed pods if you want to redirect energy to blooms. Leave a few to naturally propagate new plants. Overcrowding? Snip seed pods after they brown but before they split open (to avoid self-seeding where you don’t want it).
How do I deadhead daylilies without damaging the plant?
Use clean pruners or fingers to pinch off blooms at the base of the flower stalk (not the foliage). Avoid cutting into the leaves—focus on the dead bloom and its stem. For tough stems, snip just above a leaf node to encourage new growth.
Can I compost daylily seed pods and deadheads?
Both are great for compost—they break down easily. Just avoid composting if pests (like slugs) are a problem in your garden. Pro tip: Toss them in a closed bin to speed decomposition!
What if my daylilies stop blooming after deadheading?
Don’t panic! Daylilies may need a fertilizer boost (use a balanced 10-10-10) or more sunlight (6+ hours/day). Over-deadheading or cutting too aggressively can stress plants. Try leaving 2-3 seed pods per stalk to balance blooms and energy.
Wrapping up and next steps
Deadheading daylilies and removing seed pods isn’t just about tidying up—it’s your secret weapon for longer blooms, healthier plants, and a showstopping garden! 🌸 By dedicating just a little time to these simple tasks, you’ll encourage your daylilies to thrive year after year, saving energy for next season’s vibrant displays.
Ready to see the difference? Start with one patch today—your future garden will thank you!
Next up: Plan your garden’s next chapter. Use the extra time you’ve freed up to sketch out new plant placements, research companion plants, or even treat yourself to a fresh batch of daylily varieties. Happy gardening!