
Lawn
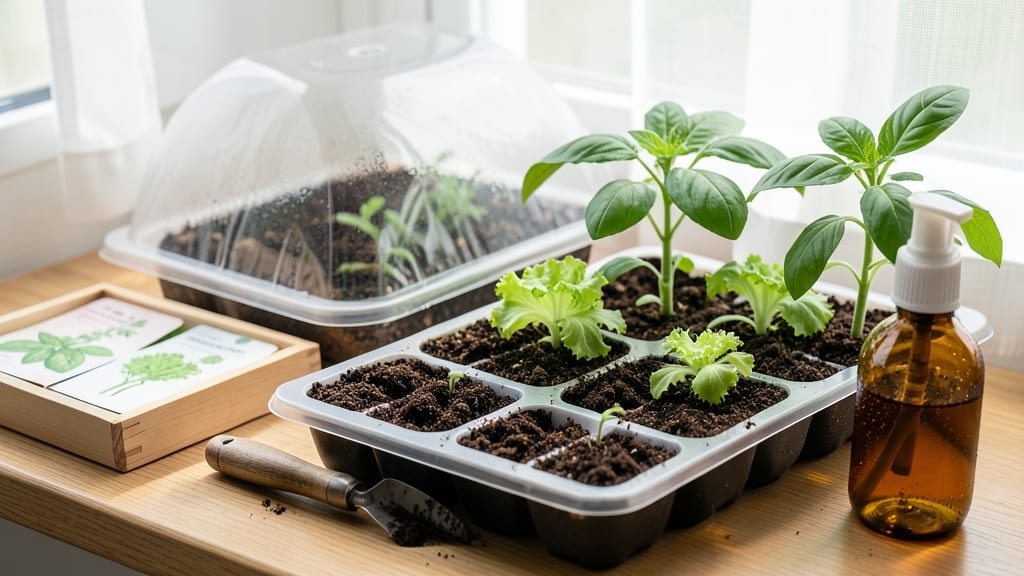
Your seed starter tray doesn’t need to cost $20—this stackable DIY version works better and saves money. 🌱 I’ve built three versions from recycled plastic bins to wooden crates, and the right setup keeps seedlings strong, prevents damping-off, and stacks neatly on a sunny windowsill.
The secret is drainage holes (use a drill or nail) and a lightweight soil mix—too-heavy potting soil smothers roots. I use a 50/50 blend of coco coir and perlite, which stays moist but breathes.
Sterilize your tray with a 10-minute bleach soak (1 part bleach to 9 parts water) to kill fungus before planting. By week 3, you’ll see bold green seedlings reaching for light, ready to transplant. The stackable design maximizes space—perfect for apartments or small greenhouses.
Plus, it’s 100% reusable (or compostable if you choose biodegradable materials). Common mistakes? Overwatering (check soil moisture daily) and skipping light (supplement with a grow bulb if natural light is weak). Troubleshoot leggy seedlings by moving them closer to the light—no stretching, no stress.
📚 In This Guide
- What you need
- Instructions
- Tips and common mistakes
- Wrapping up and next steps
What you need
- ● Seed starter tray base: A shallow, rectangular container (e.g., plastic takeout tray, wooden box, or repurposed baking dish) – must be at least 6" deep
- ● OR a stackable plastic seedling tray (if you prefer pre-made slots for individual pots)
- ● Dividers or cell materials: Toilet paper rolls (cut to 2–3" height) – quantity depends on tray size; 12–24 cells is ideal
- ● OR egg cartons (cardboard or plastic) – cut into individual cells
- ● OR small plastic cups/yogurt containers (3–4" diameter) – drill drainage holes if using
- ● Potting mix: Seed starter or light, well-draining soil mix – avoid garden soil (too dense)
- ○ Optional: Perlite or vermiculite (10–20% mix) for aeration
- ● Seeds: Your chosen variety (fast-growing like radishes or herbs work best for starters!)
- ● Basic tools: Scissors or box cutter (for cutting dividers)
- ● Drill or nail (if adding drainage holes to containers)
- ● Spray bottle (for gentle watering)
- ● Ruler (for measuring uniformity)
- ● Clear plastic dome or plastic wrap (to create a mini greenhouse effect)
- ● Labeled plant markers (toothpicks + masking tape work great!)
- ● Grow lights or sunny windowsill (for consistent light exposure)
- ● Tray feet (e.g., bottle caps glued to the base) – prevents water pooling
- ● Compost or worm castings (for nutrient boost)
Step-by-Step instructions for building DIY seed starter trays
Here's how to create a sturdy, stackable germination station that'll give your seedlings the perfect start.
🪴 Step 1: Gather Materials and Tools
You'll need 4 plastic storage boxes (with lids) that are at least 6 inches deep and 12 inches square, plus 20 plastic cups (4-6 oz size), a utility knife, sandpaper, a permanent marker, and a drill with a small bit. I like to use clear boxes so I can monitor moisture levels without opening them.
Check that all boxes have secure lids—they'll become your humidity domes. If any lids don't fit snugly, set them aside and use the next best option. The cups will become your individual seedling cells, so make sure they're uniform in size to maintain even growing conditions.
✂️ Step 2: Create Seedling Cells
Mark 2-inch diameter circles on each cup using the permanent marker. These will be your seedling holes. Cut out the circles carefully with the utility knife, then smooth the edges with sandpaper to prevent sharp corners that could damage delicate roots later.
Here's the thing—don't cut all the way through the bottom of the cups. Leave about ¼ inch of plastic intact. This creates a drainage channel while still allowing roots to grow downward. Test each cup by filling it with water to ensure proper drainage before proceeding.
🪴 Step 3: Assemble the Tray
Place 5 cups in each storage box, spacing them evenly across the bottom. The centers should be about 3 inches apart—this gives seedlings enough room to develop without crowding. I arrange them in a grid pattern for maximum stability when stacking.
Fill each box with seed-starting mix (not garden soil) until it reaches just below the rim of the cups. Press lightly to settle the mix, but don't compact it too tightly. The goal is to create a stable base while allowing good air circulation around the roots.
💧 Step 4: Prepare for Germination
Moisten the seed-starting mix until it's damp but not soggy—think of a wrung-out sponge. You want the soil to hold moisture without creating waterlogged conditions that invite damping-off disease. Place the assembled tray on a seedling heat mat set to 75-85°F for optimal germination.
Cover the entire tray with the lid to create a humidity dome. Check daily for condensation on the lid—this is your signal that moisture levels are perfect. Once 50% of your seeds have sprouted (usually within 7-10 days), remove the lid permanently to prevent fungal growth.
☀️ Step 5: Position for Growth
Move the trays to a location with 14-16 hours of bright light daily. A south-facing window works, but I supplement with LED grow lights positioned 2-4 inches above the seedlings. You'll know your light is sufficient when seedlings grow compact and dark green, not leggy and pale.
Rotate the trays a quarter turn daily so all seedlings receive equal light exposure. This prevents them from leaning toward the light source. Watch for first true leaves (the second set after the initial seed leaves)—this is your cue that the seedlings are ready for thinning if needed.
Tips & tricks for perfect DIY seed starter trays
Building your own seed starter trays is all about precision and patience—here's what I've learned to make the process smoother and more effective.
Material Selection Matters: For Step 1, prioritize plastic storage boxes with secure lids that create a tight seal when closed. Clear boxes let you monitor moisture levels without disturbing the humidity dome, which is especially helpful during the critical 7-10 day germination period. If your boxes have any gaps, reinforce them with painter's tape to maintain consistent humidity levels—this prevents the dreaded damping-off disease that can wipe out your seedlings before they even sprout.
Precision Cutting: In Step 2, when marking those 2-inch diameter circles for your seedling cells, use a ruler and draw two intersecting lines to create perfect crosshairs. This ensures your cuts are perfectly centered, which gives seedlings equal growing space and prevents them from leaning against the cup edges. After cutting, test each cup immediately by filling it with water—proper drainage is non-negotiable. If water pools at the bottom, you've gone too far with your cut.
Lighting Strategy: The 14-16 hours of daily light in Step 5 is crucial, but quality matters more than quantity. Position your LED grow lights just 2-4 inches above the seedlings—the closer they are, the more intense the light, but too close can cause overheating. I've found that a simple timer set to 14 hours of light followed by 10 hours of darkness mimics natural daylight cycles perfectly, which actually encourages healthier growth than constant artificial light.
Humidity Management: That condensation you see on the lid during germination isn't just a pretty sight—it's your best indicator of proper humidity levels. Check daily and adjust by misting the soil if needed, but never let water pool in the tray. Once 50% of your seeds have sprouted, remove the lid completely to prevent fungal growth. I've seen beginners keep the lid on too long, which leads to moldy seedlings—don't make that mistake!
Pro Tips for Diy Seed Starter Tray
- Building your own seed starter trays is all about precision and patience—here's what I've learned to make the process smoother and more effective.
- Material Selection Matters: For Step 1, prioritize plastic storage boxes with secure lids that create a tight seal when closed.
- Precision Cutting: In Step 2, when marking those 2-inch diameter circles for your seedling cells, use a ruler and draw two intersecting lines to create perfect crosshairs.
Frequently asked questions
What’s the best material for a DIY seed starter tray?
For durability and drainage, use recycled plastic containers (like yogurt cups) or wooden crates with drainage holes. Avoid metal—it can overheat. If using cardboard, line it with plastic to prevent warping when wet. Pro tip: Drill holes in the bottom to avoid soggy roots!
How long do seedlings need to stay in the starter tray?
Most seedlings spend 3–6 weeks in the tray before transplanting, depending on the plant type. Leafy greens (like lettuce) can go faster (3–4 weeks), while root veggies (carrots, beets) need 6–8 weeks. Check for 2–3 true leaves and sturdy stems before moving them outdoors.
Can I reuse seed starter trays?
Yes! Clean them thoroughly with soapy water and disinfect with a 10% bleach solution (1 part bleach to 9 parts water) to kill fungi/bacteria. Rinse well and dry before reuse. Warning: Avoid reusing trays that held diseased plants—discard or sterilize at high heat (200°F+ for 30 mins).
What if my seedlings aren’t germinating?
Check these first:
- Moisture: Keep soil damp (not soggy)—use a spray bottle for gentle watering.
- Warmth: Place trays near a sunny window or use a seedling heat mat (70–85°F is ideal).
- Light: Seedlings need 12–16 hours of light daily—supplement with a grow light if natural light is weak.
- Depth: Plant seeds at the correct depth (usually 2x their width below soil).
Are store-bought trays better than DIY?
Not necessarily! DIY trays save money and let you customize size/drainage. Store-bought trays (like biodegradable peat pots) are convenient but cost more. Hybrid tip: Use DIY trays for bulk starts, then transfer seedlings to cheap nursery pots for hardening off.
Wrapping up and next steps
Creating your own DIY seed starter tray is a rewarding way to kickstart your gardening journey—saving money, reducing waste, and giving your seedlings the best possible head start! 🌱 With just a few household materials, you’ve got a space-efficient, stackable system that’s perfect for busy gardeners or small spaces.
Now that you’re equipped with the know-how, there’s no better time to roll up your sleeves and get growing.
Ready to take the next step? Start by gathering your supplies, follow the simple steps, and watch your tiny seeds transform into thriving seedlings—one tray at a time! Happy planting! 🌿