
Lawn
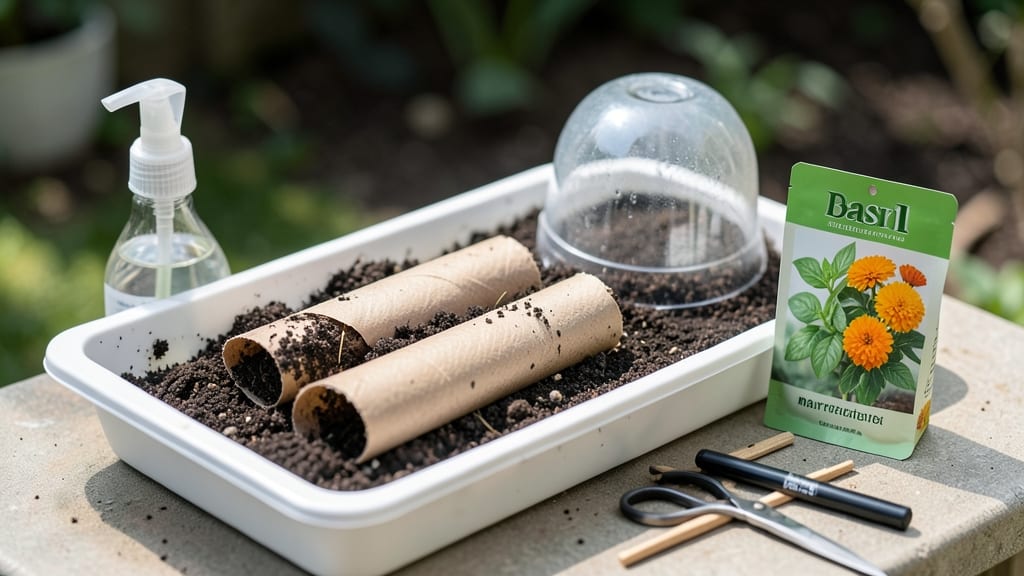
Turn empty toilet paper rolls into zero-waste seed starters that sprout faster and transplant easier than plastic pots. 🌱 I’ve saved dozens of rolls from landfills this way, and my seedlings always seem to take off with less stress—no more fragile roots breaking during moves.
The secret? Keeping them moist, bright, and cozy until those first green shoots poke through the top. You’ll need toilet paper rolls, potting soil, seeds, and a sharp knife to score the bottom for drainage. That’s it—no fancy tools or expensive setups.
The rolls break down in the soil, so you’re not left with plastic waste or root-bound plants. My favorite varieties for this method are lettuce, herbs, and marigolds, but even tomatoes and peppers get a strong start this way.
By day 7, you’ll see tiny leaves unfurling and roots snaking through the bottom. The best part? When transplant time comes, just slide the whole roll into the ground—roots and all—and the cardboard dissolves away. No shock, no fuss, just happy plants settling right in.
This works for any seed that germinates quickly, and it’s perfect for beginners or anyone tired of throwing away plastic pots. Give it a try this spring—your garden (and the planet) will thank you!
📚 In This Guide
- What you need
- Instructions
- Tips and common mistakes
- Wrapping up and next steps
What you need
- ● Toilet paper rolls: 1–2 per seed type (unbleached, 100% recycled preferred)
- ● Seeds: Fast-growing varieties like basil, radishes, or sunflowers (check seed packets for sprouting times)
- ● Potting soil: Seed-starting mix (sterile, well-draining; 1–2 cups per roll)
- ● Water: Room-temperature, gently applied (spray bottle or small watering can)
- ● Scissors or knife: For cutting rolls to size (if needed)
- ○ Plastic wrap or clear lid: To retain humidity (optional but helpful for the first 3–4 days)
- ● Plant markers: To label seeds (toothpicks + masking tape work great!)
- ● Tray or shallow container: To catch excess water (e.g., baking sheet or egg carton)
- ● Grow light or sunny windowsill: 6+ hours of light daily (south-facing window or LED bulb)
- ● Fertilizer: Diluted liquid fertilizer (after 2–3 weeks, if seeds are leggy)
Step-by-Step instructions for toilet paper seed starters
Here's how to turn empty rolls into a zero-waste, space-saving way to grow seedlings.
🌱 Step 1: Prepare Your Toilet Paper Rolls
Start with clean, empty toilet paper rolls—no labels or glue residue. I like to give them a quick wipe with a damp cloth to remove any dust or debris. Cut each roll into 4 equal sections, about 2-3 inches long each. This gives you 4 mini pots per roll, perfect for starting small seeds like lettuce, herbs, or flowers.
Leave the rolls open at one end to create a planting chamber. You'll see why this matters later—it lets roots grow downward naturally while keeping the seed snug. I stack mine in a shallow tray to catch any excess water during the process.
💧 Step 2: Soak and Plant the Seeds
Fill a small bowl with warm water and add a few drops of liquid seaweed fertilizer (optional but helpful). Place the toilet paper sections in the water, ensuring the bottom edge soaks up moisture. Let them sit for 5-10 minutes until the paper is damp but not dripping.
Remove the soaked sections and gently press 1-2 seeds into the bottom of each section, about ¼ inch deep. The toilet paper holds the seed in place while allowing roots to penetrate easily. I tap the seed packet gently to release one seed at a time—planting too many leads to weak, crowded seedlings.
☀️ Step 3: Cover and Create a Humid Environment
Place a clear plastic bag over the tray or cover each section with a small plastic wrap dome. This traps moisture and warmth, which speeds up germination. I like to poke a few tiny holes in the bag to allow some airflow—you don’t want it to feel like a sauna, just humid.
Set the tray in a warm spot, ideally 70-75°F, like on top of the fridge or near a sunny window. Check daily for condensation inside the bag. If you see water droplets, it’s too humid—remove the bag for 30 minutes to let excess moisture escape. Germination usually happens in 3-7 days, depending on the seed type.
🌿 Step 4: Transplant When Ready
Once the seedlings have 2-3 true leaves and the roots start growing out the bottom of the toilet paper, they’re ready for their next home. Carefully remove the toilet paper sections from the tray and place each one in a small pot or directly into the garden soil.
Water gently to help the toilet paper dissolve and roots integrate with the soil. The paper will break down naturally, leaving no waste behind. I like to transplant on a cloudy day to reduce stress on the seedlings—you’ll see them adjust faster and start growing stronger within a few days.
⏰ Step 5: Maintain and Watch Them Grow
Keep the soil moist but not soggy—you’ll know it’s right when the top inch feels slightly damp. Place the pots in a spot with 4-6 hours of sunlight daily, or use a grow light if natural light is limited. You’ll notice the seedlings stretch toward the light, so rotate the pots every few days for even growth.
In about 4-6 weeks, your seedlings will be ready to transplant into larger containers or the garden. The toilet paper will have fully decomposed, leaving no trace behind. This method isn’t just zero-waste—it’s a great way to start seeds early and give them a strong foundation for the growing season.
Tips & tricks for perfect toilet paper seed starters
Here's what nobody tells you about making these little seed starters work like a dream.
Seed Selection: Not all seeds thrive in toilet paper starters—stick to small seeds like lettuce, basil, or flowers. Larger seeds like beans or peas need more space to grow roots, so they're better suited for traditional pots. The key is choosing seeds that match the cozy environment these mini pots create.
Humidity Balance: During Step 3, when you're creating that humid environment, think of it like a greenhouse in a bag. The 5-10 minute soak is crucial—it's what gets the paper just right for holding moisture without becoming soggy. If you notice condensation forming inside the bag, that's your cue to remove it for 30 minutes and let some of that humidity escape. Too much moisture can lead to mold instead of sprouts.
Light Rotation: In Step 5, when your seedlings are getting their daily 4-6 hours of sunlight, don't forget to rotate them every few days. This prevents them from leaning toward one light source and growing lopsided. I like to give them a quarter turn each time I check on them—it's a small habit that makes a big difference in their growth pattern.
Transplant Timing: The moment you see roots growing out the bottom of your toilet paper sections in Step 4, that's your signal it's time to transplant. Waiting too long can cause the roots to tangle and get damaged when you try to move them. I've found that transplanting on a cloudy day gives the seedlings a gentler introduction to their new environment, helping them adjust faster.
Pro Tips for Toilet Paper Seed Starters
- Here's what nobody tells you about making these little seed starters work like a dream.
- Seed Selection: Not all seeds thrive in toilet paper starters—stick to small seeds like lettuce, basil, or flowers. L...
- Humidity Balance: During Step 3, when you're creating that humid environment, think of it like a greenhouse in a bag....
Frequently asked questions
Got questions about toilet paper seed starters?
You’re not alone! Here are answers to the most common ones—so you can get growing with confidence.
Can I use any type of toilet paper for seed starters?
Yes, but opt for unbleached, 100% recycled toilet paper—it breaks down faster and lacks harsh chemicals. Avoid scented or dyed rolls, as they may inhibit germination. Even better? Use seed paper (pre-made with seeds) for foolproof results!
How long does it take for seeds to sprout in toilet paper?
Most seeds sprout in 3–7 days, depending on the type. Fast growers like radishes or basil may pop up in 3–5 days, while slower ones (e.g., tomatoes or peppers) take 7–10 days. Keep the roll moist and in a warm spot (like a sunny windowsill) for best results.
What if my seeds don’t sprout? Troubleshooting tips!
Try these fixes if your seeds are MIA:
- Not enough moisture: Mist the roll daily—it should feel damp, not soggy.
- Too cold: Move to a warmer spot (70–80°F is ideal). A heat mat helps!
- Old seeds: Check the seed packet—viability drops after 1–2 years.
- Low light: Place under a grow light if natural light is weak.
Can I reuse toilet paper rolls after sprouting?
Once seeds sprout, gently unroll the paper and plant directly into soil—no transplant shock. The paper will decompose, adding nutrients to the soil. For larger seedlings (like herbs or veggies), wrap the roll around the stem to support growth.
What’s a good alternative if I don’t have toilet paper?
No worries! Use:
- Eco-friendly paper towels (unbleached)
- Newspaper or junk mail (remove glossy ink)
- Coffee filters (for tiny seeds like lettuce)
- Burlap strips (for a rustic, biodegradable option)
Wrapping up and next steps
Transforming toilet paper rolls into thriving seed starters is more than just a clever hack—it’s a zero-waste win that breathes new life into your garden while keeping costs (and clutter) down. 🌱 Whether you’re a seasoned gardener or a curious beginner, this method proves that sustainability and simplicity go hand in hand.
Ready to grow your green thumb? Grab those empty rolls, get planting, and watch your seeds sprout into something extraordinary in just 7 days!
Next step: Pick your favorite seeds, roll up those tubes, and let nature do the rest—your future plants (and the planet) will thank you! 🌿✨