
Planting
Transforming old newspapers into vibrant wildflower gardens is the kind of clever gardening that makes you rethink waste. 🌱 This seed paper recipe lets you grow blooms from recycled materials, turning every sheet into a biodegradable planting tool that dissolves into soil—no mess, no guilt.
The magic happens with just 3 simple ingredients: wildflower seeds, water, and a bit of natural glue like flour paste or gelatin.
Mix them into a thick slurry, spread it thinly on paper, let it dry, and you’ve got plantable paper ready for gardens, pots, or even gifts that grow. No special tools needed—just patience and a sunny spot.
Once planted, these sheets break down in 2-4 weeks, releasing seeds into moist soil. Keep the surface damp (not soggy) until sprouts appear, and watch as delicate blooms emerge where the paper once was. The best part? You’re giving back to the earth while creating beauty.
Perfect for wildflower meadows, container gardens, or eco-conscious gifts—just avoid heavy rain until germination. Here’s how to make it work every time.
📚 In This Guide
- What you need
- Instructions
- Tips and common mistakes
- Wrapping up and next steps
What you need
- ● Seeds: Choose fast-growing, easy-to-grow seeds like wildflowers, herbs (basil, parsley), or grass. Aim for 1 teaspoon (5g) per sheet of paper.
- ● Cotton lint or cotton fiber: 1 cup (120g)—this is the base for your paper. (No lint? Use old cotton T-shirts shredded into fibers.)
- ● Water: 2 cups (480ml)—distilled or tap water works fine.
- ● Blender or food processor: A high-powered blender (like a Vitamix) works best for smooth pulp.
- ● Mold and deckle: A simple DIY frame (wooden or plastic) or a store-bought paper-making kit.
- ● Absorbent surface: A towel, sponge, or felt sheet to press out excess water.
- ● Rolling pin or heavy book: For smoothing and drying.
- ● Natural dyes: Turmeric (yellow), beet juice (pink), or spinach (green) to tint your paper.
- ● Dried flowers or petals: Pressed flowers or edible petals for decorative flair.
- ● Essential oils: A drop of lavender or citrus oil for a subtle scent.
- ● Seed packet labels: Pre-cut paper slips to write seed names or planting tips.
How to make seed paper that actually grows
Here's how I create seed paper that's both beautiful and functional—no wasted materials, just pure planting potential.
🌱 Step 1: Mix the Paper Pulp Base
Start by tearing 4-5 sheets of recycled paper into small pieces and soaking them in 2 cups of warm water for 1-2 hours. I like to use old newspapers or printer paper—the thinner the paper, the smoother your final seed paper will be. Add 1 tablespoon of psyllium husk powder to the soaking water to help bind everything together.
After soaking, blend the mixture in a food processor or blender until it reaches a smooth, thick consistency—similar to thick paint. If it's too runny, add a little more paper; if it's too thick, stir in a splash of water. The goal is a paste that holds its shape when spread thinly. This is your foundation, so take your time getting the texture right.
💧 Step 2: Add Seeds and Optional Decorations
Once your pulp is ready, stir in 1 teaspoon of wildflower seeds (or your chosen variety) and ½ teaspoon of chia seeds for extra binding. I like to add a few drops of natural dye, like turmeric for yellow or beet juice for pink, if I want colored paper. Mix everything gently by hand to avoid damaging the seeds.
For a decorative touch, sprinkle in dried flowers, glitter, or even tiny pressed leaves. Just be sure not to overload the mixture—too many extras can weaken the paper's structure. The seeds should be evenly distributed but still visible when you spread the mixture later. This is where creativity meets function—your paper will be as pretty as it is practical.
☀️ Step 3: Spread and Dry the Seed Paper
Pour the mixture onto a silicone baking mat or a smooth, non-stick surface. Use a spatula or your hands to spread it into an even layer, about ⅛ inch thick. The thinner you spread it, the more delicate (and delicate-looking) your final paper will be. Let it dry completely—this can take 24-48 hours, depending on humidity.
Once dry, gently peel the paper off the mat. If it cracks or tears, don’t worry—just press it back together with a little water. Store it in a cool, dry place until you're ready to plant. The key here is patience; rushing the drying process can ruin the paper’s integrity. When it’s fully dry, it should feel sturdy but still flexible enough to fold or cut.
🌿 Step 4: Plant and Watch It Grow
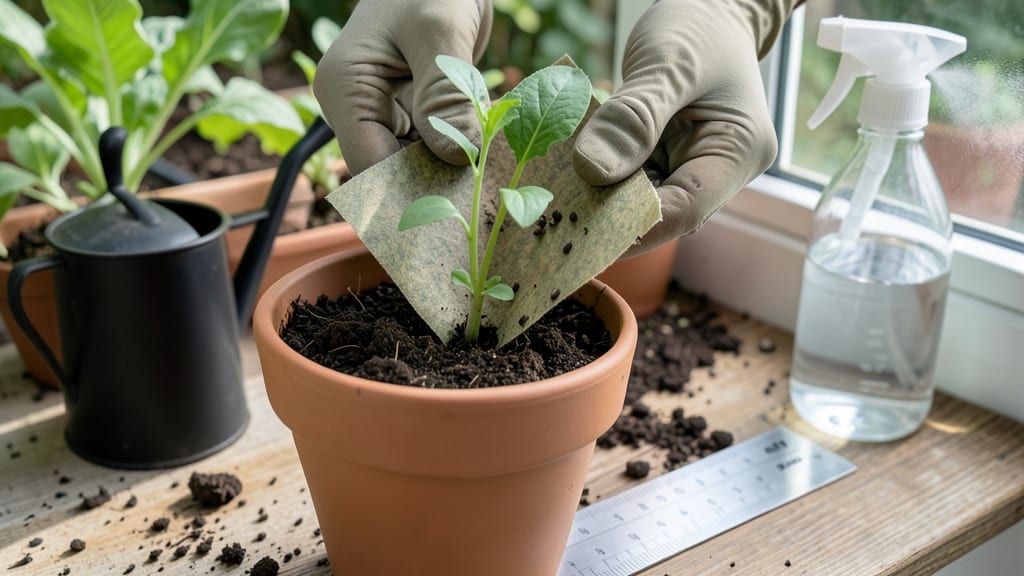
To plant, simply place the seed paper on top of moist soil in your garden or a pot. Press it lightly so it makes contact with the earth. Water gently to keep the soil damp but not soggy. You’ll see sprouts in 7-14 days, depending on the seeds. The paper will break down naturally over time, becoming part of the soil.
Here’s the thing—seed paper is forgiving. If you forget to plant it right away, just keep it dry and cool until you’re ready. Once planted, it’s low-maintenance. Just keep the soil moist and watch your garden bloom from something as simple as a piece of paper. It’s a small act with a big impact on reducing waste and growing beauty.
Tips & tricks for perfect seed paper
Here's what nobody tells you about making seed paper that actually grows—these little tricks make all the difference between something that falls apart and something beautiful that blooms.
Paper Selection Tip: While any recycled paper works, I've found that using a mix of newspaper and printer paper creates the best balance of smoothness and durability. Newspaper provides texture while printer paper gives that silky finish. Avoid glossy magazines—the ink can interfere with seed germination. If you're short on time, soak the paper for the full 2 hours to ensure complete saturation before blending.
Psyllium Husk Hack: The 1 tablespoon of psyllium husk powder is your secret weapon for binding. If you can't find it, a ½ teaspoon of xanthan gum works in a pinch, but psyllium creates that perfect gel-like consistency that holds everything together beautifully. Here's the thing: if your pulp feels too sticky after blending, let it sit for 10 minutes before adding seeds—this gives the psyllium time to fully activate and bind properly.
Seed Distribution Secret: When you're stirring in those 1 teaspoon of wildflower seeds and ½ teaspoon of chia seeds, think of it like making a seed salad. Distribute them evenly throughout the pulp so every piece of your final paper has planting potential. For a visual guide, imagine dividing your pulp into four equal parts and making sure each part gets a taste of seeds. This ensures consistent germination across your entire sheet.
Drying Strategy: The 24-48 hour drying time can feel like forever, but patience pays off. Place your seed paper in a well-ventilated area away from direct sunlight—bright light can cause uneven drying and cracking. If you're in a humid climate, prop a small fan nearby to help circulate air. Once dry, your paper should peel off easily but still feel sturdy enough to handle. If it cracks during drying, don't stress—just press it back together with a damp paper towel before it fully dries.
Pro Tips for Seed In Paper
- Here's what nobody tells you about making seed paper that actually grows—these little tricks make all the difference ...
- Paper Selection Tip: While any recycled paper works, I've found that using a mix of newspaper and printer paper creat...
- Psyllium Husk Hack: The 1 tablespoon of psyllium husk powder is your secret weapon for binding. If you can't find it,...
Frequently asked questions
Got questions about seed paper? We’ve got answers! Whether you’re curious about timing, materials, or troubleshooting, here’s what you need to know to make your eco-friendly seed paper project a success.
How long does it take for seed paper to grow into plants?
Seed paper typically sprouts within 7–14 days if kept moist and warm. Full growth depends on the plant type—fast growers like basil or marigolds may bloom in 4–6 weeks, while slower varieties (e.g., sunflowers) take 2–3 months. Patience is key!
Can I use any seeds in seed paper?
Not all seeds work—choose small, lightweight seeds (e.g., wildflowers, herbs, or grass) that won’t sink or clump. Avoid large seeds (like beans) or those with hard coats (e.g., sunflower seeds), as they won’t distribute evenly. Stick to organic, untreated seeds for best results.
What’s the best way to water seed paper?
Mist seed paper lightly 1–2 times daily with a spray bottle to keep it damp (not soggy). Place it in a shallow tray or peat pot to catch excess water. Once sprouts appear, reduce watering to every other day and transplant seedlings to soil.
What if my seed paper moldy or doesn’t sprout?
Mold or slow sprouting usually means too much moisture or poor airflow. Try these fixes:
- Spread paper in a single layer to dry between waterings.
- Use sterilized water (boiled and cooled) to prevent bacteria.
- Add a tiny pinch of cinnamon (natural antifungal) to the pulp mix.
- Move to a sunny, warm spot (60–75°F) for faster germination.
Can I reuse or compost seed paper that didn’t work?
If seeds fail to sprout, tear the paper into small pieces and mix it into garden soil as nutrient-rich compost. The paper will break down in 4–6 weeks, enriching the earth—zero waste!
Wrapping up and next steps
Creating your own seed paper is a rewarding way to reduce waste while bringing nature into your home—literally! 🌱 With just a few simple ingredients and a little creativity, you can craft beautiful, biodegradable paper that grows into vibrant plants.
Whether you’re a gardening enthusiast or a sustainability advocate, this eco-friendly project proves that small actions can make a big impact.
Ready to take the next step? Start small by making a few sheets to gift or plant in your garden. Then, explore DIY seed paper kits or experiment with wildflower seeds for even more variety. Your green thumb (and the planet) will thank you!