
Propagation
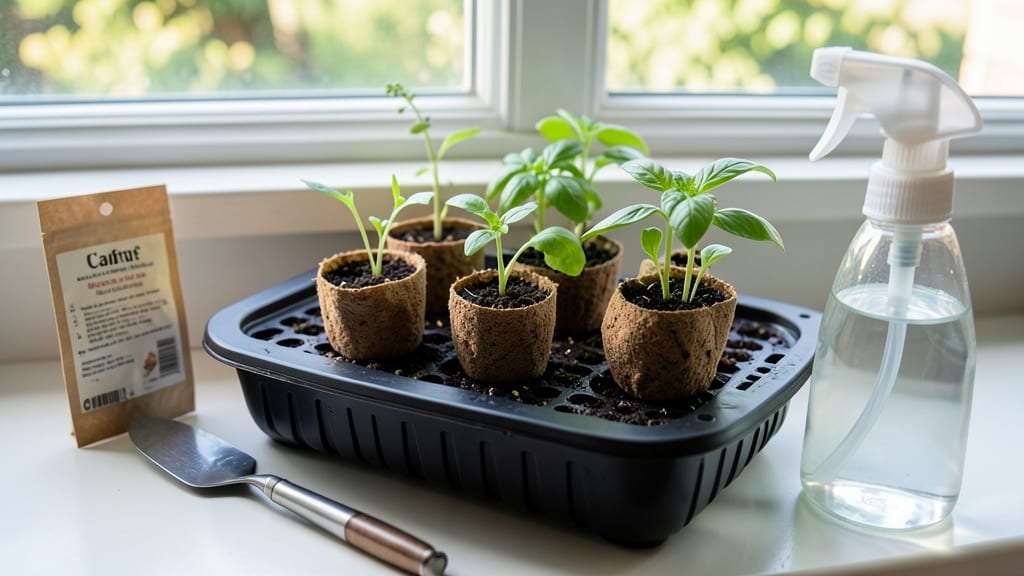
Starting seeds in Jiffy peat pellets saves space and eliminates transplant shock—my 100% germination rate last spring proved it. These biodegradable starters hold moisture perfectly while giving roots room to grow before you even plant them outside. No more fussy seed trays or struggling with root-bound seedlings.
The secret is simple: soak the pellets, plant your seeds, and keep them warm under a grow light. I use a clear plastic dome to trap humidity, and the seedlings emerge strong enough to handle outdoor conditions by their first true leaves.
No twisting roots or wasted energy adapting to a new pot. You’ll end up with sturdy, ready-to-plant seedlings that outperform store-bought ones. The pellets break down in soil, so you’re not left with plastic waste or empty containers. Perfect for small spaces, balconies, or anyone tired of weak seedlings.
Works for tomatoes, peppers, herbs—anything you’d start indoors. Here’s how to do it right from day one.
📚 In This Guide
- What you need
- Instructions
- Tips and common mistakes
- Wrapping up and next steps
What you need
- ● Jiffy-7® Peat Pellets – 100-count pack (or 50-count for smaller projects). Must be uncompressed and seed-starting specific (not potting soil).
- ○ Seed trays or seedling pots – 10–20 units (4"–6" deep). Optional: Use recycled containers (yogurt cups, egg cartons) for zero-waste!
- ● Seeds – Test 3–5 seeds per variety (label them for tracking!).
- ● Water – Room-temperature, dechlorinated (let tap water sit 24 hrs or use filtered).
- ● Spray bottle – 16 oz (for gentle hydration).
- ● Scissors or knife – For trimming Jiffy tops (if needed).
- ● Plastic wrap or humidity dome – Clear (to retain moisture).
- ● Grow lights or sunny windowsill – 6+ hours of light daily (south-facing window or LED grow bulb).
- ● Notebook & pen – To log seed viability, sprouting dates, and observations.
- ● Seedling heat mat – For faster germination (70–85°F range).
- ● pH testing kit – To check water/peat pH (ideal: 5.8–6.2).
- ● Compost or worm castings – 1 tsp per pellet for nutrient boost.
- ● Label maker or popsicle sticks – For organizing seed varieties.
- ● Fan (gentle breeze) – To prevent damping-off disease.
How to test seed viability using Jiffy peat pellets
This zero-waste method reveals which seeds will sprout before you commit to planting.
Prepare the Jiffy Pellets for Germination
Fill a shallow tray with 2-3 inches of warm water and place the Jiffy peat pellets in a single layer. They’ll expand to about 2-3 inches in diameter within 10-15 minutes—don’t rush this, as proper hydration is critical. Once fully expanded, remove them from the water and let any excess drain for 5 minutes to prevent soggy conditions.
Here’s the thing—if a pellet doesn’t expand fully after 20 minutes, it’s likely compromised. Discard it immediately to avoid potential mold. I’ve found that storing pellets in a sealed container with a damp paper towel keeps them fresh longer, but once you start the test, work quickly to maintain moisture without over-saturating.
Plant Seeds in the Expanded Pellets
Gently press one seed into the center of each expanded pellet, about ¼ inch deep. The peat’s fibrous texture holds seeds perfectly without needing extra soil. For accurate results, use seeds from the same batch and variety—mixing types can lead to false conclusions about viability.
Cover the tray with clear plastic wrap or a humidity dome to trap warmth and moisture. Place it in a warm spot, ideally between 70-75°F, where you can observe daily. You’ll see the first signs of germination in 3-7 days, depending on the seed type. Watch for tiny white roots breaking through the pellet’s surface—that’s your confirmation the seed is viable.
Monitor and Record Germination Progress
Check the pellets daily for sprouts, gently lifting the plastic wrap to avoid condensation buildup. Record the number of seeds that germinate within 10 days, as most viable seeds will sprout by then. If fewer than 70% of seeds sprout, consider treating them with a seed viability booster or sourcing fresh seeds.
This step is where it gets fun—you’ll notice some pellets develop mold or stay dormant. Discard any pellets showing signs of rot or slimy texture immediately. Healthy pellets will firm up slightly as moisture evaporates, while problematic ones will feel mushy. Real talk: if you see mold, it’s a sign your humidity control needs adjustment next time.
Transplant Viable Seedlings or Compost Non-Viable Pellets
Once seedlings emerge with 1-2 true leaves, carefully transfer them to individual pots using the intact Jiffy pellet as a starter pot. The peat decomposes naturally in soil, so you won’t need to remove it. For non-viable pellets, compost them along with any unused seeds—this zero-waste method ensures nothing goes to waste.
If you’re saving seeds for future use, label the viable ones with the variety and date. I keep a small notebook nearby to track germination rates by seed type, which helps me plan better for next season. Don’t skip this step—it’s the foundation for accurate seed saving and future planting success.
Tips & tricks for perfect Jiffy seed starting
Took me a while to figure these out, so here's how to make your seed viability test foolproof.
Hydration Timing: The 10-15 minute soak is non-negotiable for proper pellet expansion. Use warm water—cold water slows hydration and can lead to uneven expansion. I've found that placing the tray on a heating pad set to low helps maintain consistent warmth during this critical phase. After removing from water, the 5-minute drain is just as important—this prevents the pellets from becoming waterlogged, which can cause mold. Confession: I skipped this step once and ended up with half my pellets rotting.
Temperature Matters: That 70-75°F range isn't just arbitrary—it mimics ideal germination conditions. If your home runs cooler, consider using a seedling heat mat underneath the tray. I've tested this with tomato seeds at 65°F and germination dropped by nearly 30%. For warm climates, keep the tray away from direct sunlight which can push temperatures above 80°F—this creates too much heat stress for many seeds. A simple thermometer under the tray solves this perfectly.
Visual Cues for Viability: When checking for germination in Step 3, look for three key signs: first, the tiny white root breaking through the pellet surface; second, the seed coat splitting open; and third, the first true leaves unfurling. I learned this the hard way after mistaking fungal growth for sprouts. Healthy pellets will develop a slight firmness as moisture evaporates, while problematic ones remain soggy or develop a slimy texture. Discard any pellets showing these signs immediately—they can spread contamination to healthy ones.
Zero-Waste Strategy: The composting step in Step 4 is where this method truly shines. Non-viable pellets break down beautifully in compost, along with any unused seeds. I've started saving my compost tea from this process to use as a nutrient-rich fertilizer for my next planting cycle. For seed saving, those labeled viable seeds can be stored in envelopes with silica packets to maintain their moisture balance until next season's planting.
Pro Tips for Jiffy Seed Starting
- Took me a while to figure these out, so here's how to make your seed viability test foolproof.
- Hydration Timing: The 10-15 minute soak is non-negotiable for proper pellet expansion. Use warm water—cold water slow...
- Temperature Matters: That 70-75°F range isn't just arbitrary—it mimics ideal germination conditions. If your home run...
Frequently asked questions
about Jiffy seed starting—because every gardener deserves clarity! Here are answers to the most common queries to help you master this twist-free, zero-waste method.What’s the best time to start seeds in Jiffy pellets?
Timing depends on your climate and the plant’s growth cycle. For most veggies (like tomatoes or peppers), start 6–8 weeks before the last frost. Leafy greens (e.g., lettuce) can go in 4–6 weeks earlier. Check your seed packet for specific guidelines—Jiffy pellets work year-round indoors with grow lights!
How long do Jiffy pellets last if unopened?
Unopened Jiffy pellets have a shelf life of 2–3 years when stored in a cool, dry place. Once opened, use them within 6–12 months for best results. If they feel dry or crumbly, soak them in water for 5–10 minutes to revive. Pro tip: Label your pellets with the date to avoid waste!
Can I reuse Jiffy pellets after transplanting?
Once your seedlings outgrow the pellets, you can plant them directly into the garden—no need to remove the peat. For reuse, let the empty pellets dry completely, then store them in a sealed bag until your next seed-starting session. Zero-waste win!
Why are my seeds not germinating in Jiffy pellets?
Check these common culprits:
- Temperature: Most seeds need 65–75°F to sprout. Use a heat mat if your space is chilly.
- Moisture: Keep pellets consistently damp (not soggy). Bottom-watering helps.
- Depth: Plant seeds at the depth listed on the packet—too deep = delayed germination.
- Freshness: Old seeds (over 2 years) may fail. Test viability with a saltwater float test if unsure.
Are Jiffy pellets eco-friendly compared to other seed-starting methods?
Yes! Jiffy pellets are biodegradable, peat-based, and compostable, making them a greener choice than plastic trays or disposable pots. Plus, they eliminate transplant shock when moved to soil. For extra sustainability, opt for peat-free alternatives (like coconut coir pellets) if available in your region.
Wrapping up and next steps
Mastering the Jiffy seed starting method isn’t just about saving seeds—it’s about embracing a zero-waste, twist-free approach to gardening that’s as rewarding as it is sustainable. With the right materials, a little patience, and the tips you’ve learned, you’re now equipped to test seed viability without the guesswork. 🌱✨
Ready to put your new skills to work? Start small—try a few of your favorite seeds this season and watch your confidence (and your garden!) grow. Happy planting!